It’s been a bit over a year since my last astrophotography post highlighting galaxies and a bit over two years doing serious astrophotography. Even though my rig has been nearly static, with the exception of adding an Antlia ALP-T 5nm Ha+Oiii filter to retire the Svbony and its impressive Oiii halos and replacing my flexible spider vane with a rigid one including better adjustment screws for the secondary mount, I have learned a lot about how to handle the raw data to produce more impressive results. Now it’s your turn, or you can skip to the end and just enjoy the images.
A refined deep-sky workflow
Data acquisition
At the core of my routine is still acquiring dithered and calibrated data of the sky with my telescope and an OSC camera, optionally using an Ha+Oiii dualband filter. I now use a ZWO ASI2600MC-Pro camera exclusively, which has some implications for calibration: there’s (almost) no dark current (sometimes called “amp glow”) so dark calibration is entirely unnecessary. That leaves just bias and flats, which I take each session with the same gain and offset as the target with the camera always cooled to -10C so that discrepancy is never a concern.
Recently I’ve defaulted to a gain of 100 (minimum for high conversion efficiency to achieve lowest read noise + highest dynamic range) and offset of 50 for broadband targets, adjusting exposure time as necessary to fill the available dynamic range. When using a dualband filter, I’ll increase the gain to 300 to keep exposure times in the several minute range for full use of the dynamic range.
I use the INDI and KStars/Ekos suite for all my telescope control and data acquisition needs. It can do everything from goto to polar alignment to guiding to scheduling acquisitions and is Linux native.
Remember: good data is taken in a dark location. Both the sky and the surroundings (street lights, etc) matter, and any skimping here will show up in the final stacked image and must be handled in post-processing.
Pre-processing
For pre-processing (calibrating and stacking) the raw data I strongly prefer Siril’s workflow to any competition. The reason for this is multifaceted: it’s FOSS, I understand how to use it, and it implements a drizzle integration algorithm for raw (undebayered) OSC images. I also find in my earlier data, which is plagued by gradients from street lights, that the Radial Basis Function (RBF) background extraction technique in Siril does the best of the non-AI algorithms.
My Siril workflow goes roughly like this, which would work for any zero dark current OSC camera:
- Create a sequence of bias frames
- Average stack with rejection to create the bias master
- No normalization, 3 sigma winsorized clipping
- Create a sequence of flat frames
- Calibrate flats with dark subtraction
- Using the bias master from #2 as the dark master and no bias or flat master set
- Average stack with rejection to create the flat master
- Multiplicative normalization, 3 sigma winsorized clipping
- Create a sequence of light frames
- Calibrate with flat division and dark subtraction to produce calibrated lights
- Using the bias master from #2 as the dark master, flat master from #5, and no bias master set
- Background subtract 1D poly on sequence with default sample points
- Performing this before stacking can better handle per-frame gradients
- Perform 2-pass global registration (first pass only)
- Perform sub-frame selection on wFWHM, roundness, background, etc
- Apply 2-pass global registration (second pass only) 1x drizzle
- Try a larger drizzle scale if feeling spicy – 1.5x is not insane for OSC
- Average stack with rejection to create the integrated stack
- Additive normalization with scaling, 3 sigma winsorized clipping
- Tweak rejection sigma (2.0 - 5.0) depending on data amount and artifacts (satellites etc)
- Background subtract 1D/2D poly or RBF to remove remaining sky-glow
- Careful with the sample points this time to avoid stars / features
- Save final image and proceed to post-processing
Post-processing
Taking good data isn’t even half the battle, as it turns out. People have a lot of aesthetic expectations about what a “good astrophotograph” looks like, and those are not usually driven by scientific accuracy or true-to-life appearance, but rather the false color highly processed images released by space telescopes like Hubble or the James Webb or other hobbyists chasing the same look. The solution, of course, is to highly process the data in similar ways, and choosing your own line in the sand for what is “too much” in terms of allowable image manipulations.
There are some major manipulations to consider: color calibration, noise reduction, deconvolution, masking, gradient reduction, nonlinear stretching, and other standard photo adjustments. Of these, only stretching (similar to an exposure adjustment in photo processing) is truly required to get a viewable image; linear data is simply not meant for direct viewing. Color calibration, photo adjustments, are not technically required but very important in achieving a pleasing final result, and generally accepted. That just leaves noise reduction, deconvolution, gradient reduction, and masking as points of tension.
Noise reduction
Noise reduction is as critical here as any other low-light situation, though there are different techniques for the extreme low-light night sky than for a dim room. Historically, many heuristics have been tried from median filters to edge-dependent blurring algorithms, and they all are well understood and have drawbacks. The cutting edge, and top performers, are neural networks trained on reconstructing the latent image most likely to have produced noisy data. This family has several contenders: GraXpert, NoiseXterminator, and DeepSNR of varying degrees of openness and cost. I found GraXpert and NoiseXterminator to perform similarly, perhaps with a slight edge to NoiseXterminator, which I did purchase to evaluate. Overall, DeepSNR consistently produced the best results out of the three. Props to GraXpert for being FOSS and DeepSNR for being free. Images below were produced with one of the three – I’ll try to note which.
Overall, the lack of high-performing algorithms without neural-networks generating pixel-level corrections to the image leads me to use DeepSNR as the noise reducer of choice.
Gradient reduction
I was going to leave this step out, since my pre-processing includes gradient removal with Siril using mathematically well-defined background models, but shout-out to GraXpert for having a quite good neural-network based gradient removal tool in addition to its noise reduction. Some images below leveraged this, and I am following the development to include this in the Siril UI as a background removal option. I should note that GraXpert (FOSS) should not be confused with GradientXterminator (proprietary) which I did not evaluate due to its cost.
Deconvolution
Deconvolution is the astrophotography word for “sharpening” and realistically that’s how its meant these days as opposed to a true deconvolution. The true deconvolution techniques utilized a point spread function based on stars in the image to estimate the imperfections in the optics to in turn estimate the latent image most likely to have produced this one without those imperfections, thereby sharpening the image. Now practitioners apply sharpening techniques at the point in the process at which one would previously have deconvolved, and there are again many options out there. GraXpert again has some neural-network latent image reconstruction functionality in this space, making its inclusion in Siril and future refinement a very promising development for FOSS, but I was not impressed with the degree to which it made images look artificial. Indeed, this is a problem that exists even with the deterministic non-AI techniques: it is very easy to over-sharpen an image.
RC Astro’s BlurXterminator shines here for offering a “correct only” option that tones down the sharpening operation into something that could more believably be described as an ideal deconvolution with a position dependent point spread function. I find the resulting image to look like data taken with excellent collimation, zero tilt, and a perfectly coma-free flat field instead of something run through a sharpening algorithm, but make no mistake this too is a neural-network based reconstruction technique.
BlurX “correct only” is my line in the sand as far as substantial manipulation goes, and I now use it on most images to clean them up.
Masking
Slightly less egregious than neural-network sharpening is the idea of using masks to process different regions of an image differently, i.e. (and most common in practice) separating stars from the rest of the image. The motivation for this is good: the stars are very bright and the rest of the image is typically very dim, so it better leverages the output dynamic range to stretch the stars separately. It is possible to use range masks or generate masks with Gaia data to literally mask out stars, but again a neural-network latent image reconstructor from RC Astro, StarXterminator, is the only game in town.
There is a free alternative, StarNet (StarNet2? StarNet++? inconsistent branding…), but I found the results from StarNet to be particularly poor on Newtonian diffraction spikes, which StarXterminator identified and removed reliably. If you’re using a refractor instead of a Newtonian, give StarNet a try, but otherwise my recommendation would be StarXterminator despite the cost.
PixInsight
Historically I have used Siril for these steps, but in chasing the dragon of noise reduction techniques, I eventually landed in the market-cornering insanely-priced monopoly that is PixInsight for astro image processing. It’s a de-facto monopoly because its often the only/best way to access tools meant to be used on astro data: they’re distributed by third parties as Pix plugins. If you’re going to bite the bullet and pay for it, you might as well use it for every post-processing step, since it is a nicely integrated environment for standard techniques even if its most powerful features are 3rd-party (sometimes paid) plugins. Fingers crossed Siril gets there, but until then, PixInsight it is.
A post-processing workflow is highly varied and includes many more options than pre-processing, but most recent projects have followed the following procedure:
- ScreenTransferFunction (STF) the linear image into something that looks decent
- Use the ImageSolver script to get an astronomical solution for future steps
- Apply Spectro-Photometric Color Calibration (SPCC) to the image.
- This uses reference information for the expected color of the stars to calibrate the image
- Many other options exist, but this one is data-driven (choose camera settings) and deterministic
- Remove noise with DeepSNR or other technique
- Generally strength of 0.7-0.95 produce decent results, depending on starting noise levels
- Deconvolve / sharpen / correct image with BlurXterminator “correct only”
- If feeling spicy, try the heavier sharpening options
- Split stars into separate image with StarXterminator
- Remaining steps apply to both variants, but won’t use the same settings
- Adjust the STF to get decent star and starless starting points
- HistogramTransform the linear images into nonlinear form
- CurvesTransform to highlight detail, hide flaws, boost saturation, etc
- GeneralizedHyperbolicTransform could be used here, especially on the star image
- Use BackgroundNeutralization primarily to get background levels at 0.05-0.08
- AutomaticBackgroundExtraction might be a good idea as well, if stretching revealed more gradient
- Note: this is not needed on the star-having image, but greatly impacts the starless
- Recombine the star and starless images into the final result with PixelMath
~((~starless)*(~stars))for the math: invert both, multiply together, invert result
Now, on to the results.
Deep-sky images taken or processed in 2025
These are grouped by type of object for some insight into the nature of what’s captured. Some were processed with GraXpert noise reduction only, others were processed with NoiseX and BlurX (correct), and yet others with DeepSNR and BlurX (correct), as noted in the captions. All were pre-processed in Siril and post-processed in PixInsight, following what was described above. I have added exposure details where readily available, and included any interesting processing quirks as well. All were captured from my backyard in Bortle 7/8 conditions.
Many of these images were featured in the last two astro blog posts, but have now been reprocessed and worth a comparison. Others are entirely new, being processed for the first time with the more advanced tools.
Supernova Remnants
Nebula generally are going to be glowing gas, usually red (Ha) and blue (Oiii) and various other light atoms. In order to glow, something has to keep them hot, and usually that something has some bearing on the shape and age of the nebula as well. In this case, the glow is sustained by the shockwave of a star that previously went supernova and blew itself up, making them relative recent and ephemeral compared to other deep-sky objects. Being single star scale objects, the smallest will be O(1 ly - 10 ly), while being very energetic, the largest can be O(100 ly) before fading.
M1 Crab Nebula

9hr (mixed 5min / 3min). Processed with DeepSNR and BlurX. Heavily cropped – one of the smaller targets on this post. M1 is the youngest object on this post, having exploded (from our perspective) in the year 1054 AD.
IC443 Jellyfish Nebula
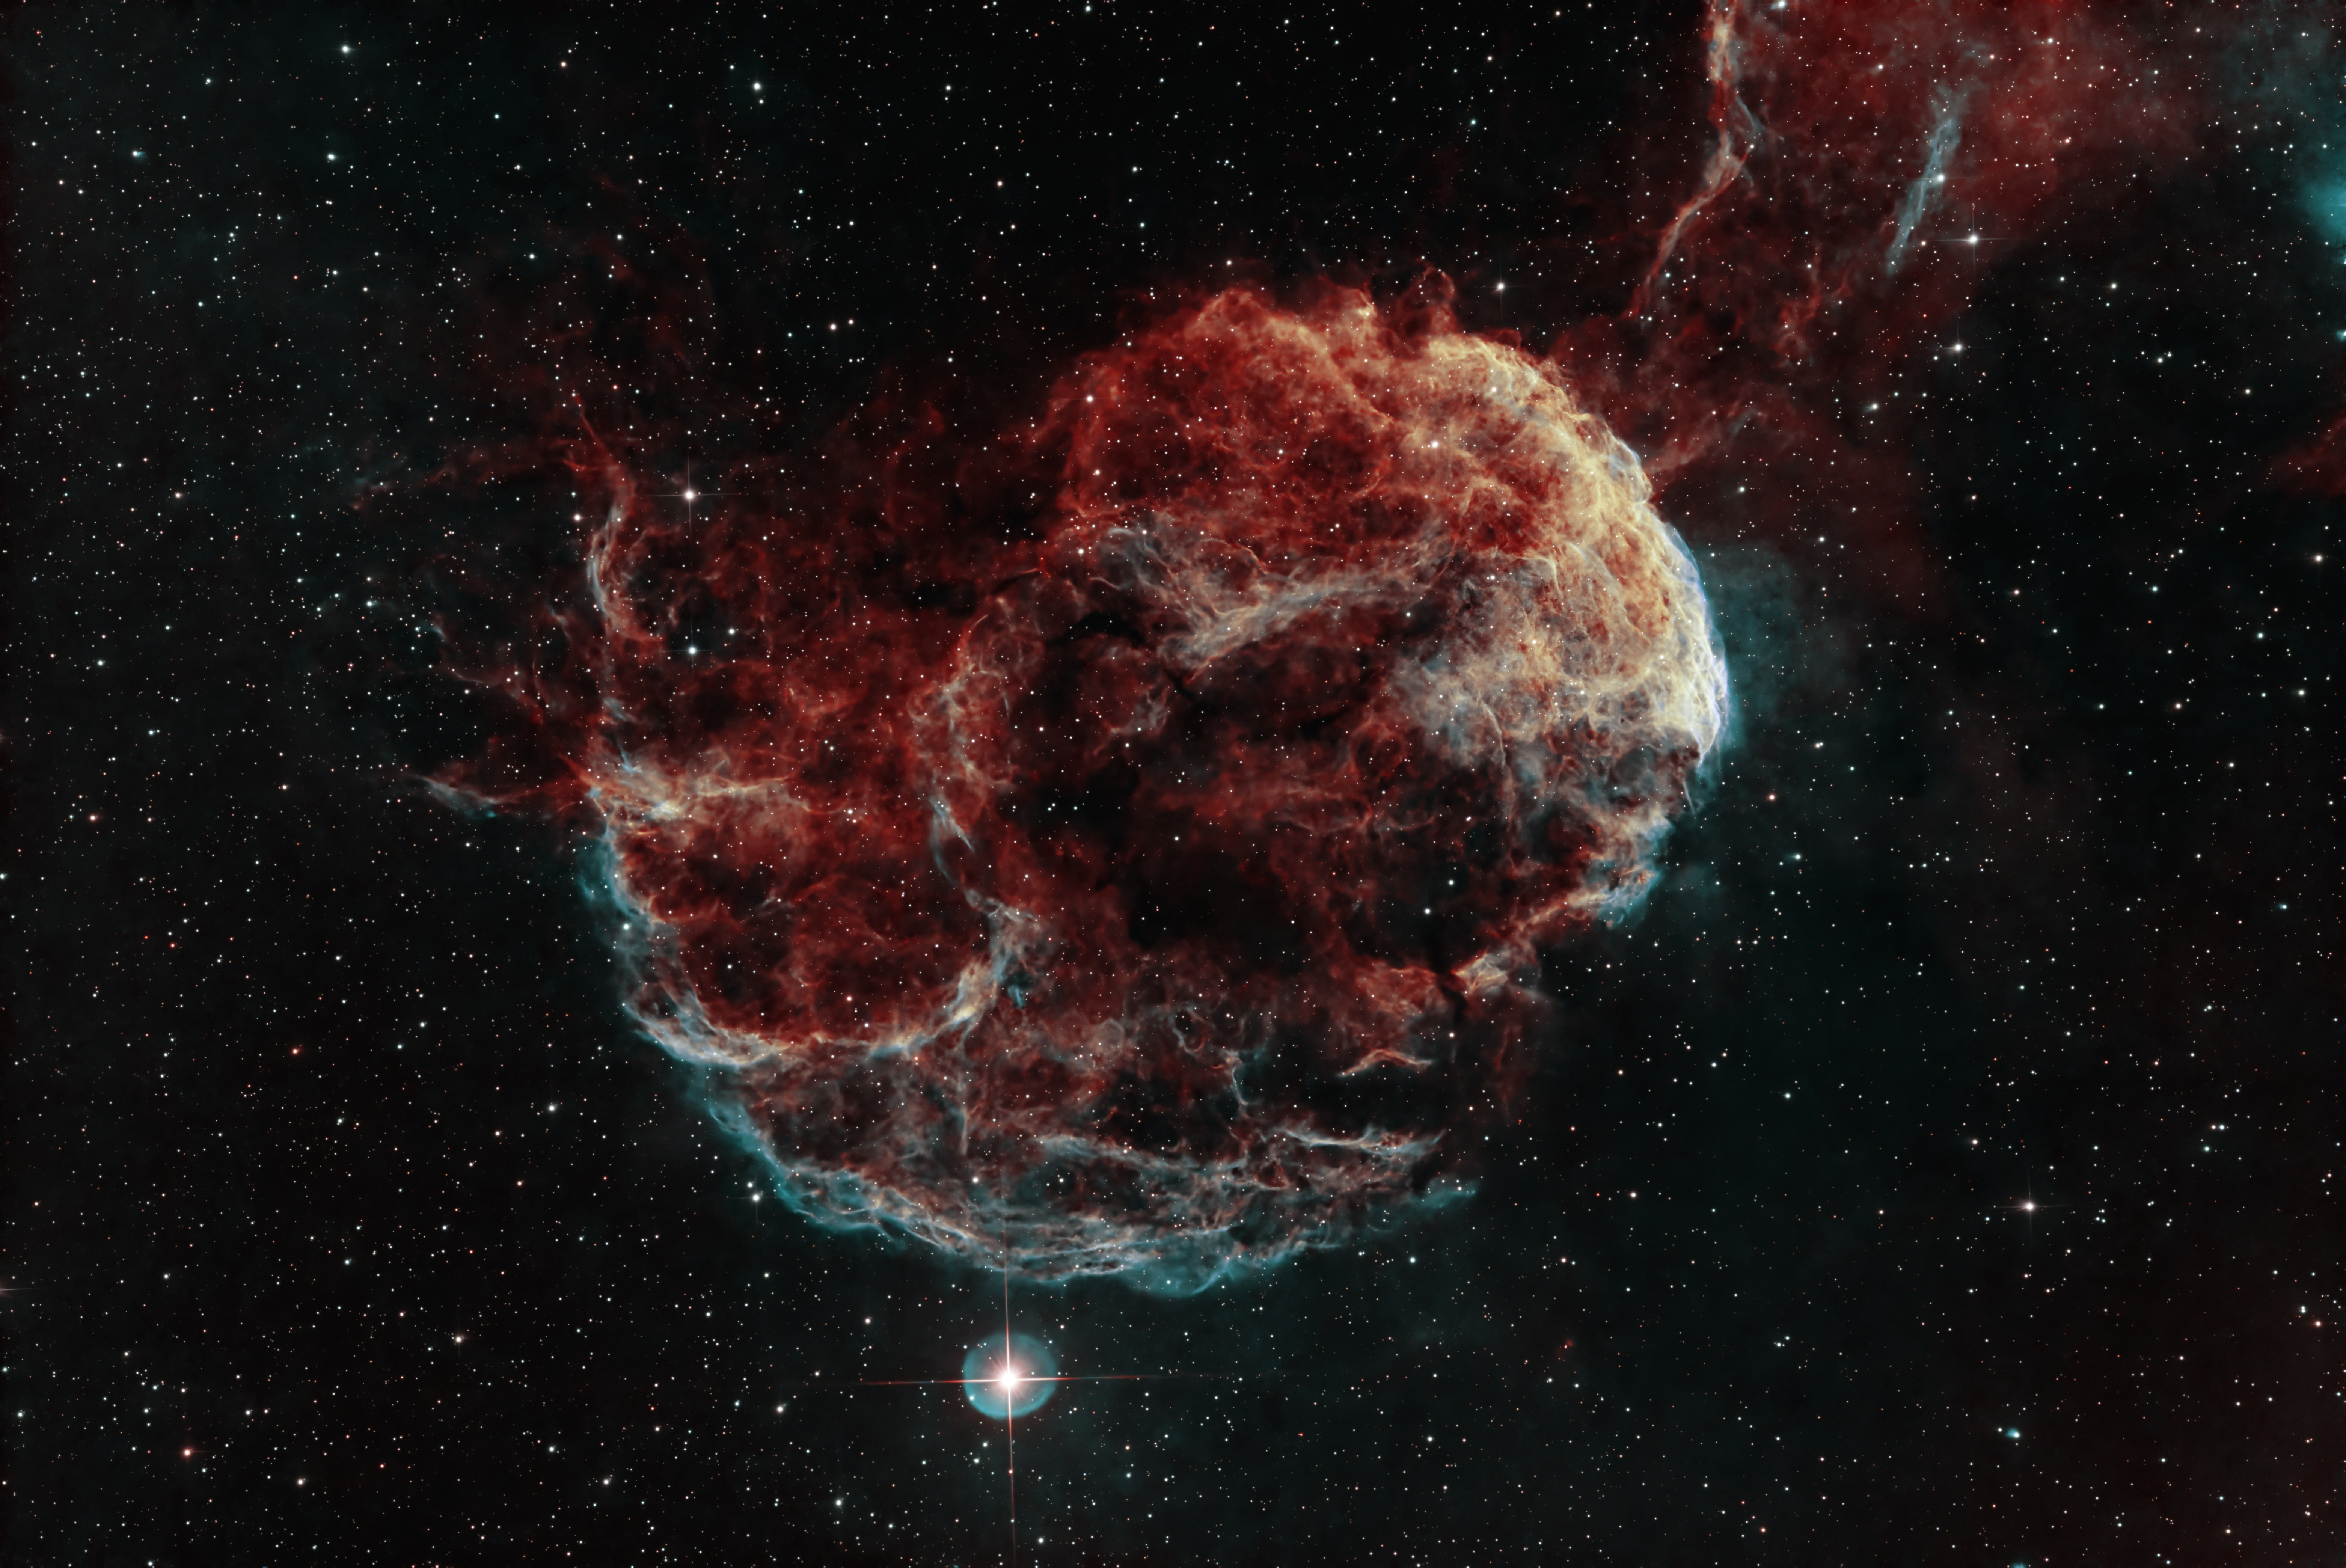
3h40m (44 x 5min) Dualband. Processed with DeepSNR and BlurX. Oiii and Ha split, stretched, and recombined. Technically a false color image, and the only one on this post. Note the blue halo around the star on the bottom is an optical artifact. Somewhere between 3-30k years old.
NGC6992 Eastern Veil Nebula
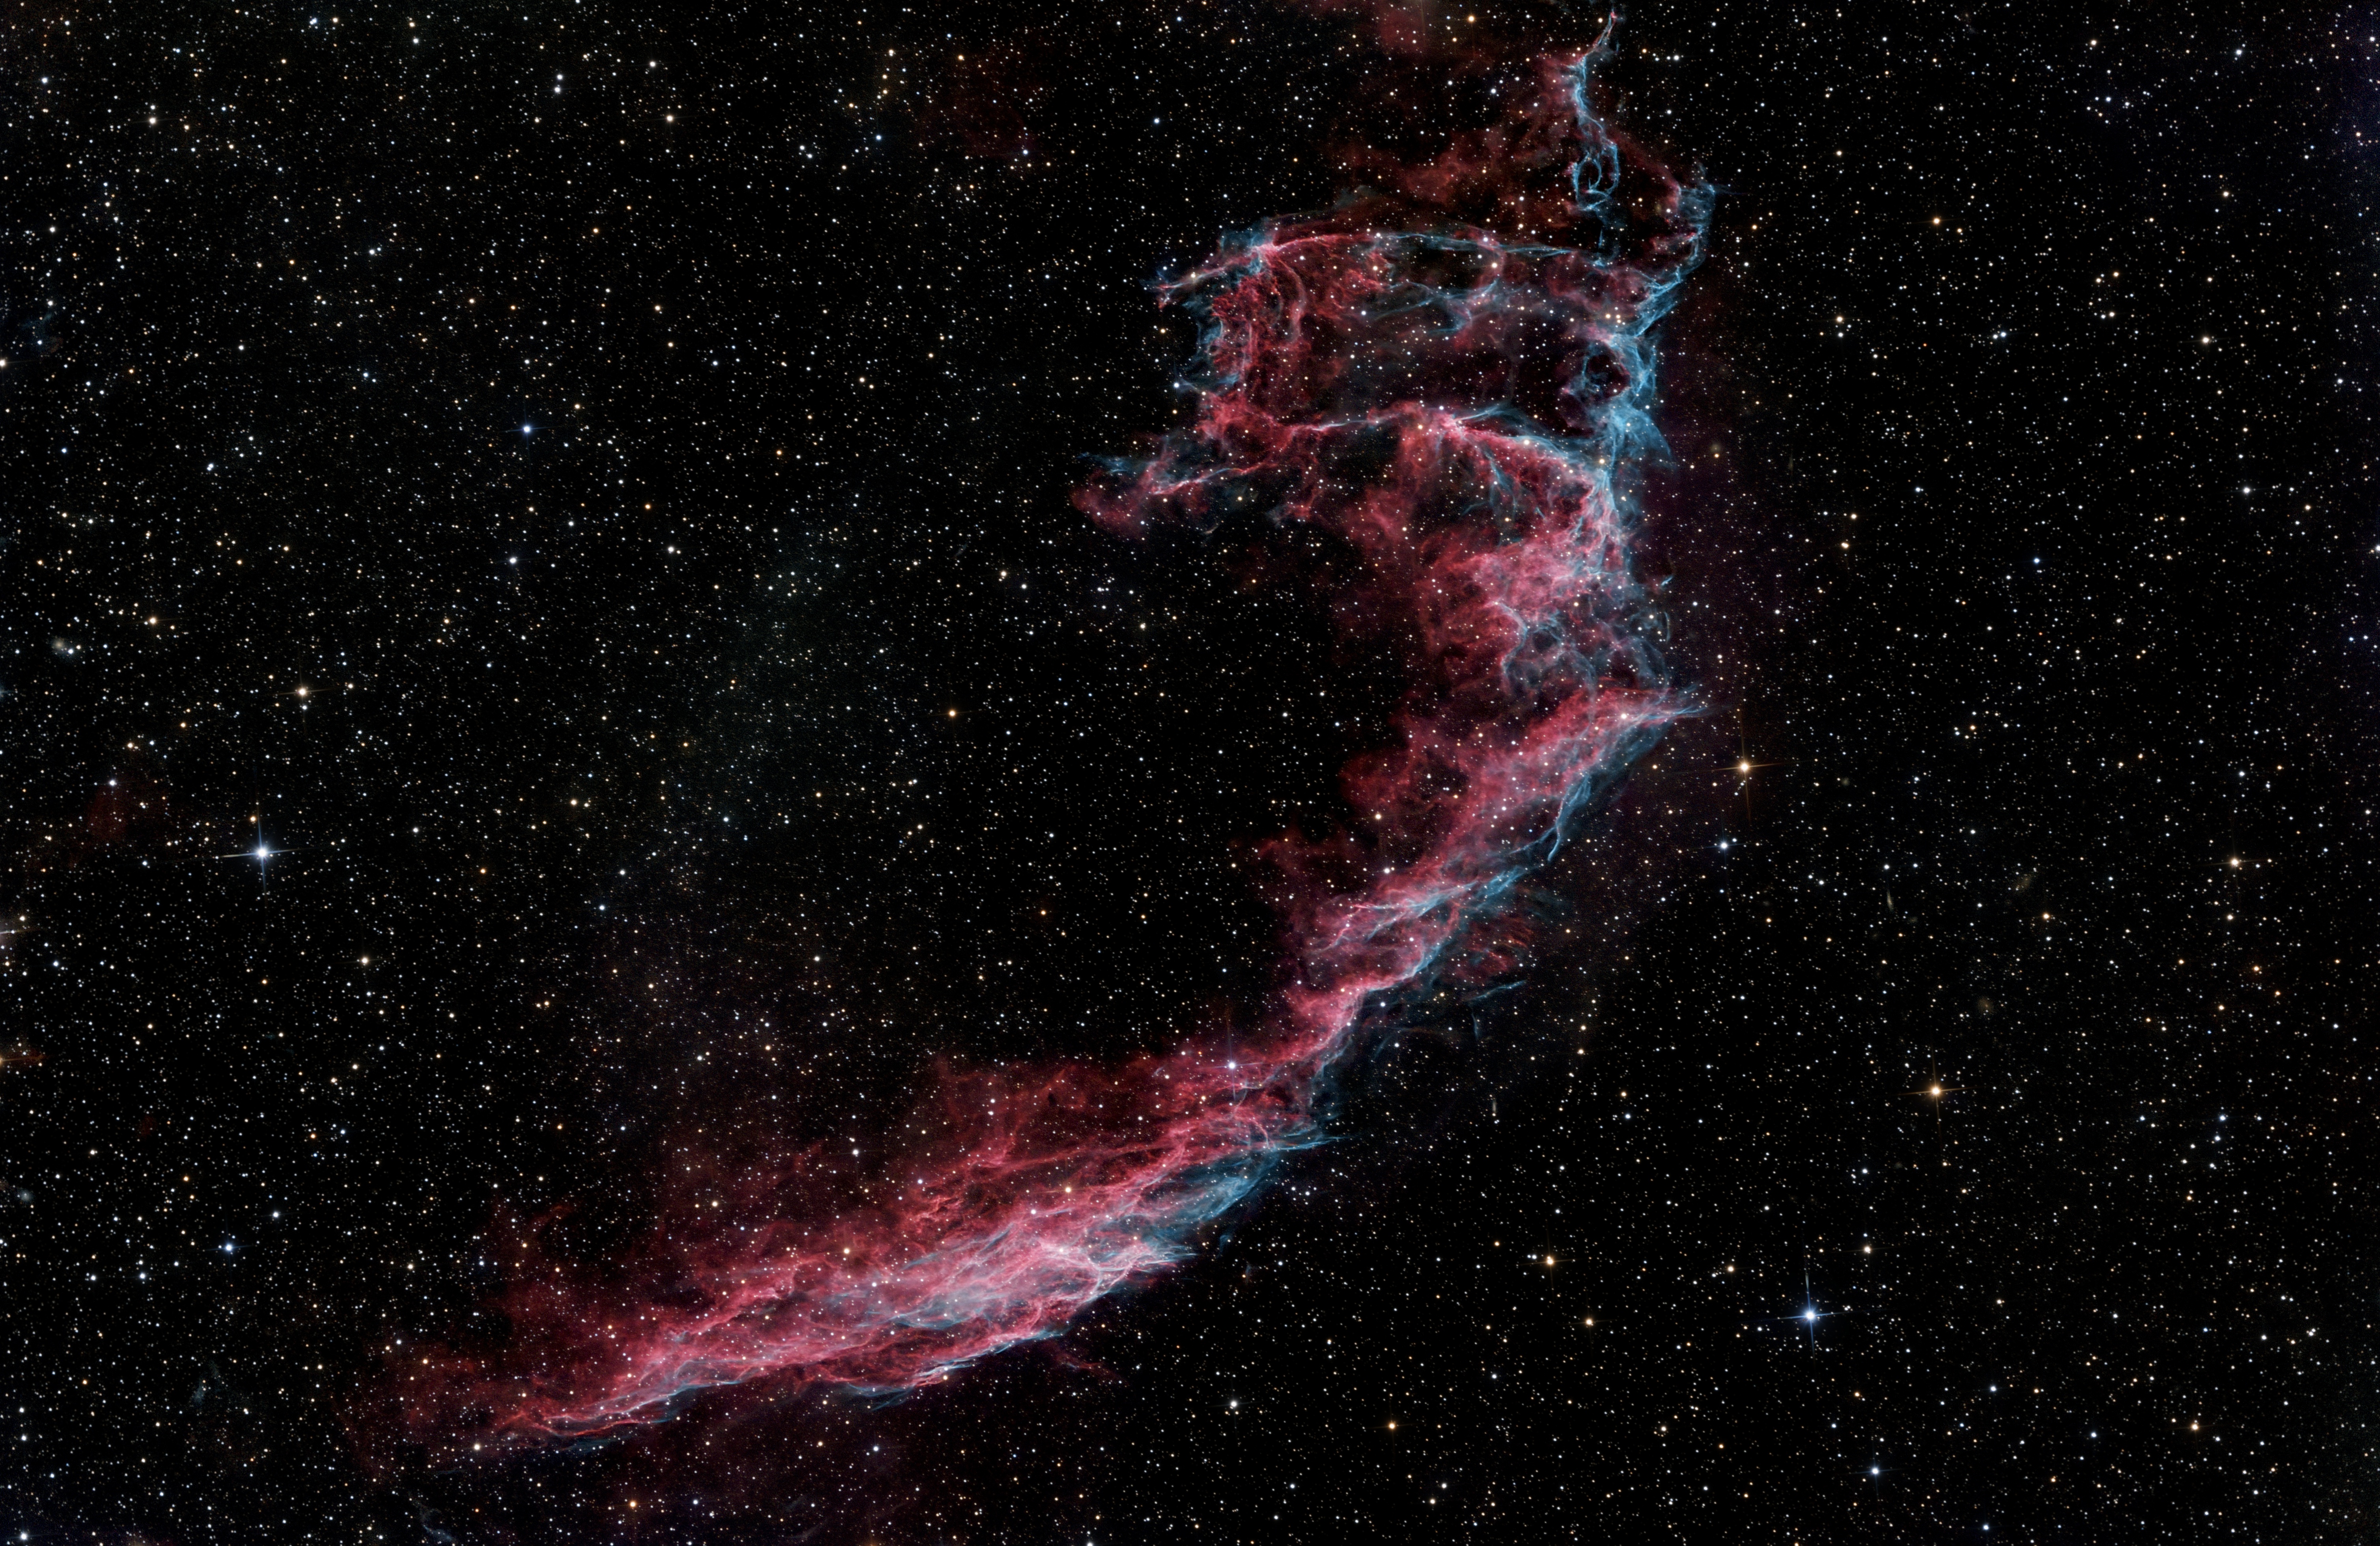
The first DSO I captured with my 2600MC. Broadband. Processed with GraXpert. Part of a larger complex around 10k-20k years old.
Cygnus Loop (widefield)

You may recognize the lower left component of the loop from the previous image. This widefield image was taken using a 135mm F/2 Rokinon lens mounted to my ASI2600MC. More on that later. Broadband. Processed with GraXpert. Cropped.
Planetary Nebula
Unlike supernova remnants where a star exploded, a planetary nebula is a slower more gradual death as the outer layers of a star are blown away by its own power. These gas expand into complex oddly symmetrical shapes with variously colored layers, and are heated by the solar wind and light of the dying star. Like supernova remnants, these are decently ephemeral, but may last much longer than a remnant. The small selection here is in the O(10k year) range of age. These are on the smaller side compared to remnants, as they tend to be far less energetic than supernova, but still can reach the O(10 ly) scale.
NGC7293 Helix Nebula
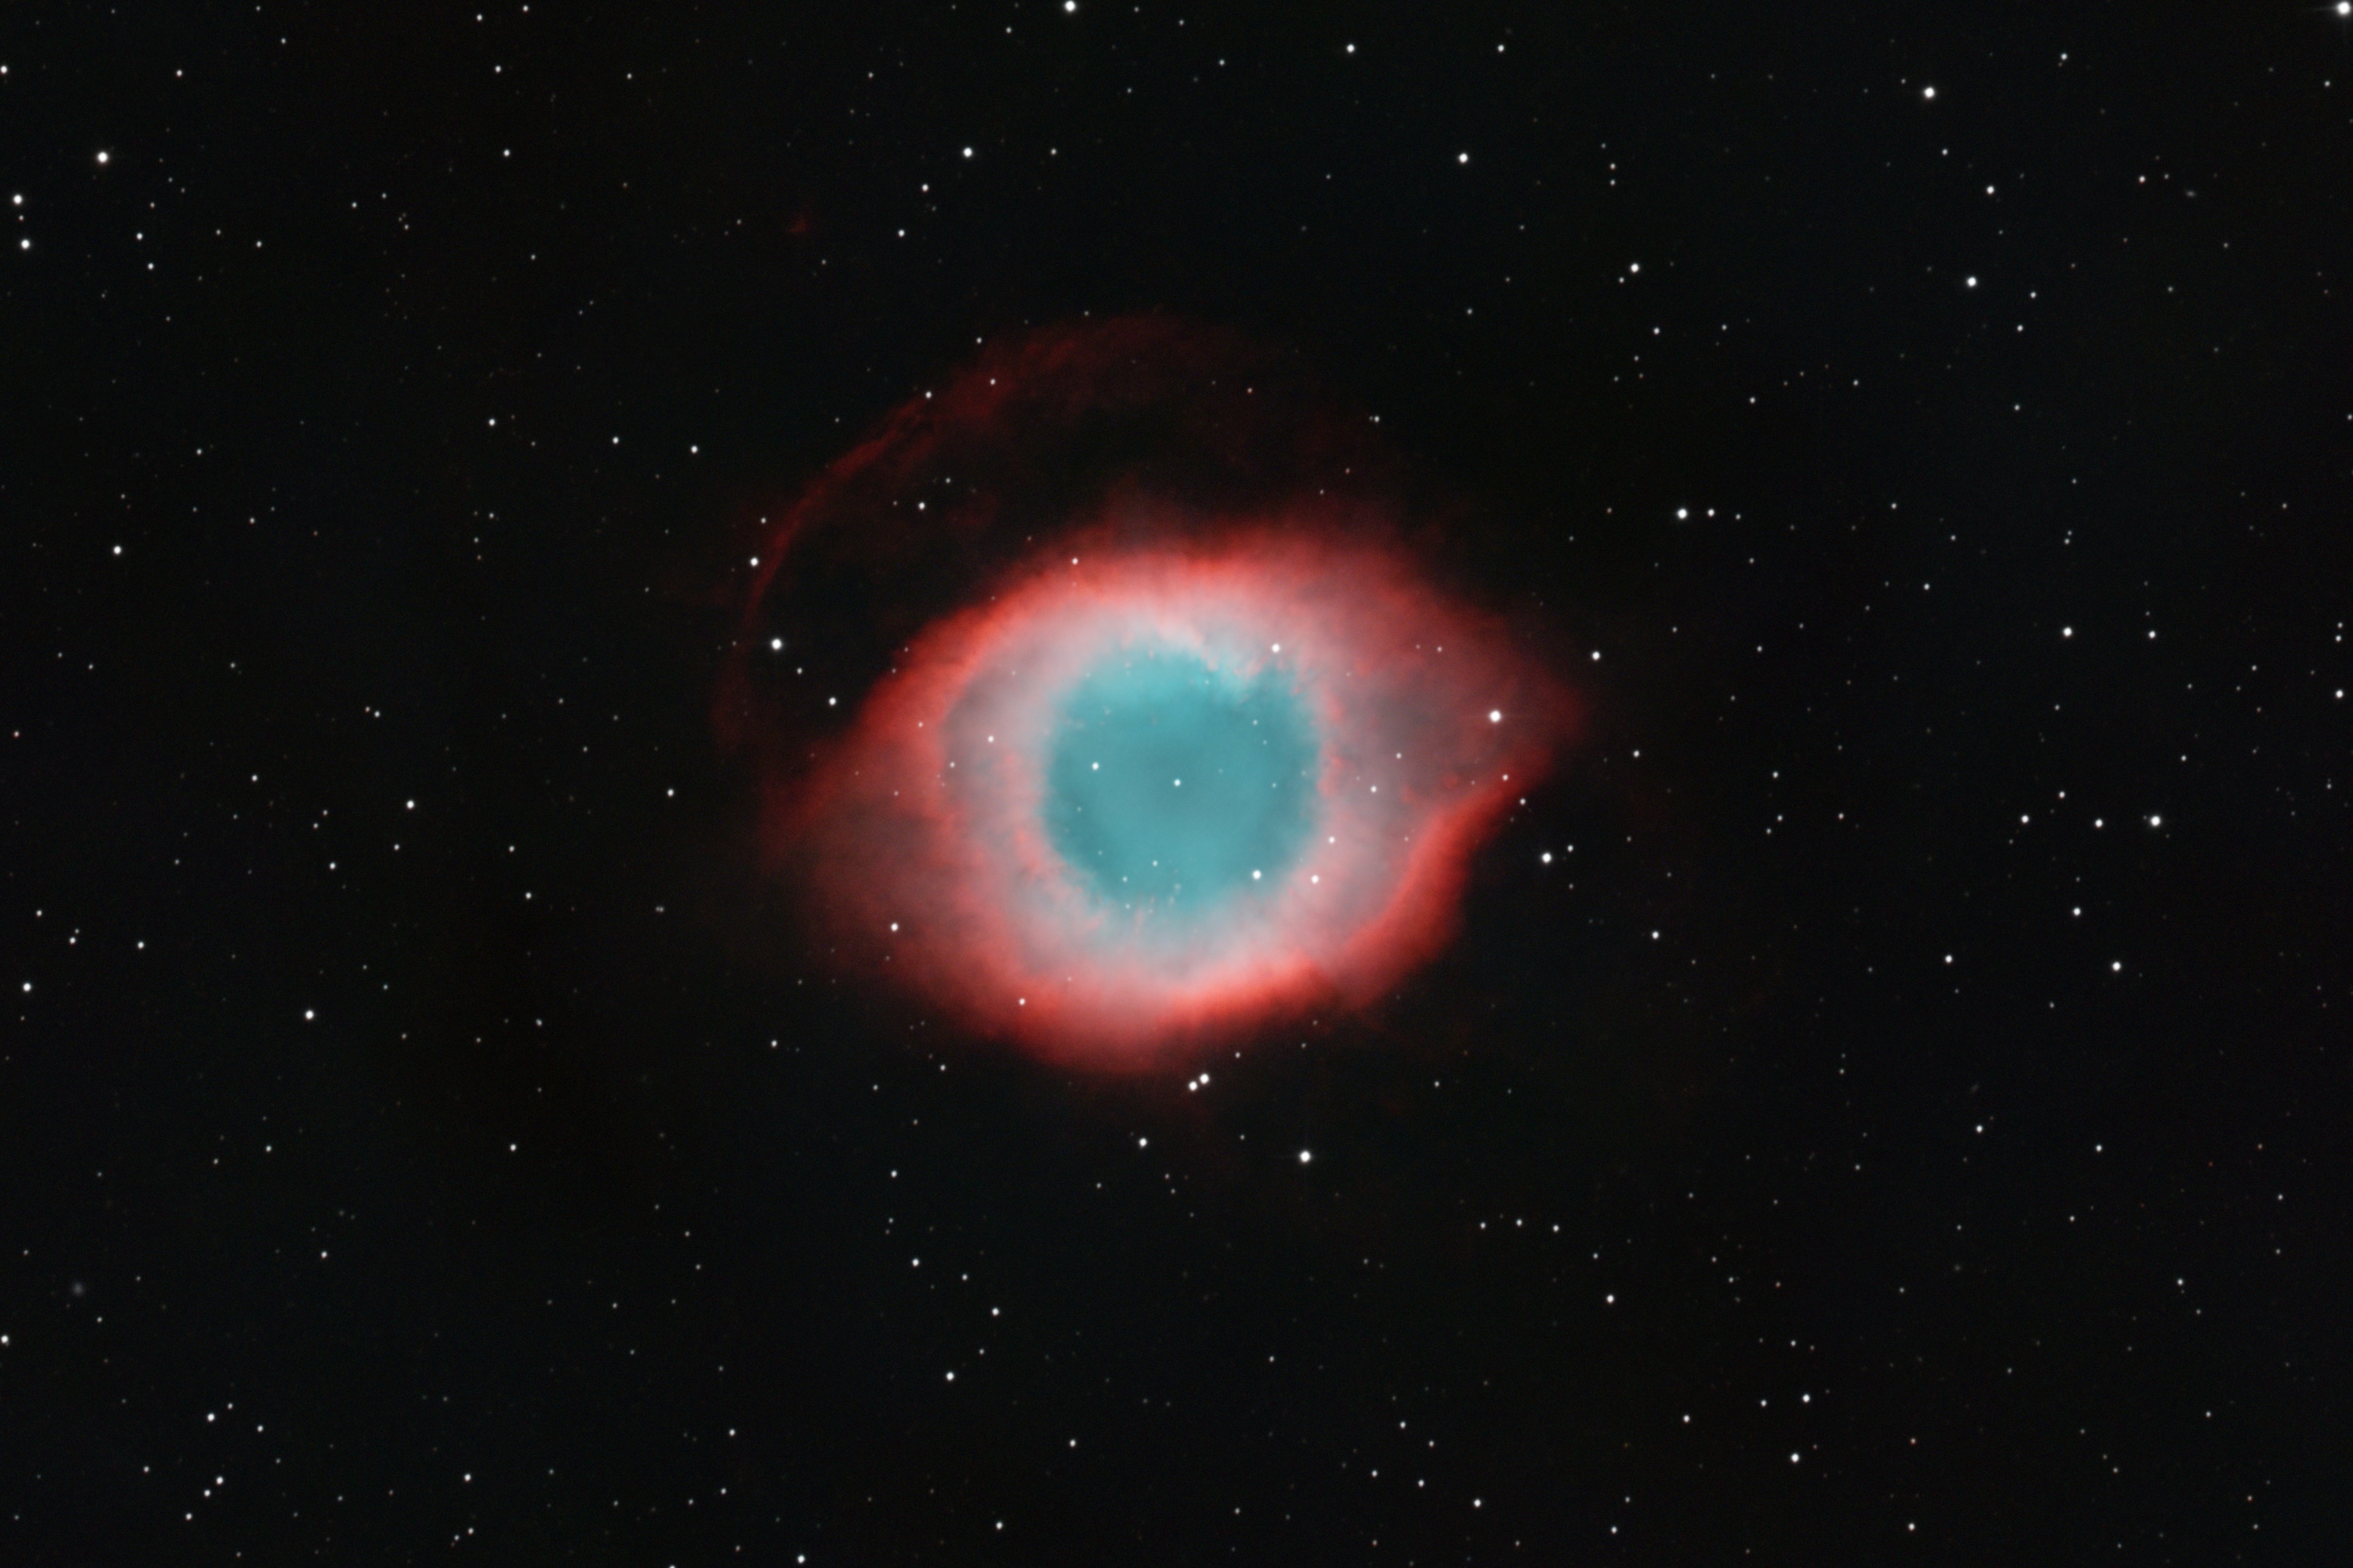
3h30m (mixed 5min / 3min) Dualband. Processed with GraXpert. Cropped.
M27 Dumbbell Nebula
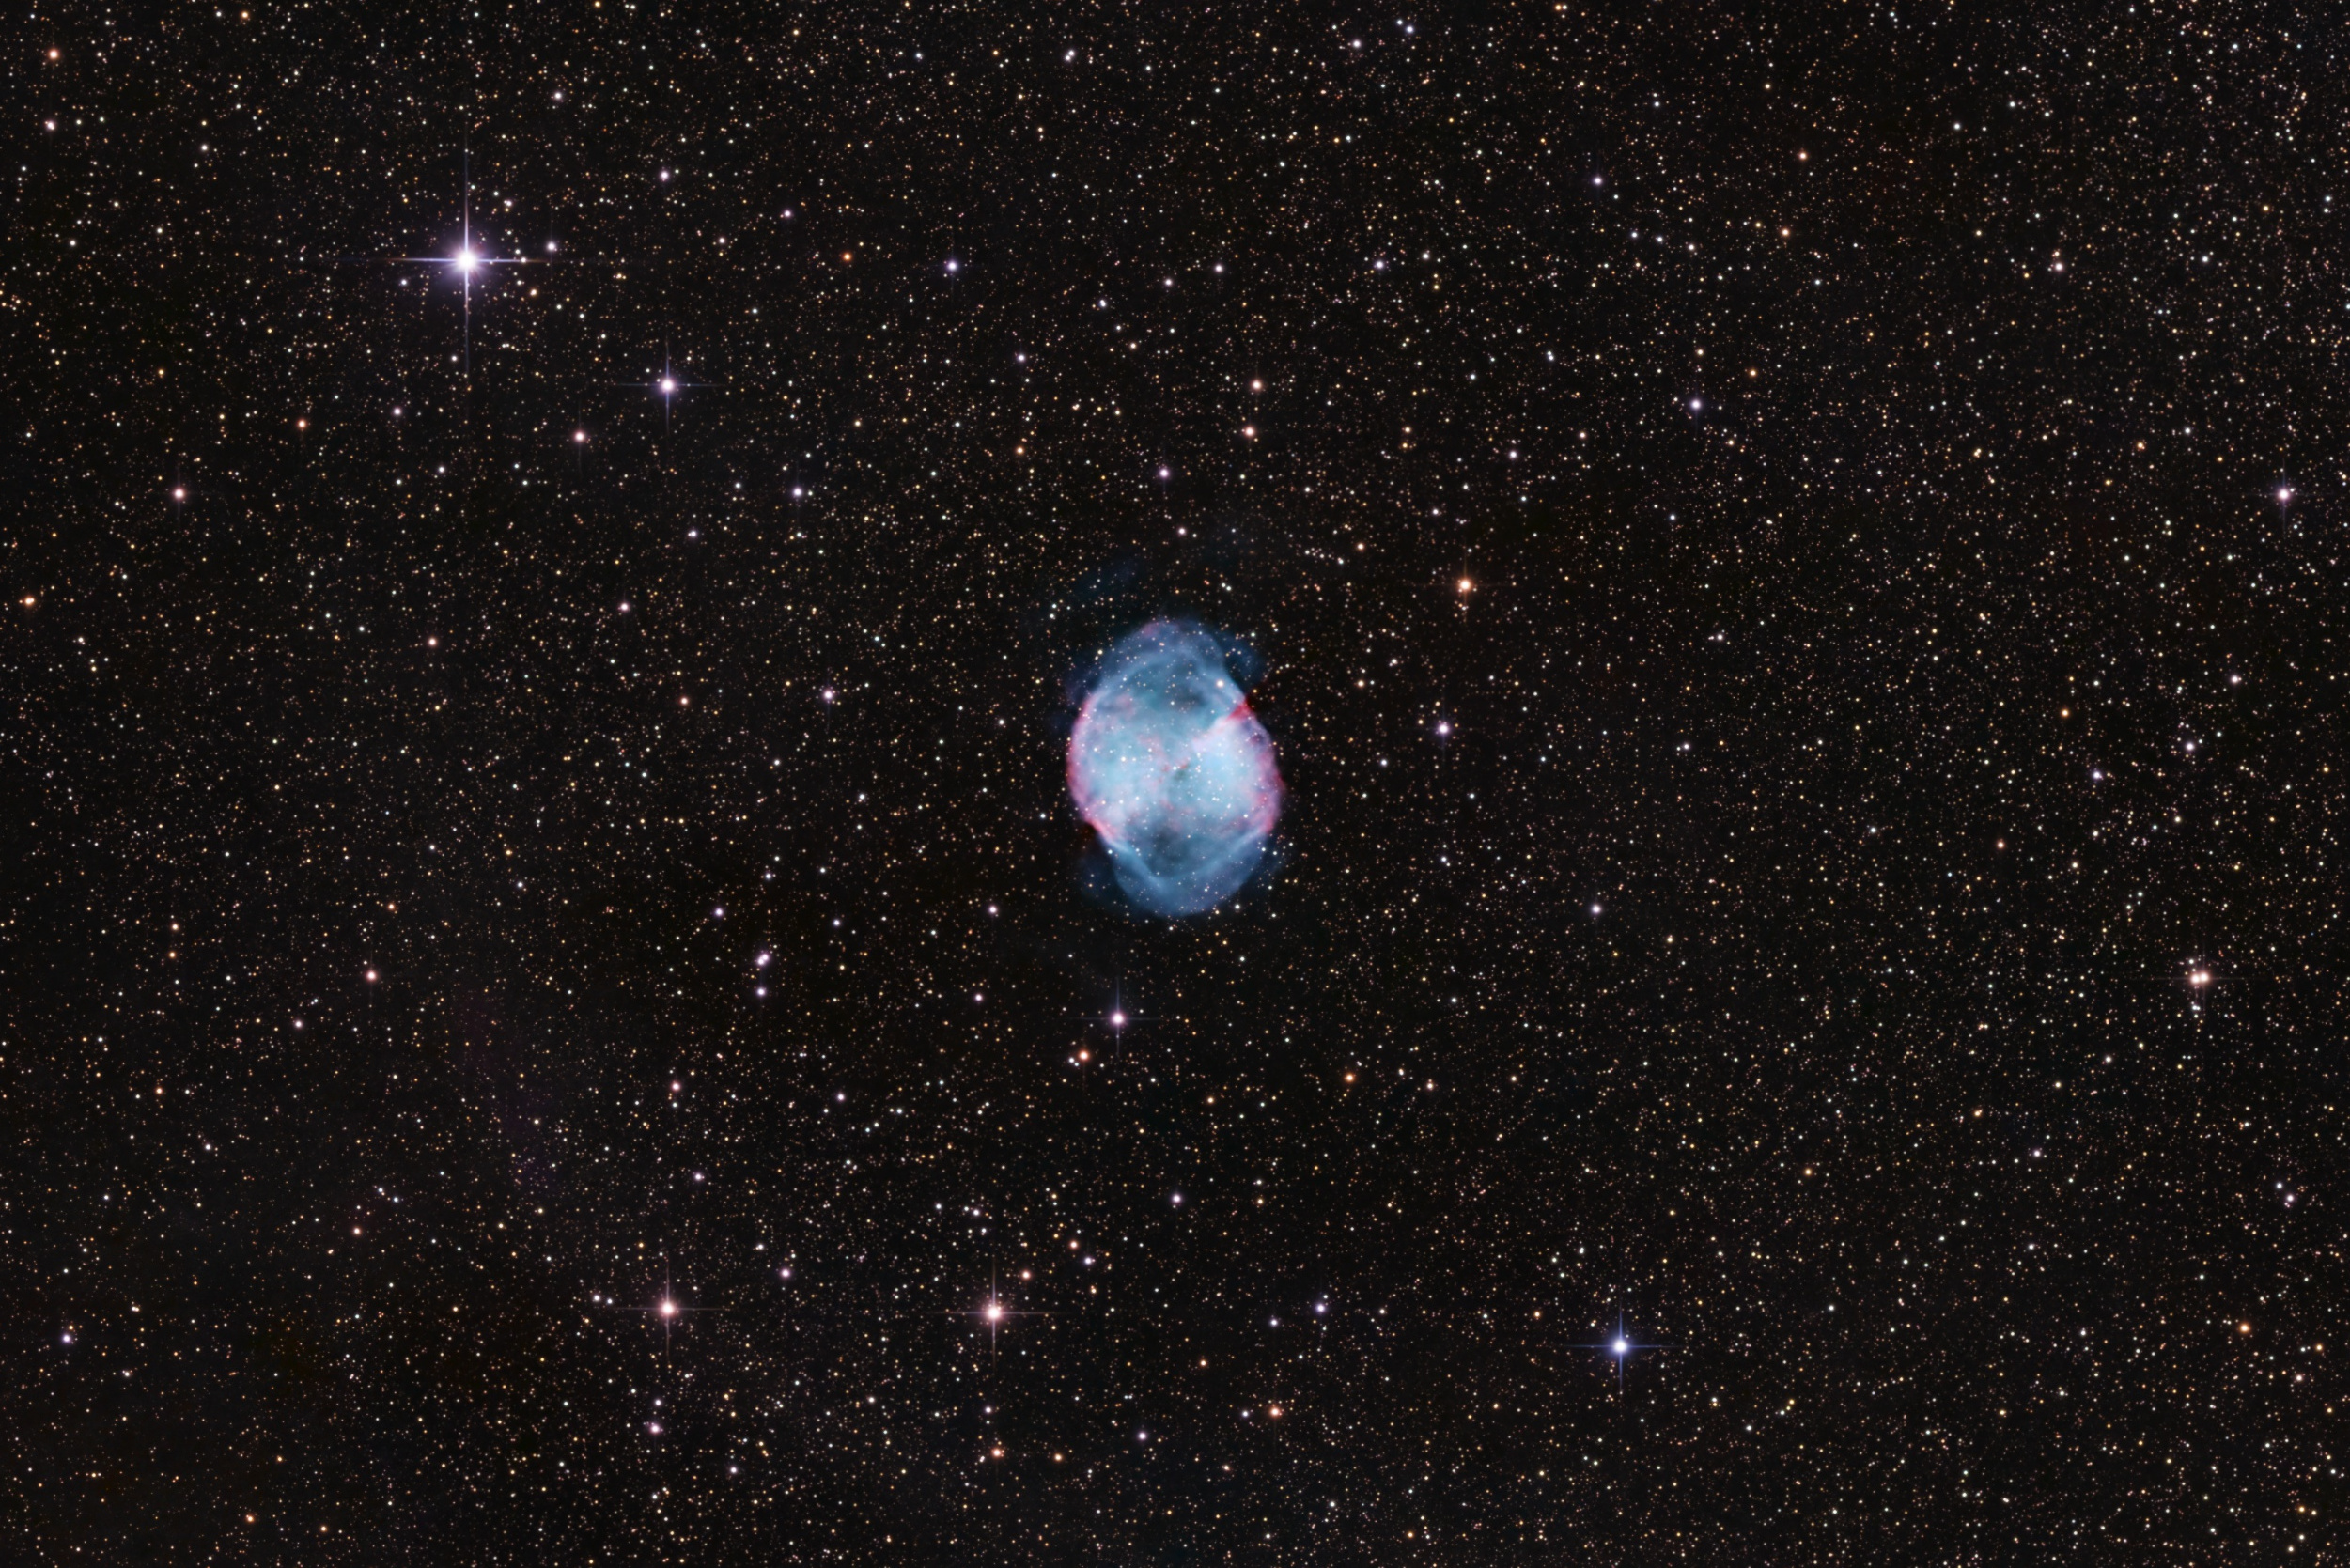
3h30m (55 x 4min) Broadband using Sony α7C. Processed with DeepSNR and BlurX. Cropped.
M76 Little Dumbbell Nebula
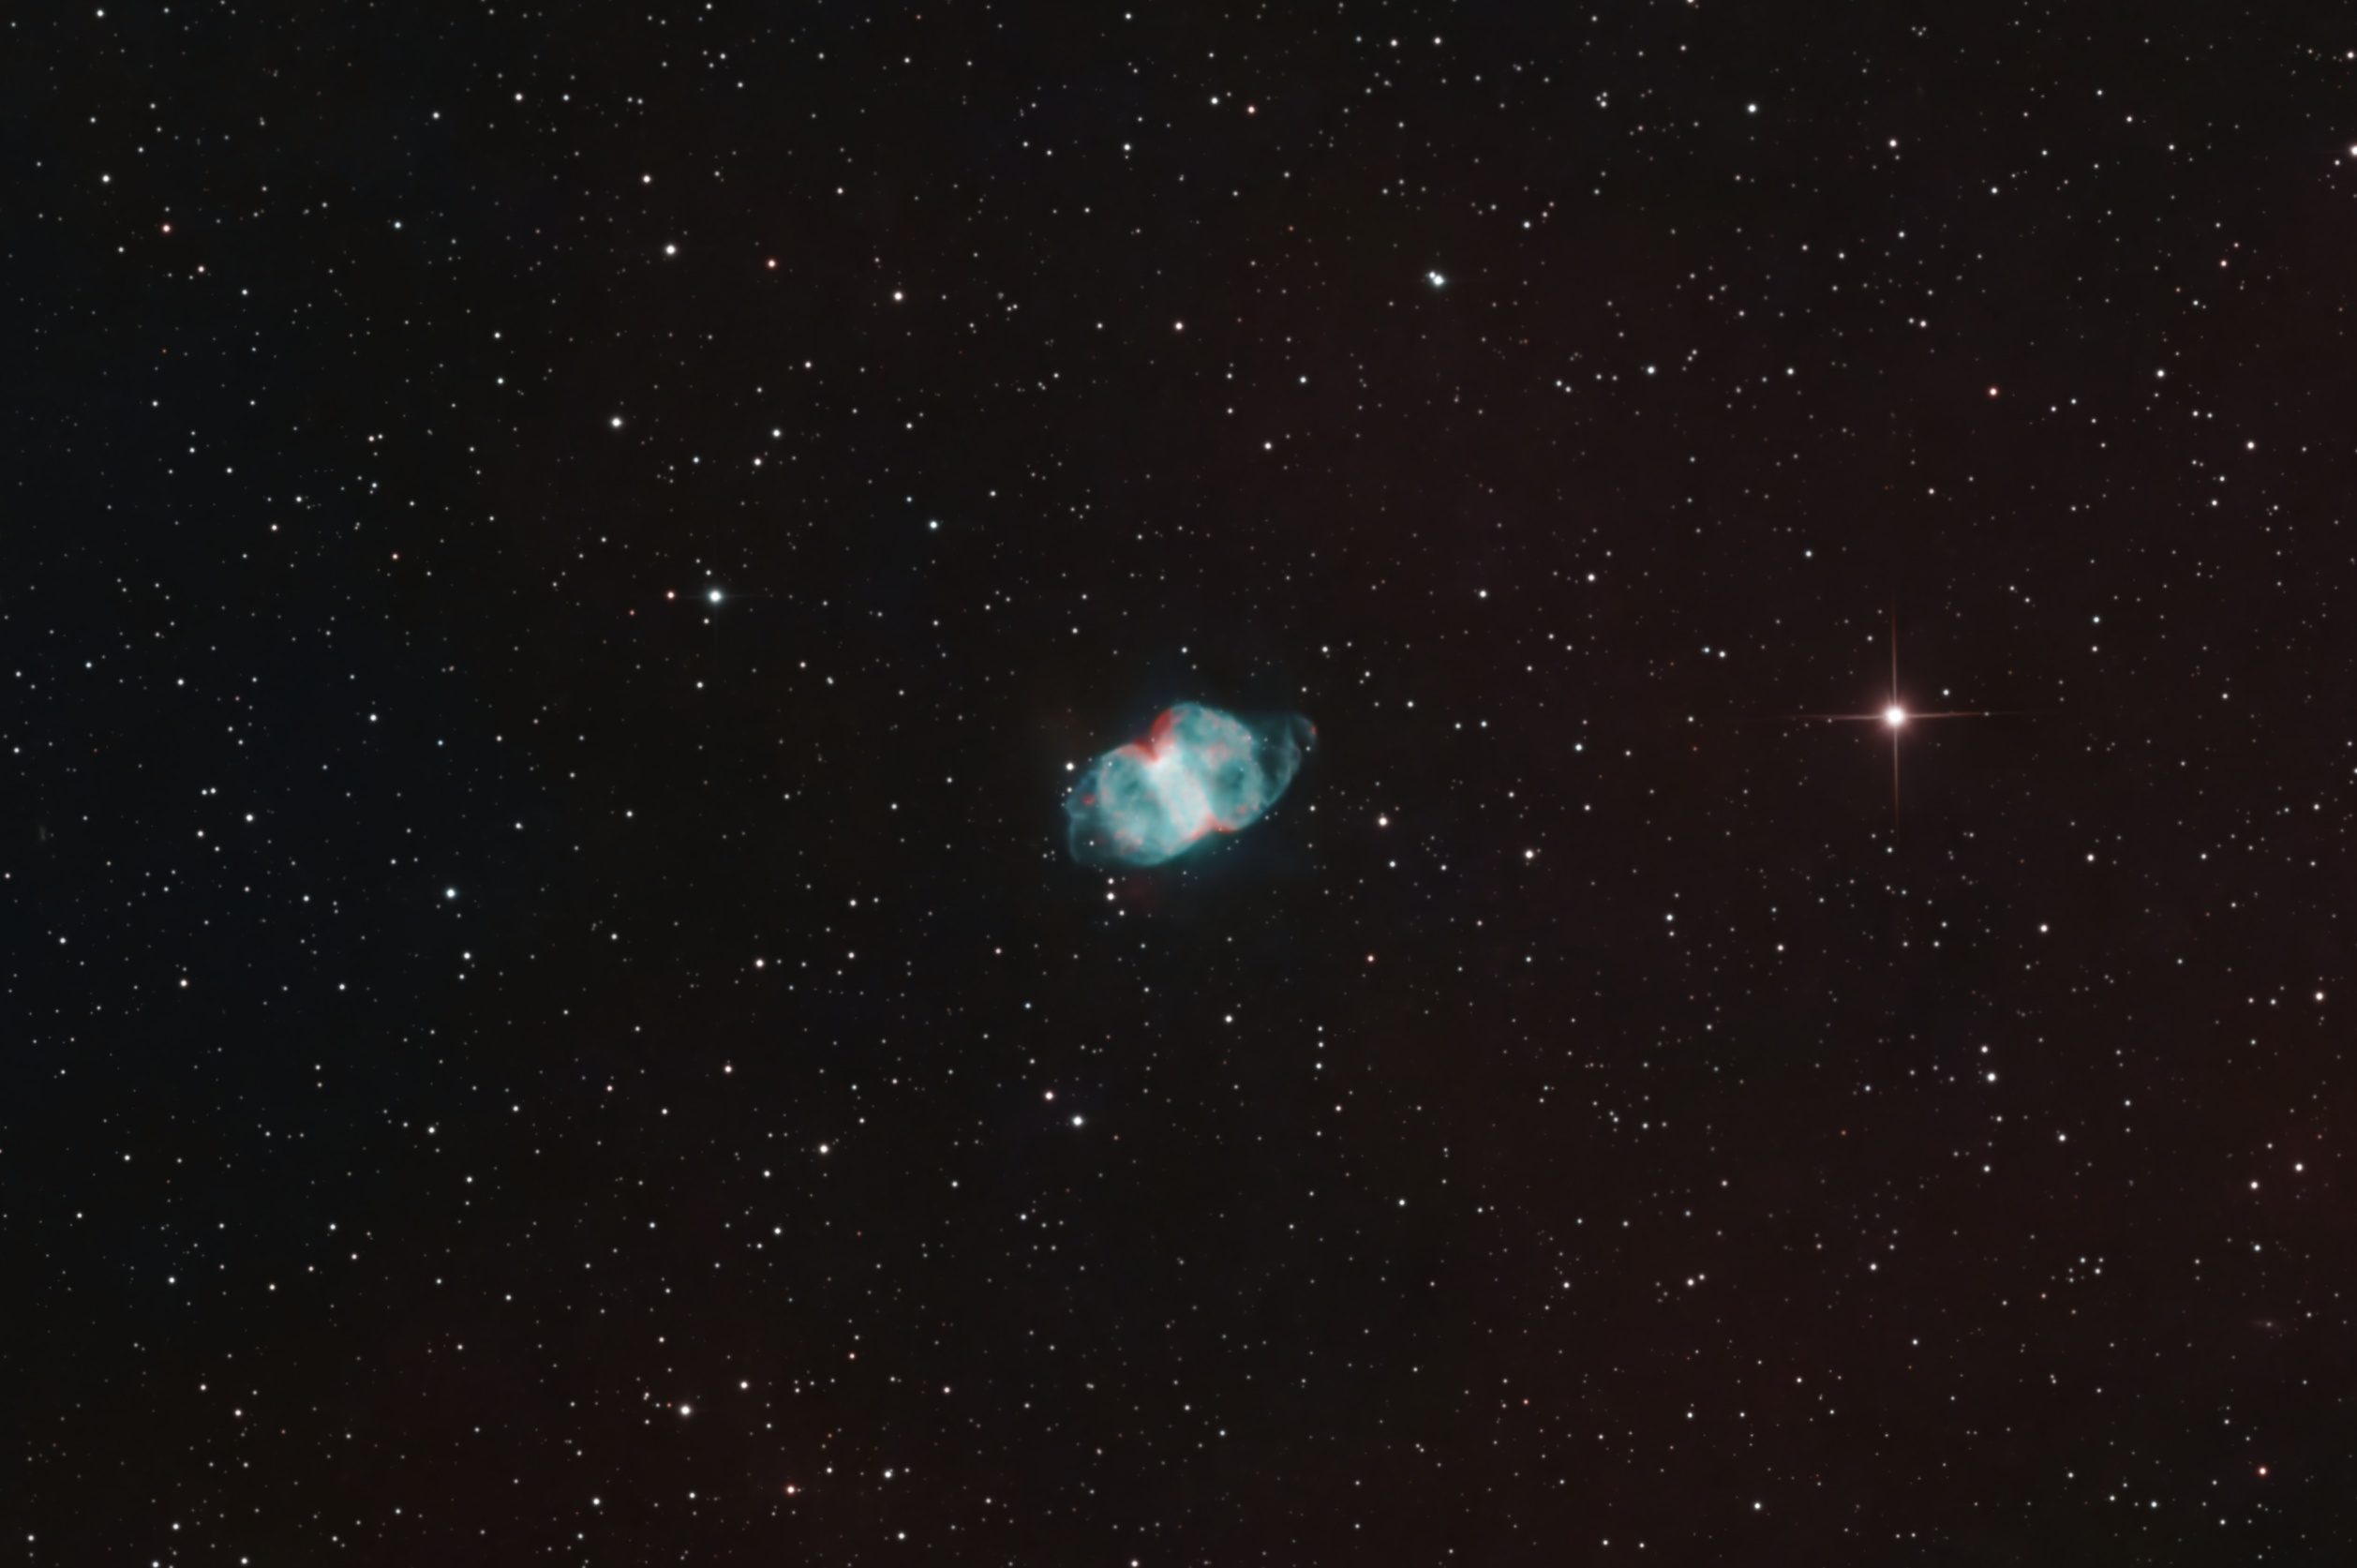
5h25m (65 x 5min) Dualband. Processed with DeepSNR and BlurX. Cropped. Smaller than M1.
Reflection / Emission Nebula
Unlike planetary nebula and supernova remnants, nebula with a reflection component are always associated with living and typically young (for a star) stars. The starlight is reflected off local dust, hence the name. These nebula often have some amount of emission light as well, since dust usually contains some hydrogen, and hydrogen tends to glow red. Usually the star is actively blowing this dust away, so regions of low density will have been swept clean, while higher density regions are being swept. Proximity to a star is still important here, so objects (the illuminated parts, anyway) will tend to be on the O(1 ly - 10 ly) size, but since the existence is now contingent on star life, the ages and lifespans of objects easily exceeds O(10m years). I’ll lump dark nebula in here as well, as occlusion and reflection seem related to me.
M45 Pleiades
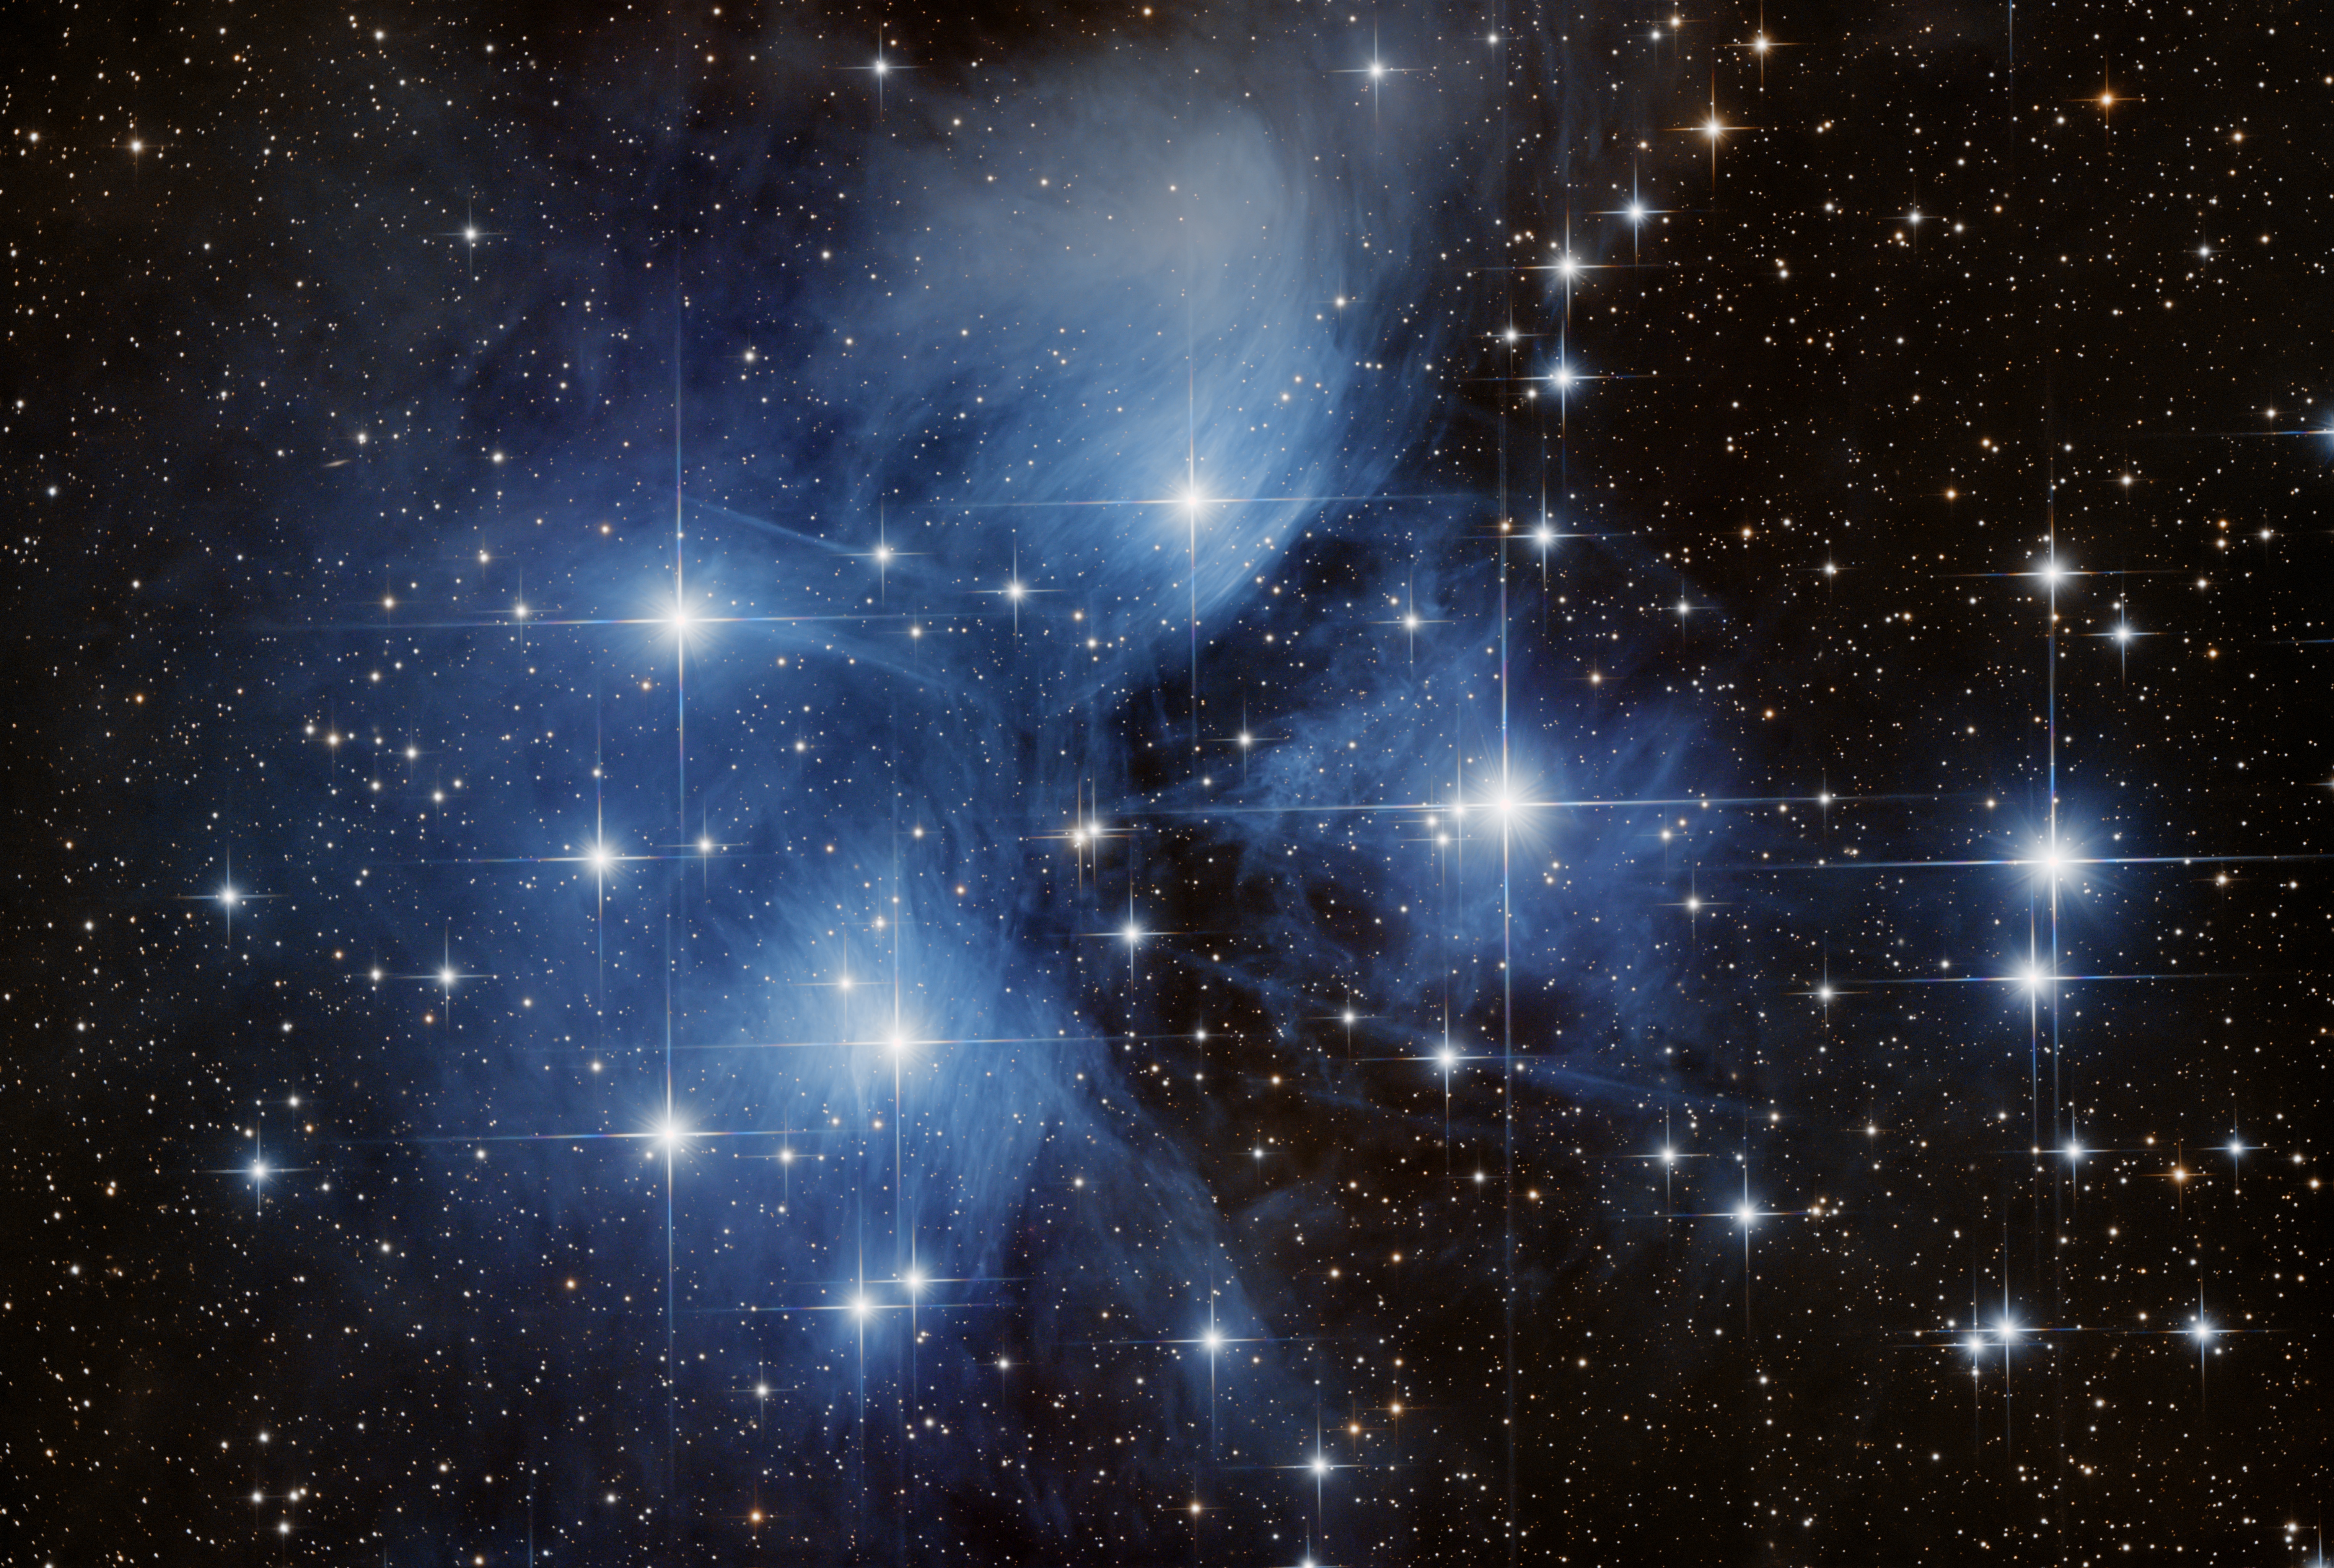
First data I took with my telescope, using a Sony α7C. Processed with GraXpert. Pure reflection of the bright blue sisters off local dust.
M78

7hr (140 x 3min) Broadband. Processed with DeepSNR and BlurX. A recent project – I don’t usually do dark nebula, as they are quite challenging from Bortle 7, but this one was particularly interesting for having a bright nebula behind it.
B33 Horsehead, NGC2024 Flame, IC434, NGC2023
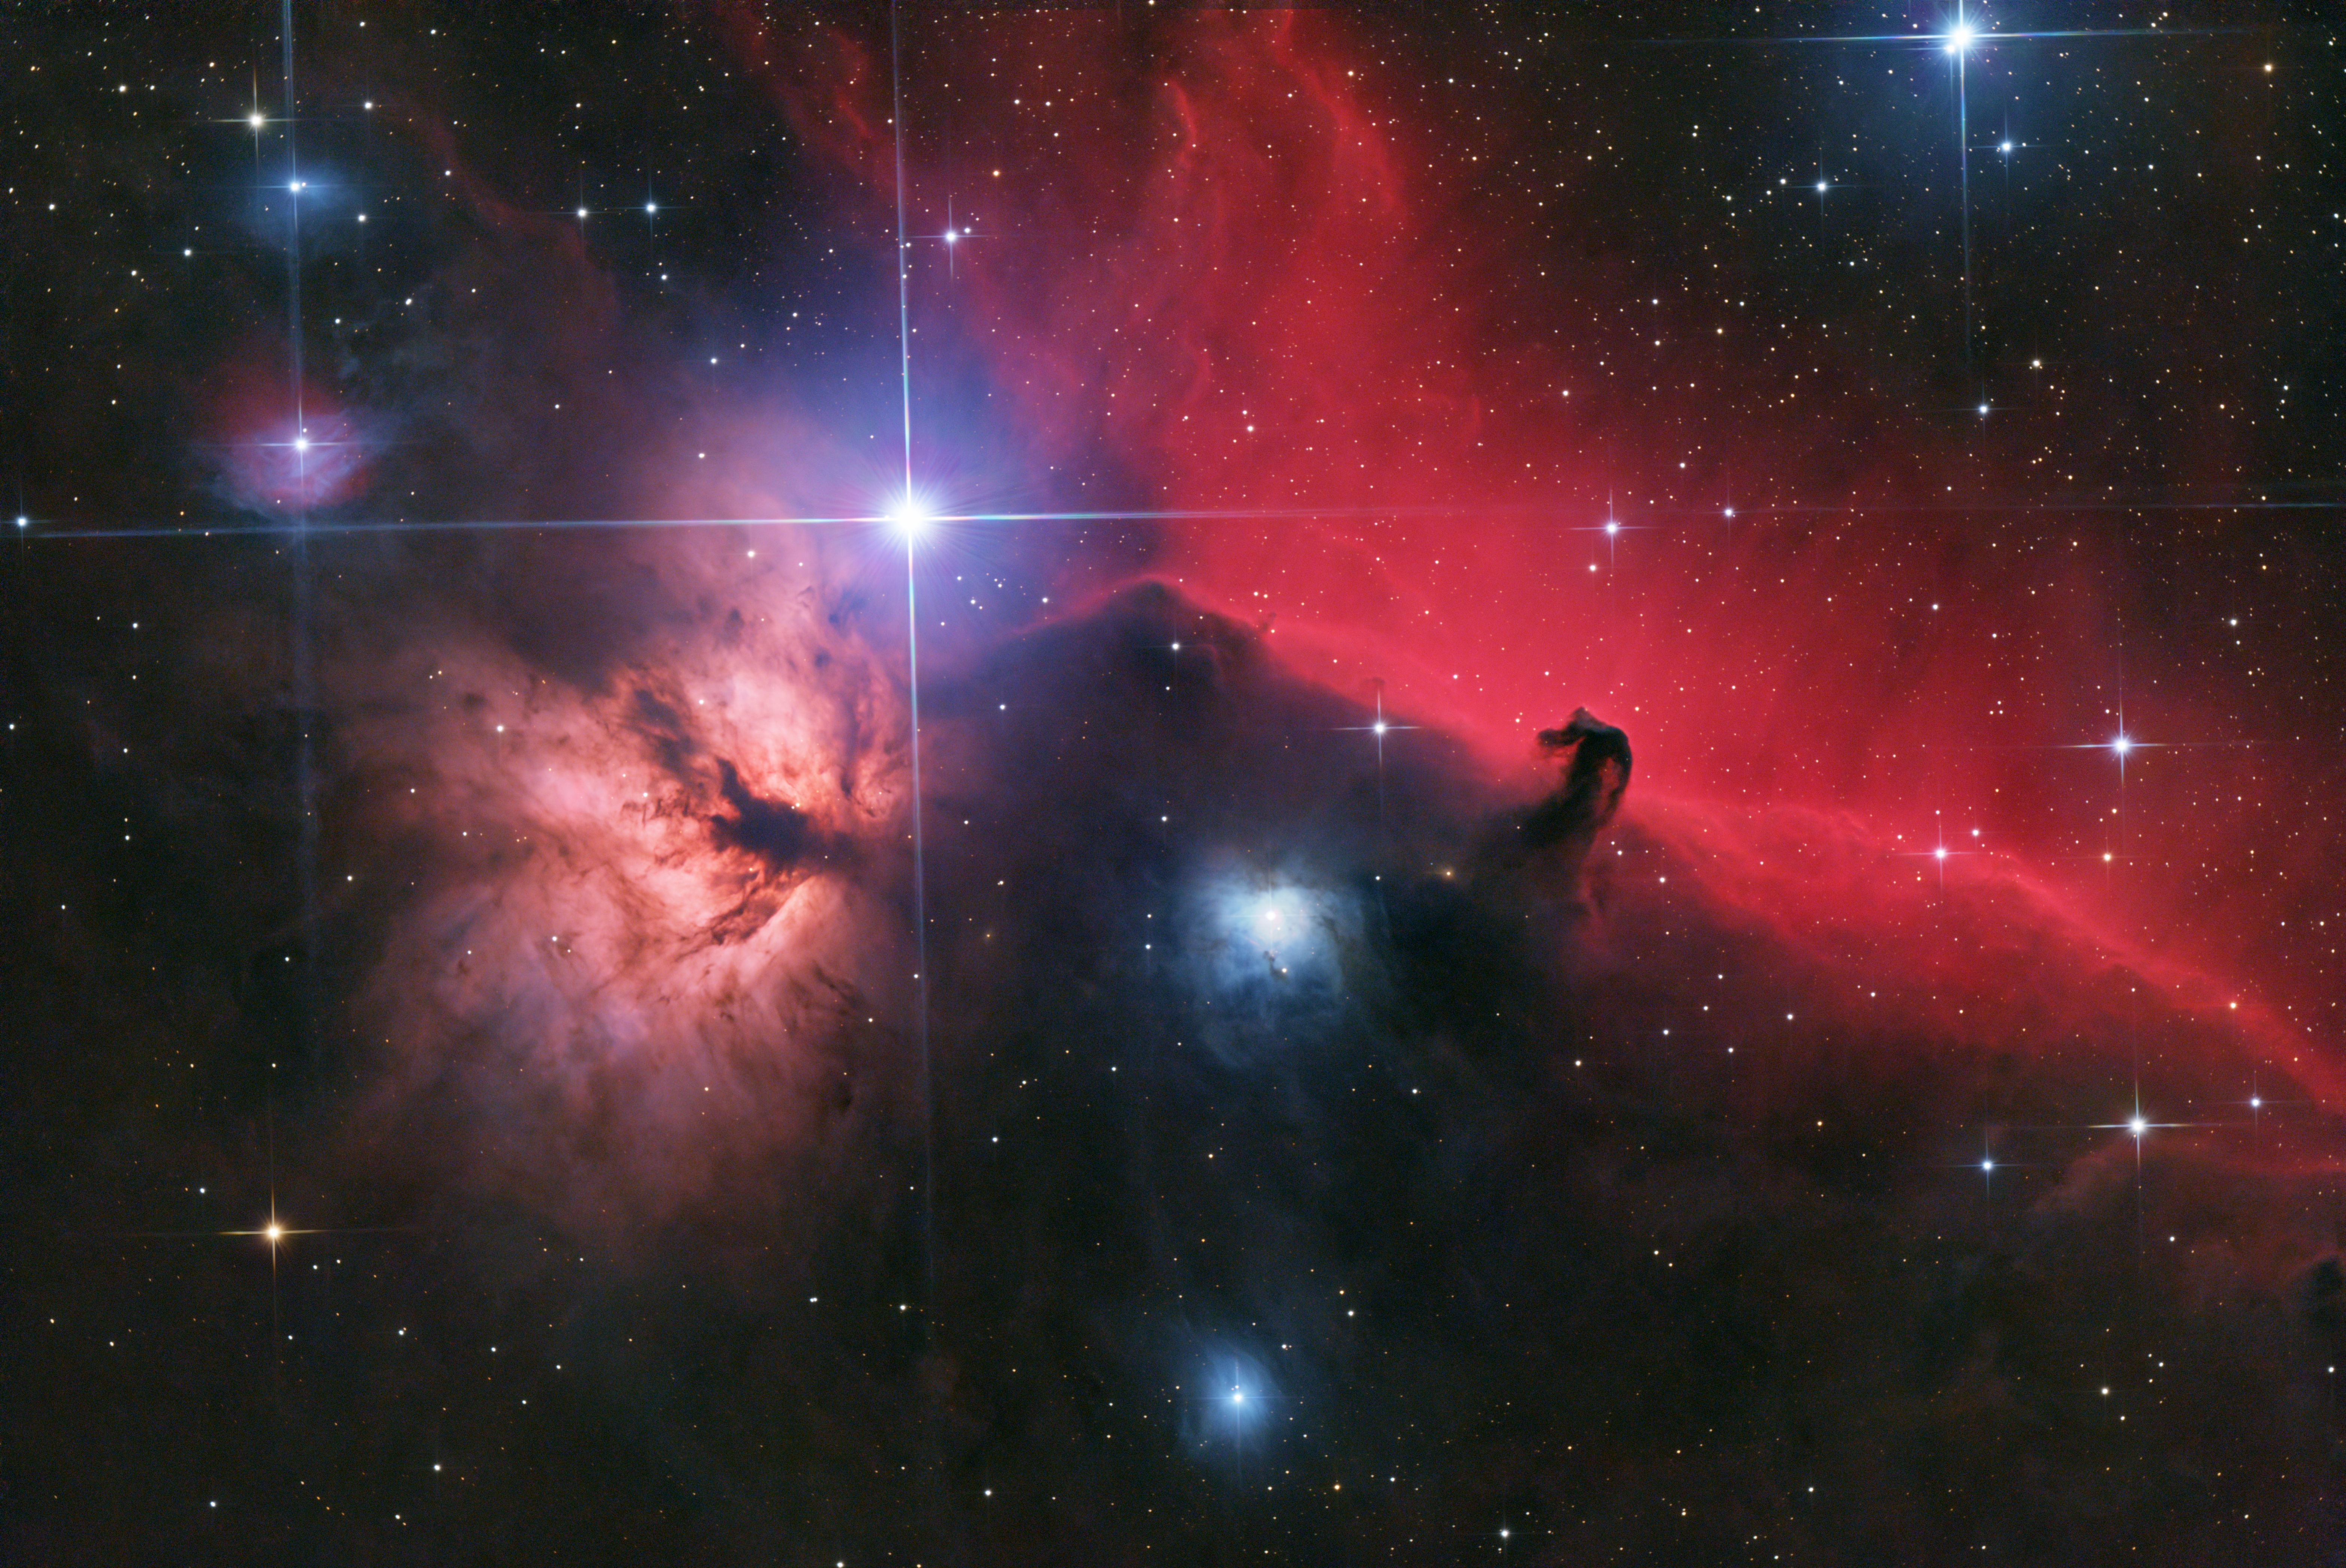
2hr (24 x 5min) Dualband + 2hr (40 x 3min) Broadband. Processed with GraXpert. Dualband split into Ha+Oiii and Oiii discarded. Ha continuum subtracted to remove broadband leakage, then mixed back into the broadband image to accentuate the Ha on the RGB image. The horse head is a dark nebula in front of IC434, which is a very strong emission nebula. All of this is mixed into the Orion Molecular Cloud star forming region.
IC63 Cassiopeia’s Ghost
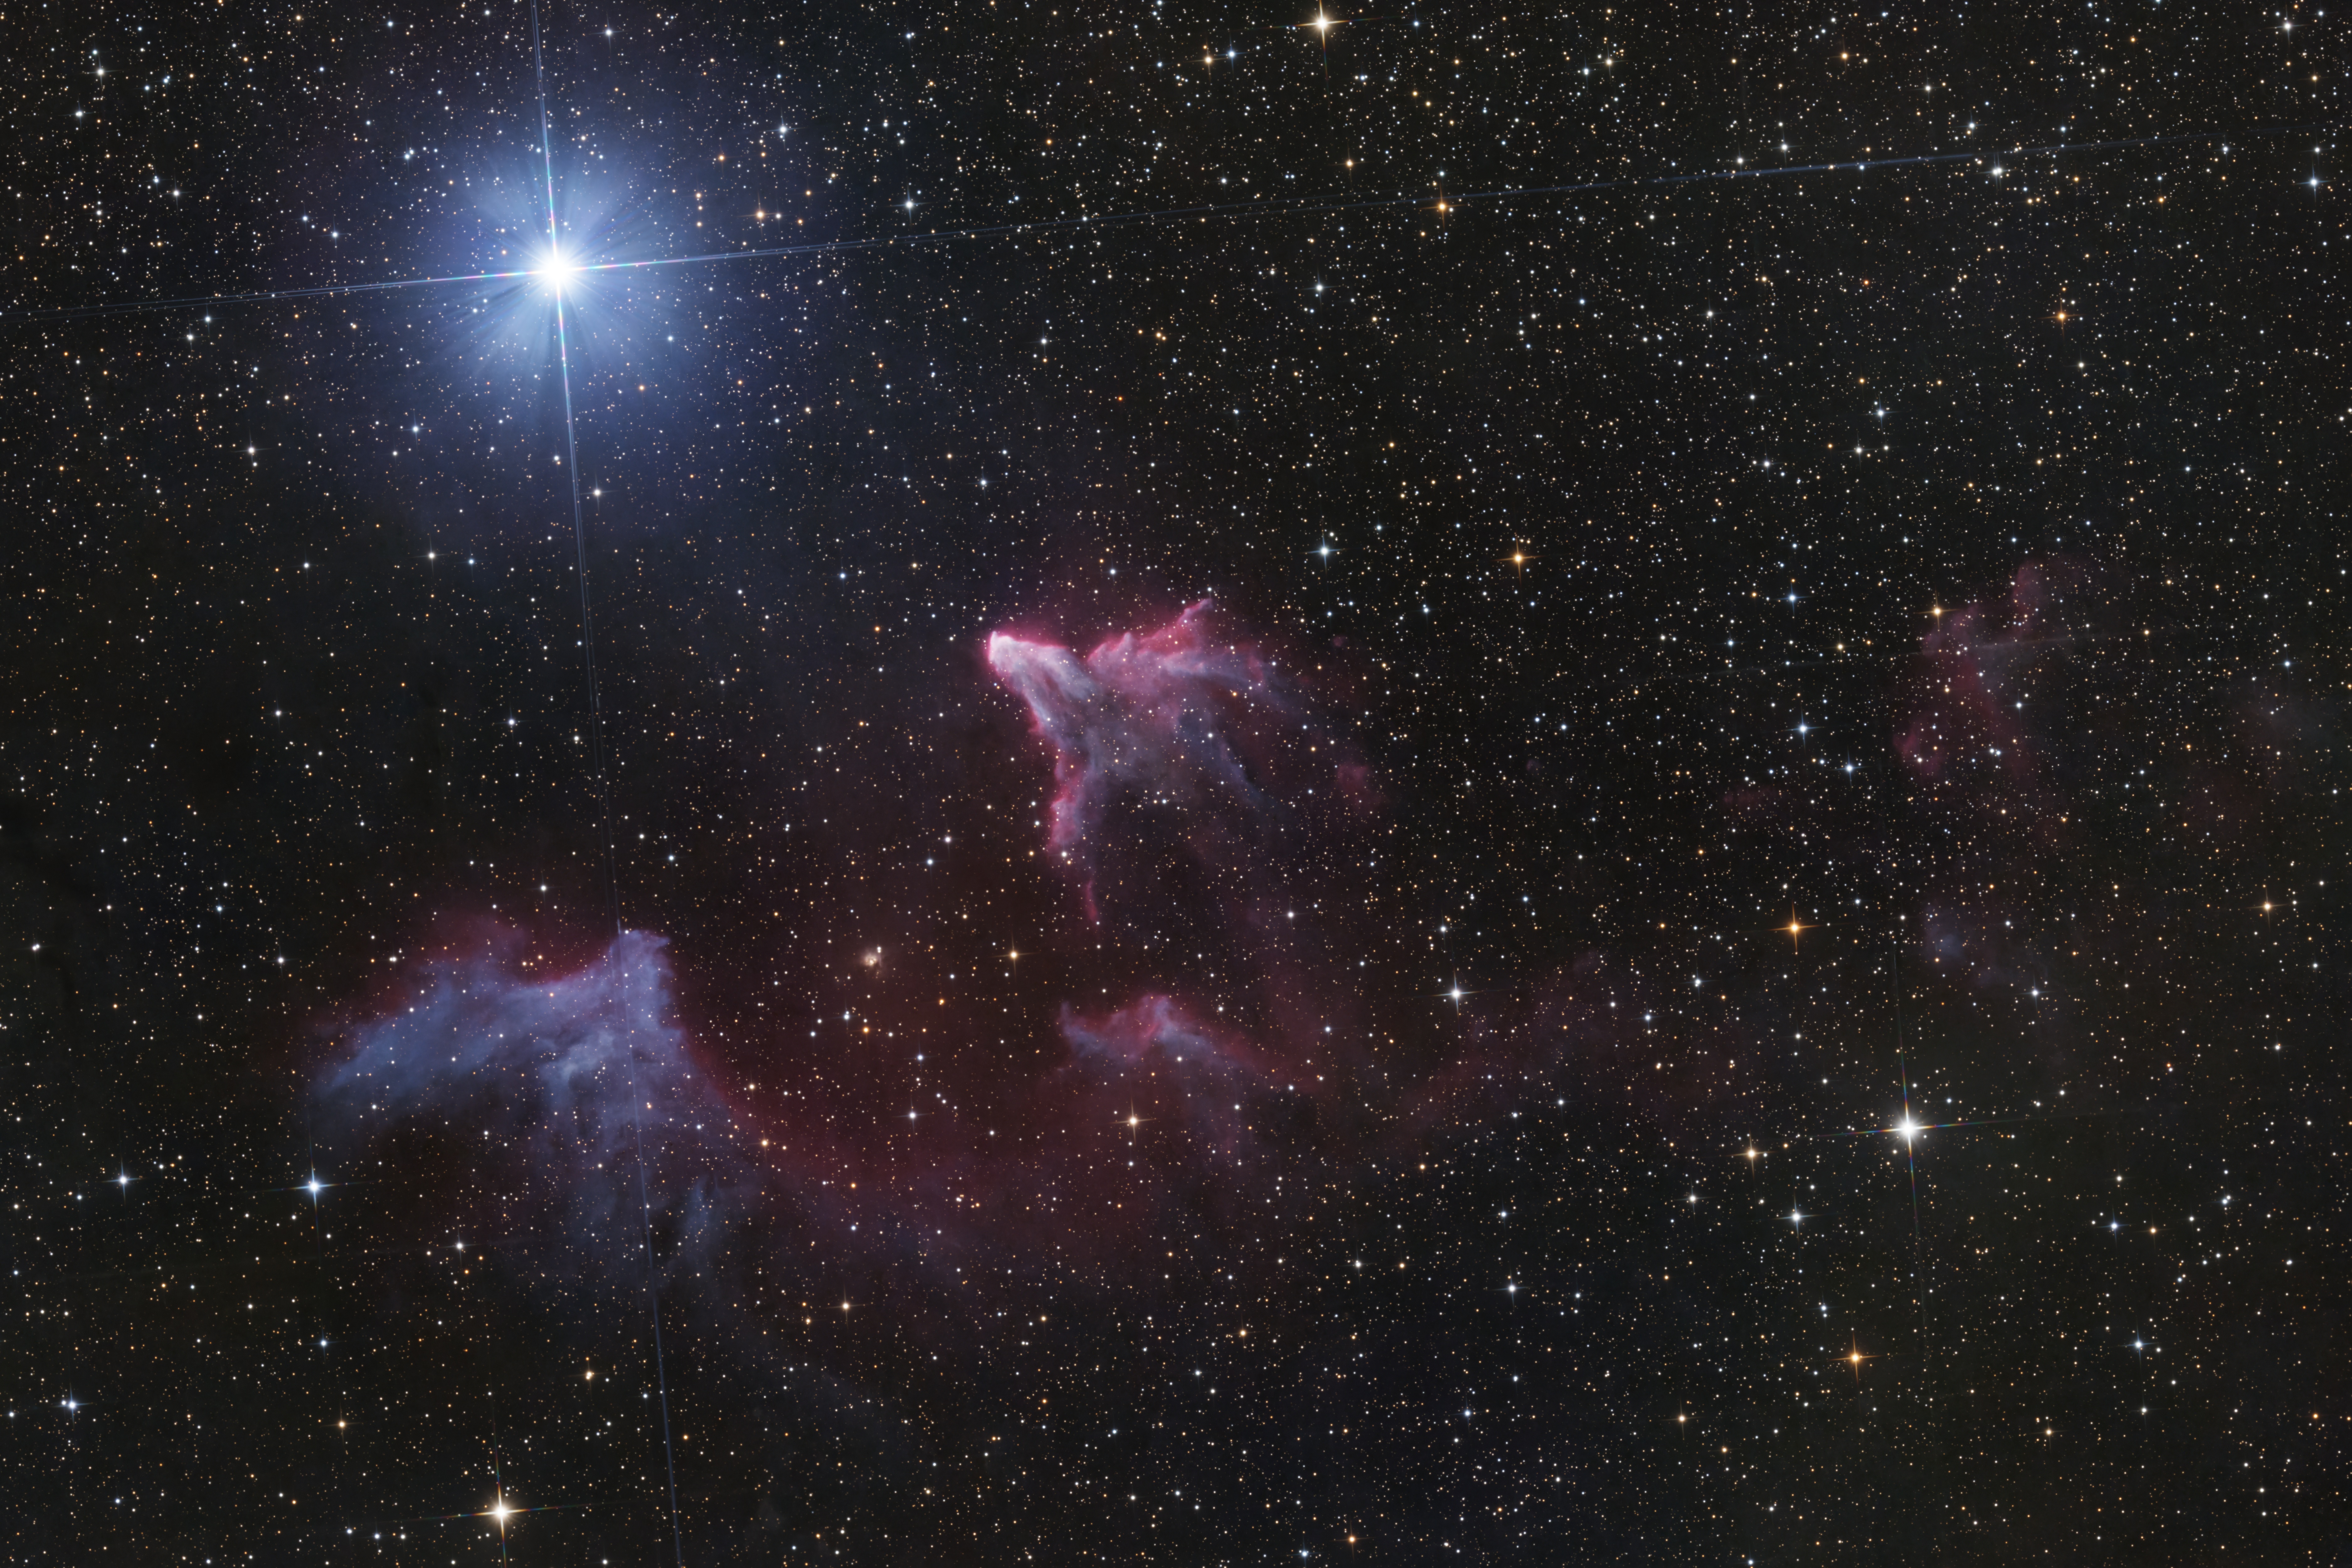
24h16m (728 x 2min) Broadband. Processed with DeepSNR and BlurX. Cropped. Easily the longest exposure on here; for a competition. The bright star has blown away all the dust except the ghosts that remain and their hint of Ha glow.
M42 Orion Nebula

4h40m (160 x 30s + 200 x 1min) Broadband. Processed with GraXpert. Used a high dynamic range transformation to equalize contrast over the multiple orders of magnitude M42 spans, allowing simultaneous rendering of the faint dust and extremely bright core. Mode of the same complex that includes the Horsehead and Flame Nebula.
Emission Nebula
Emission nebula may still be heated by stars, but they are characterized by primarily emission instead of reflected star light. Since the object is visible primarily through emission (much like older supernova remnants), dualband filtering helps to reduce the impact of a bright sky to see much fainter objects than would usually be possible. These nebula come in all sizes, but tend to be both larger and older than reflection nebula.
M16 Eagle Nebula ft. Pillars of Creation
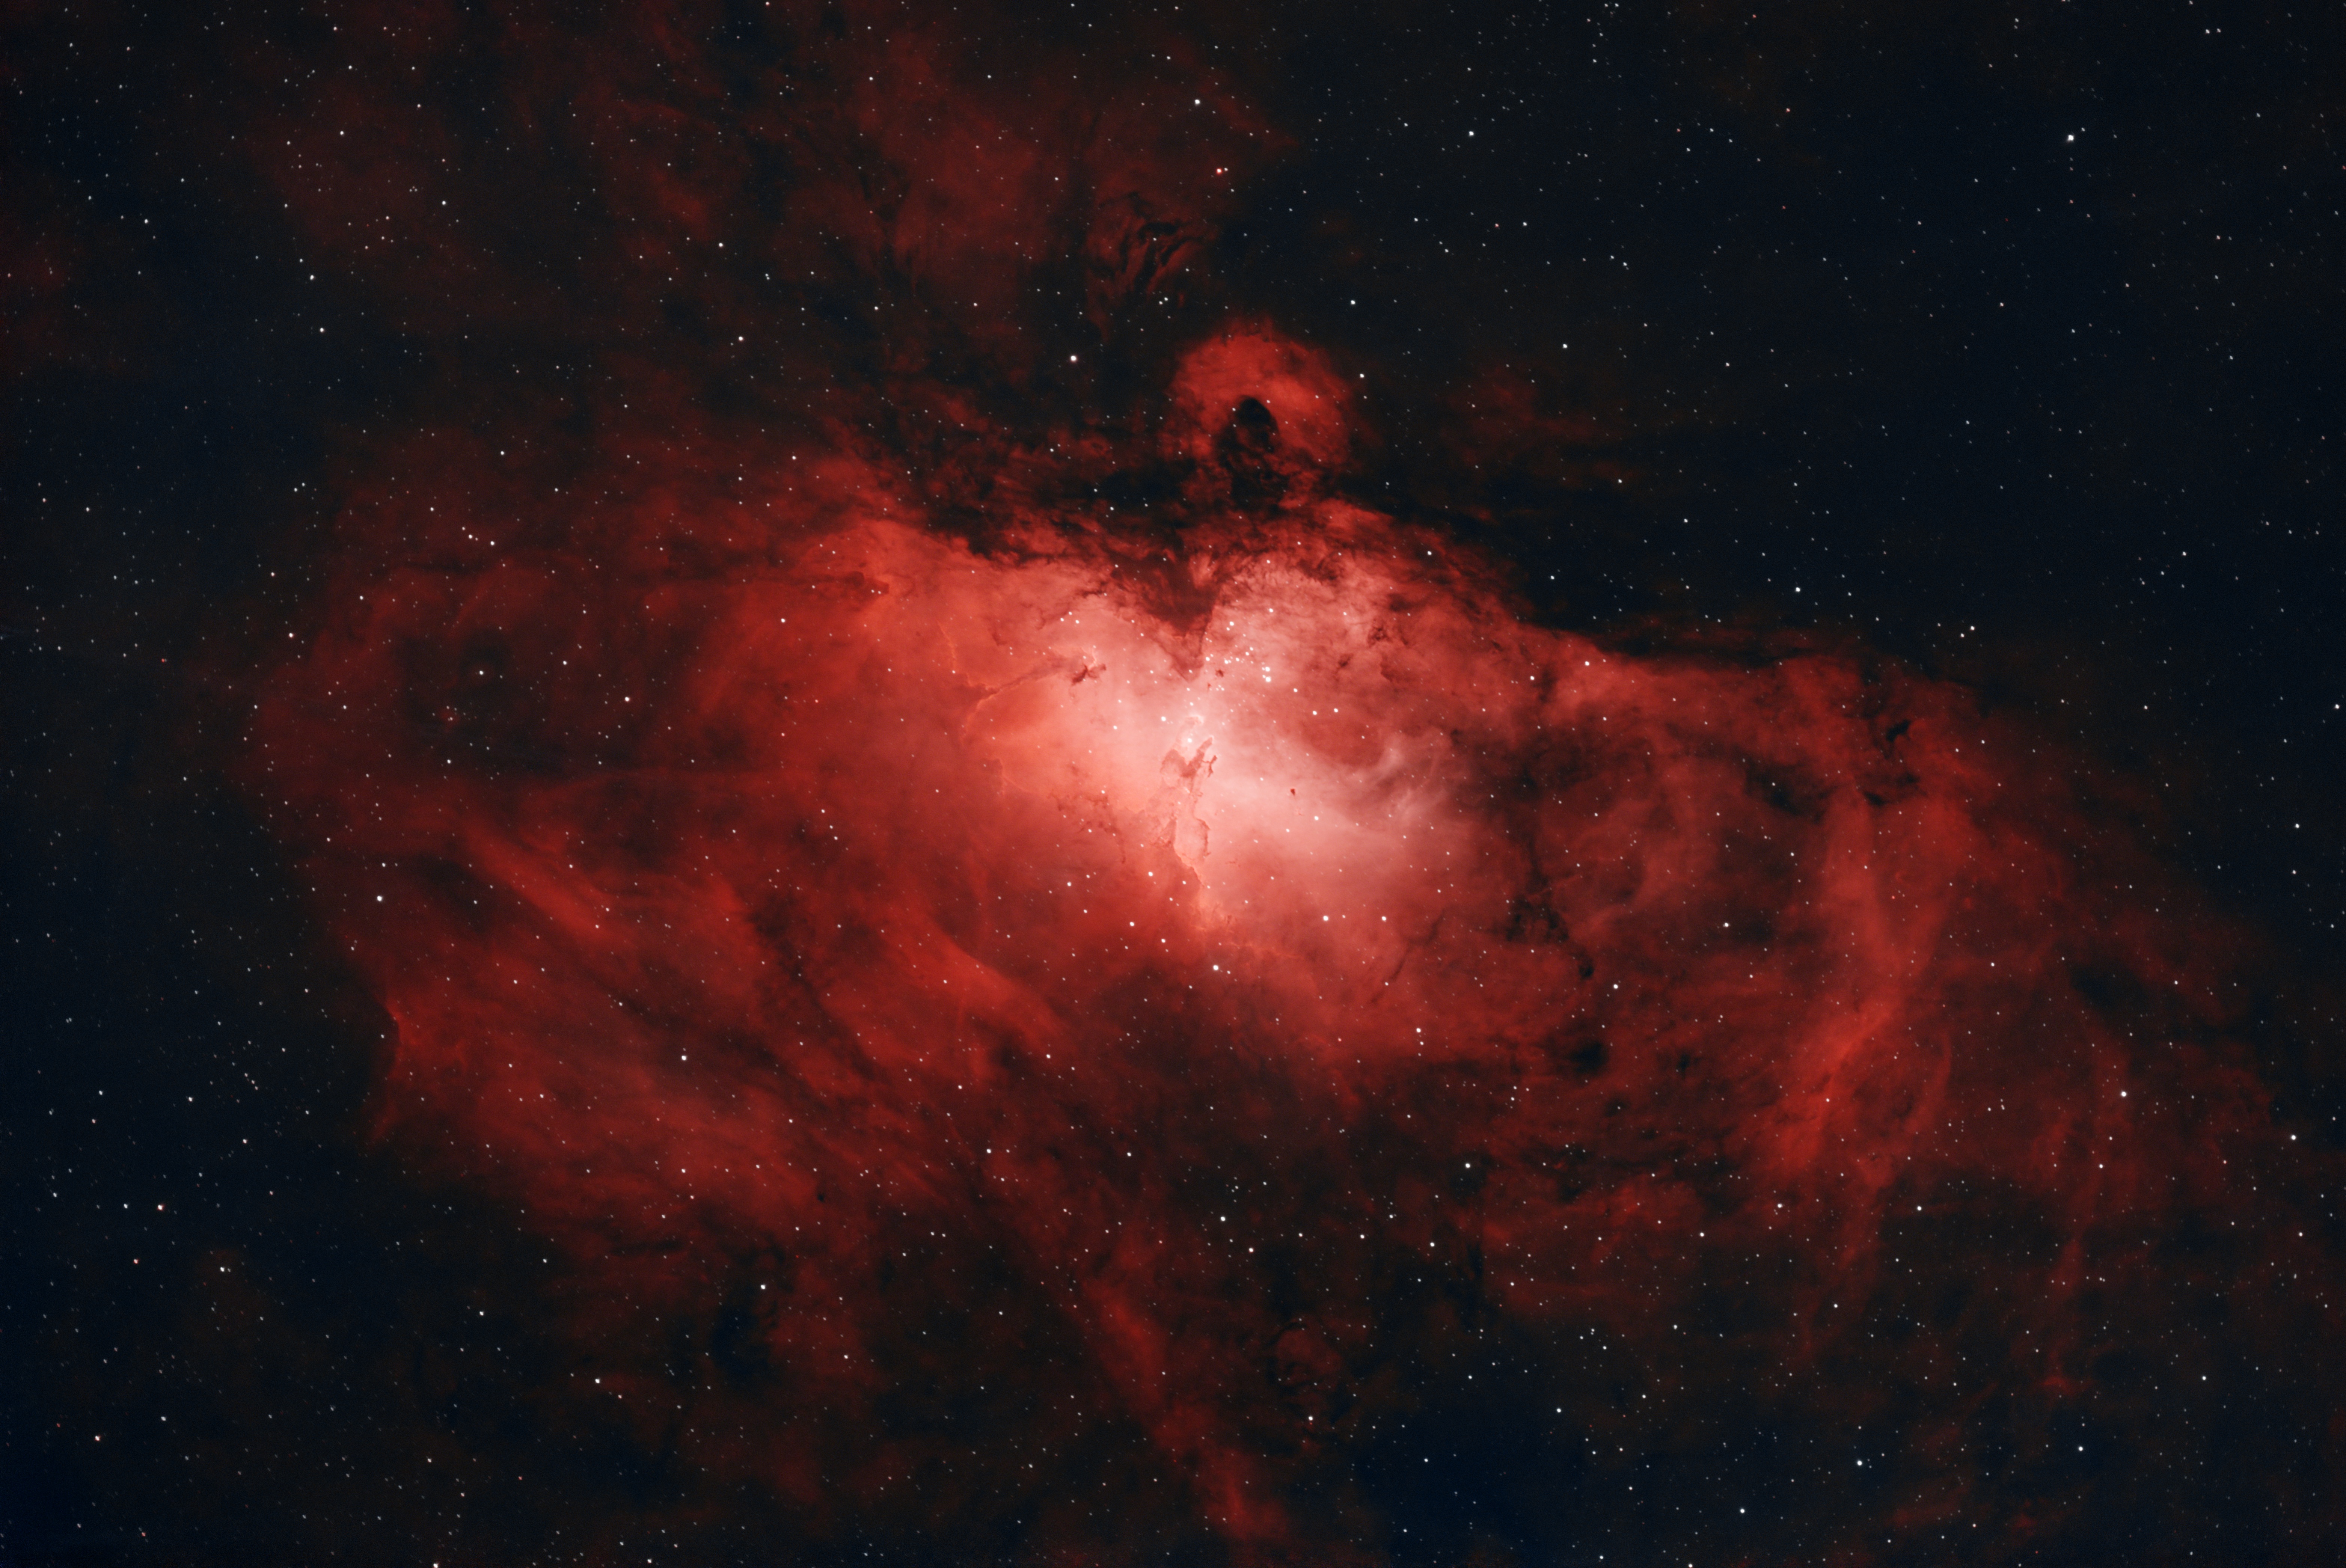
4h27m (89 x 3min) Dualband. Processed with GraXpert. Hubble-famous Pillars of Creation are visible dead center.
NGC2359 Thor’s Helmet
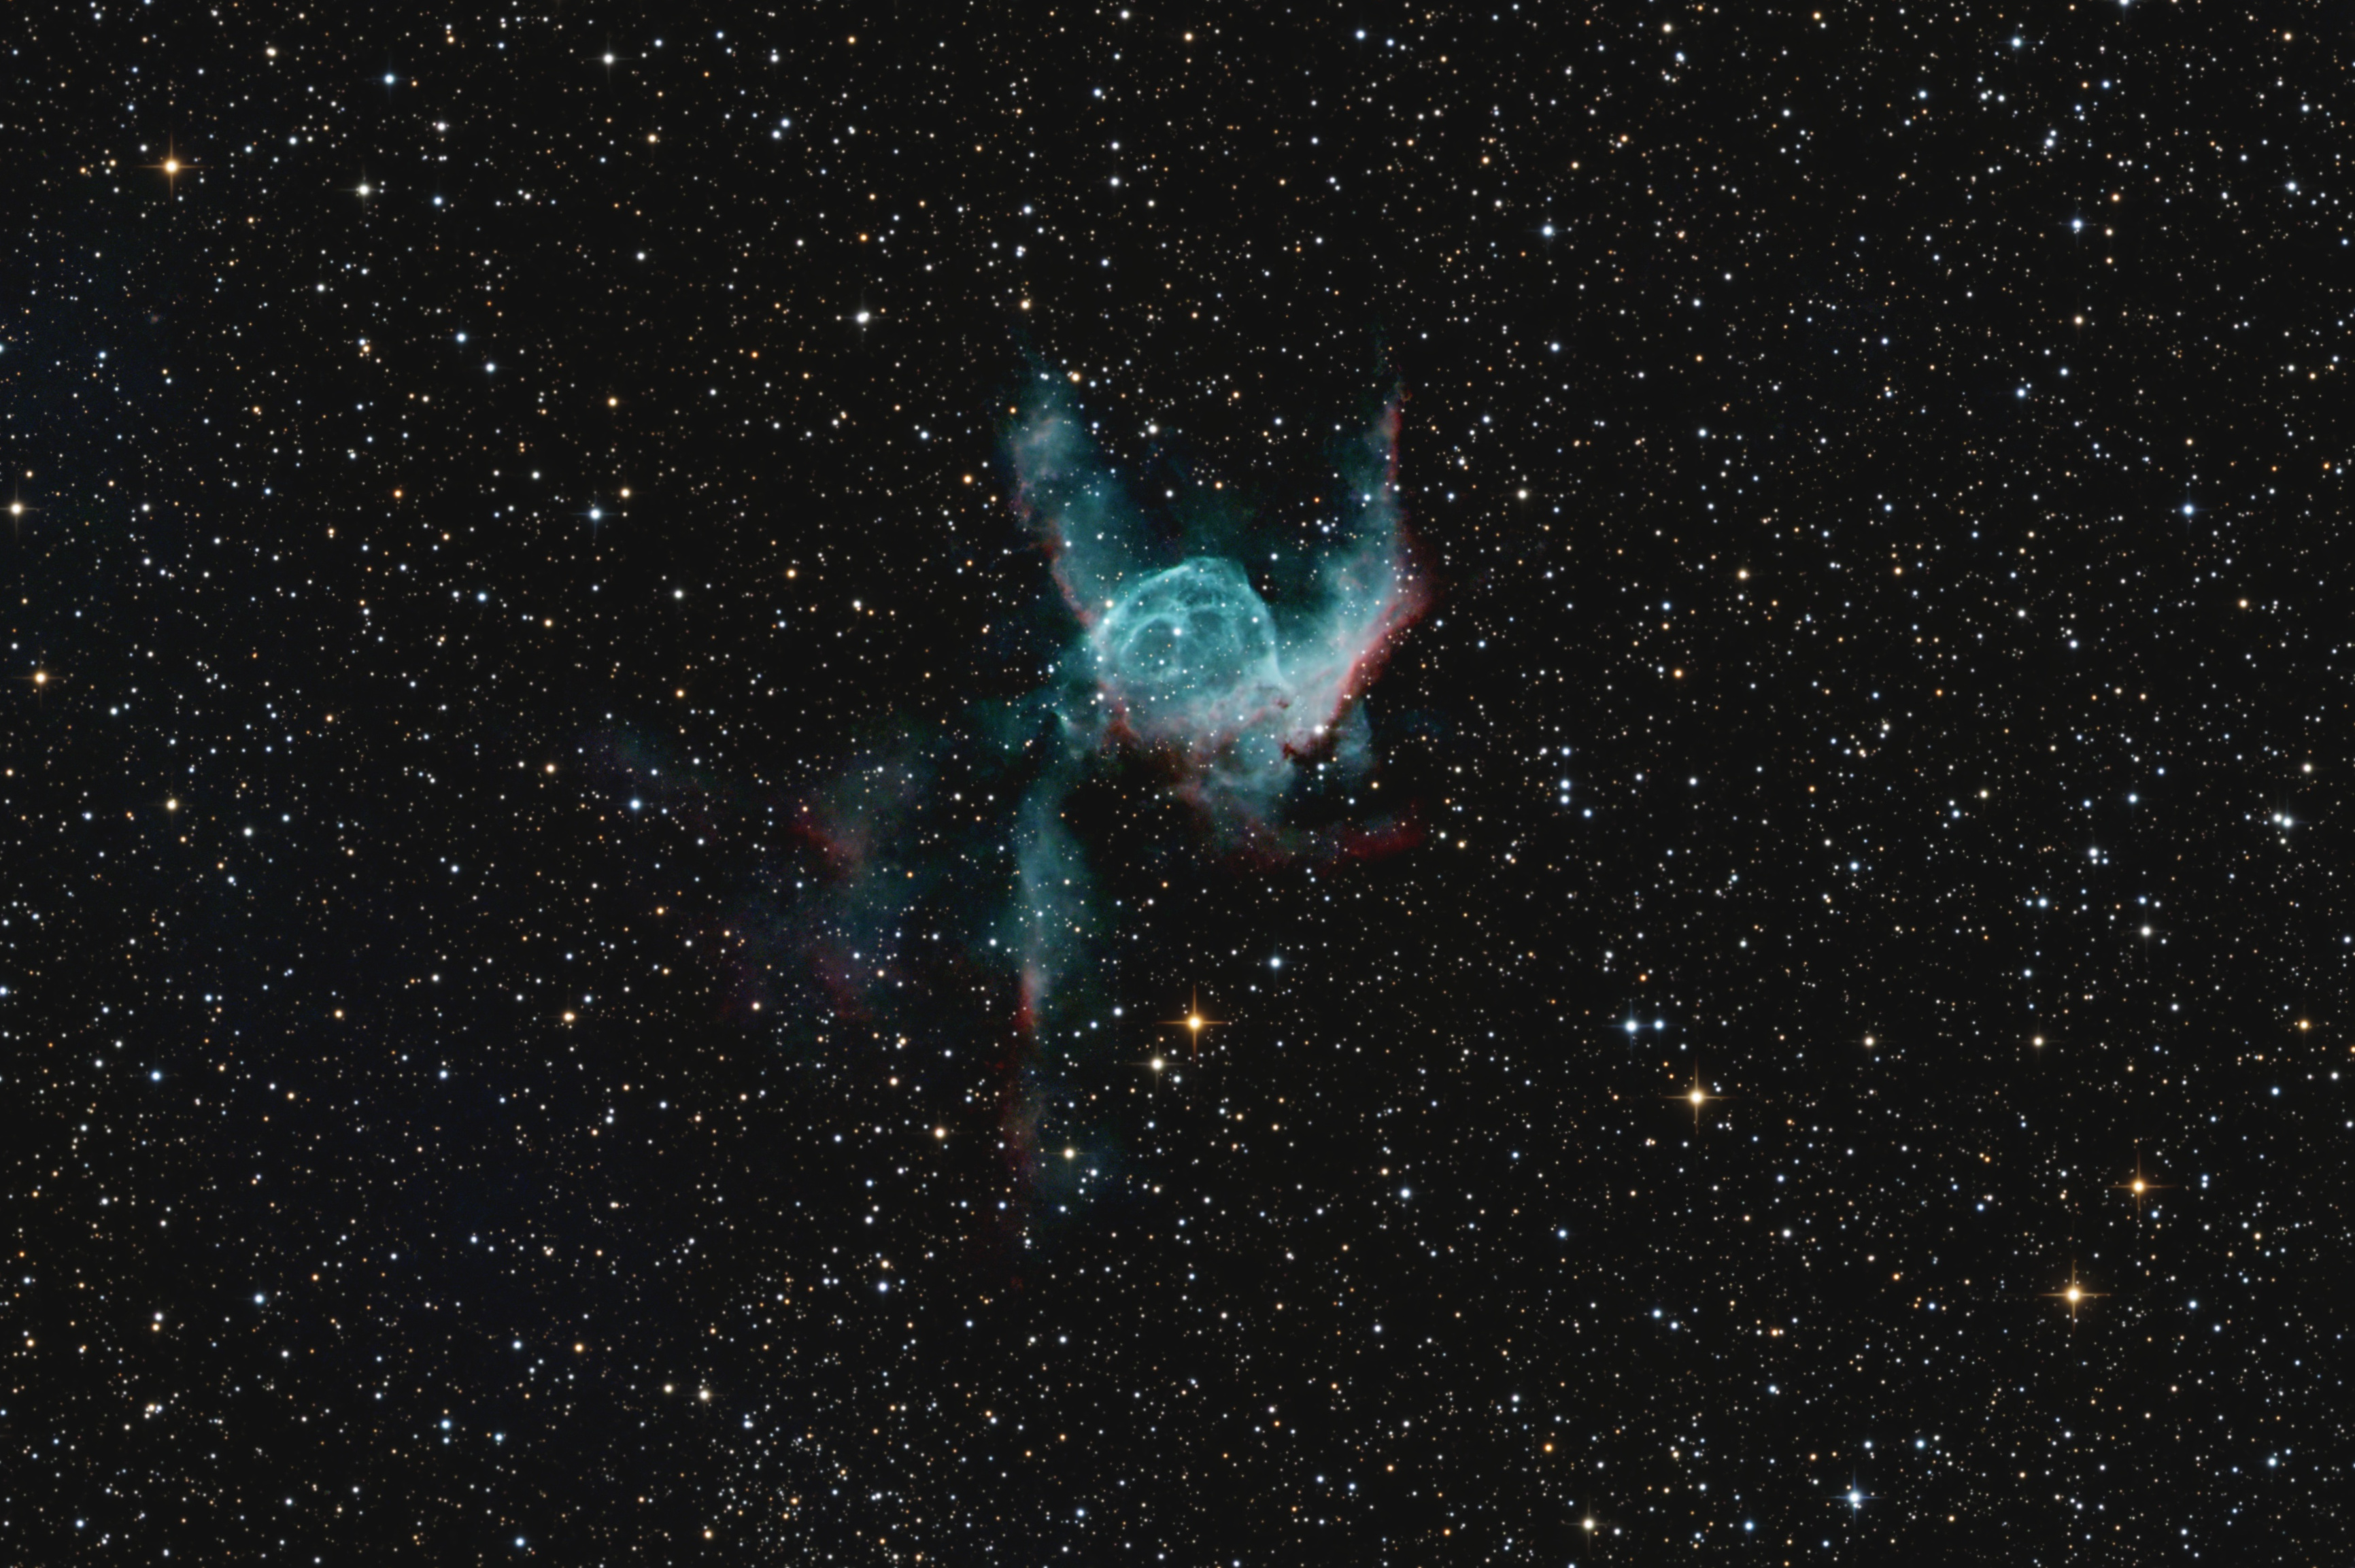
4hr (127 x 2min) Broadband. Processed with NoiseX and BlurX. Cropped. Notable for a large amount of Oiii (teal) and minimal Ha (red) powered by a central star.
C49 Rosette Nebula
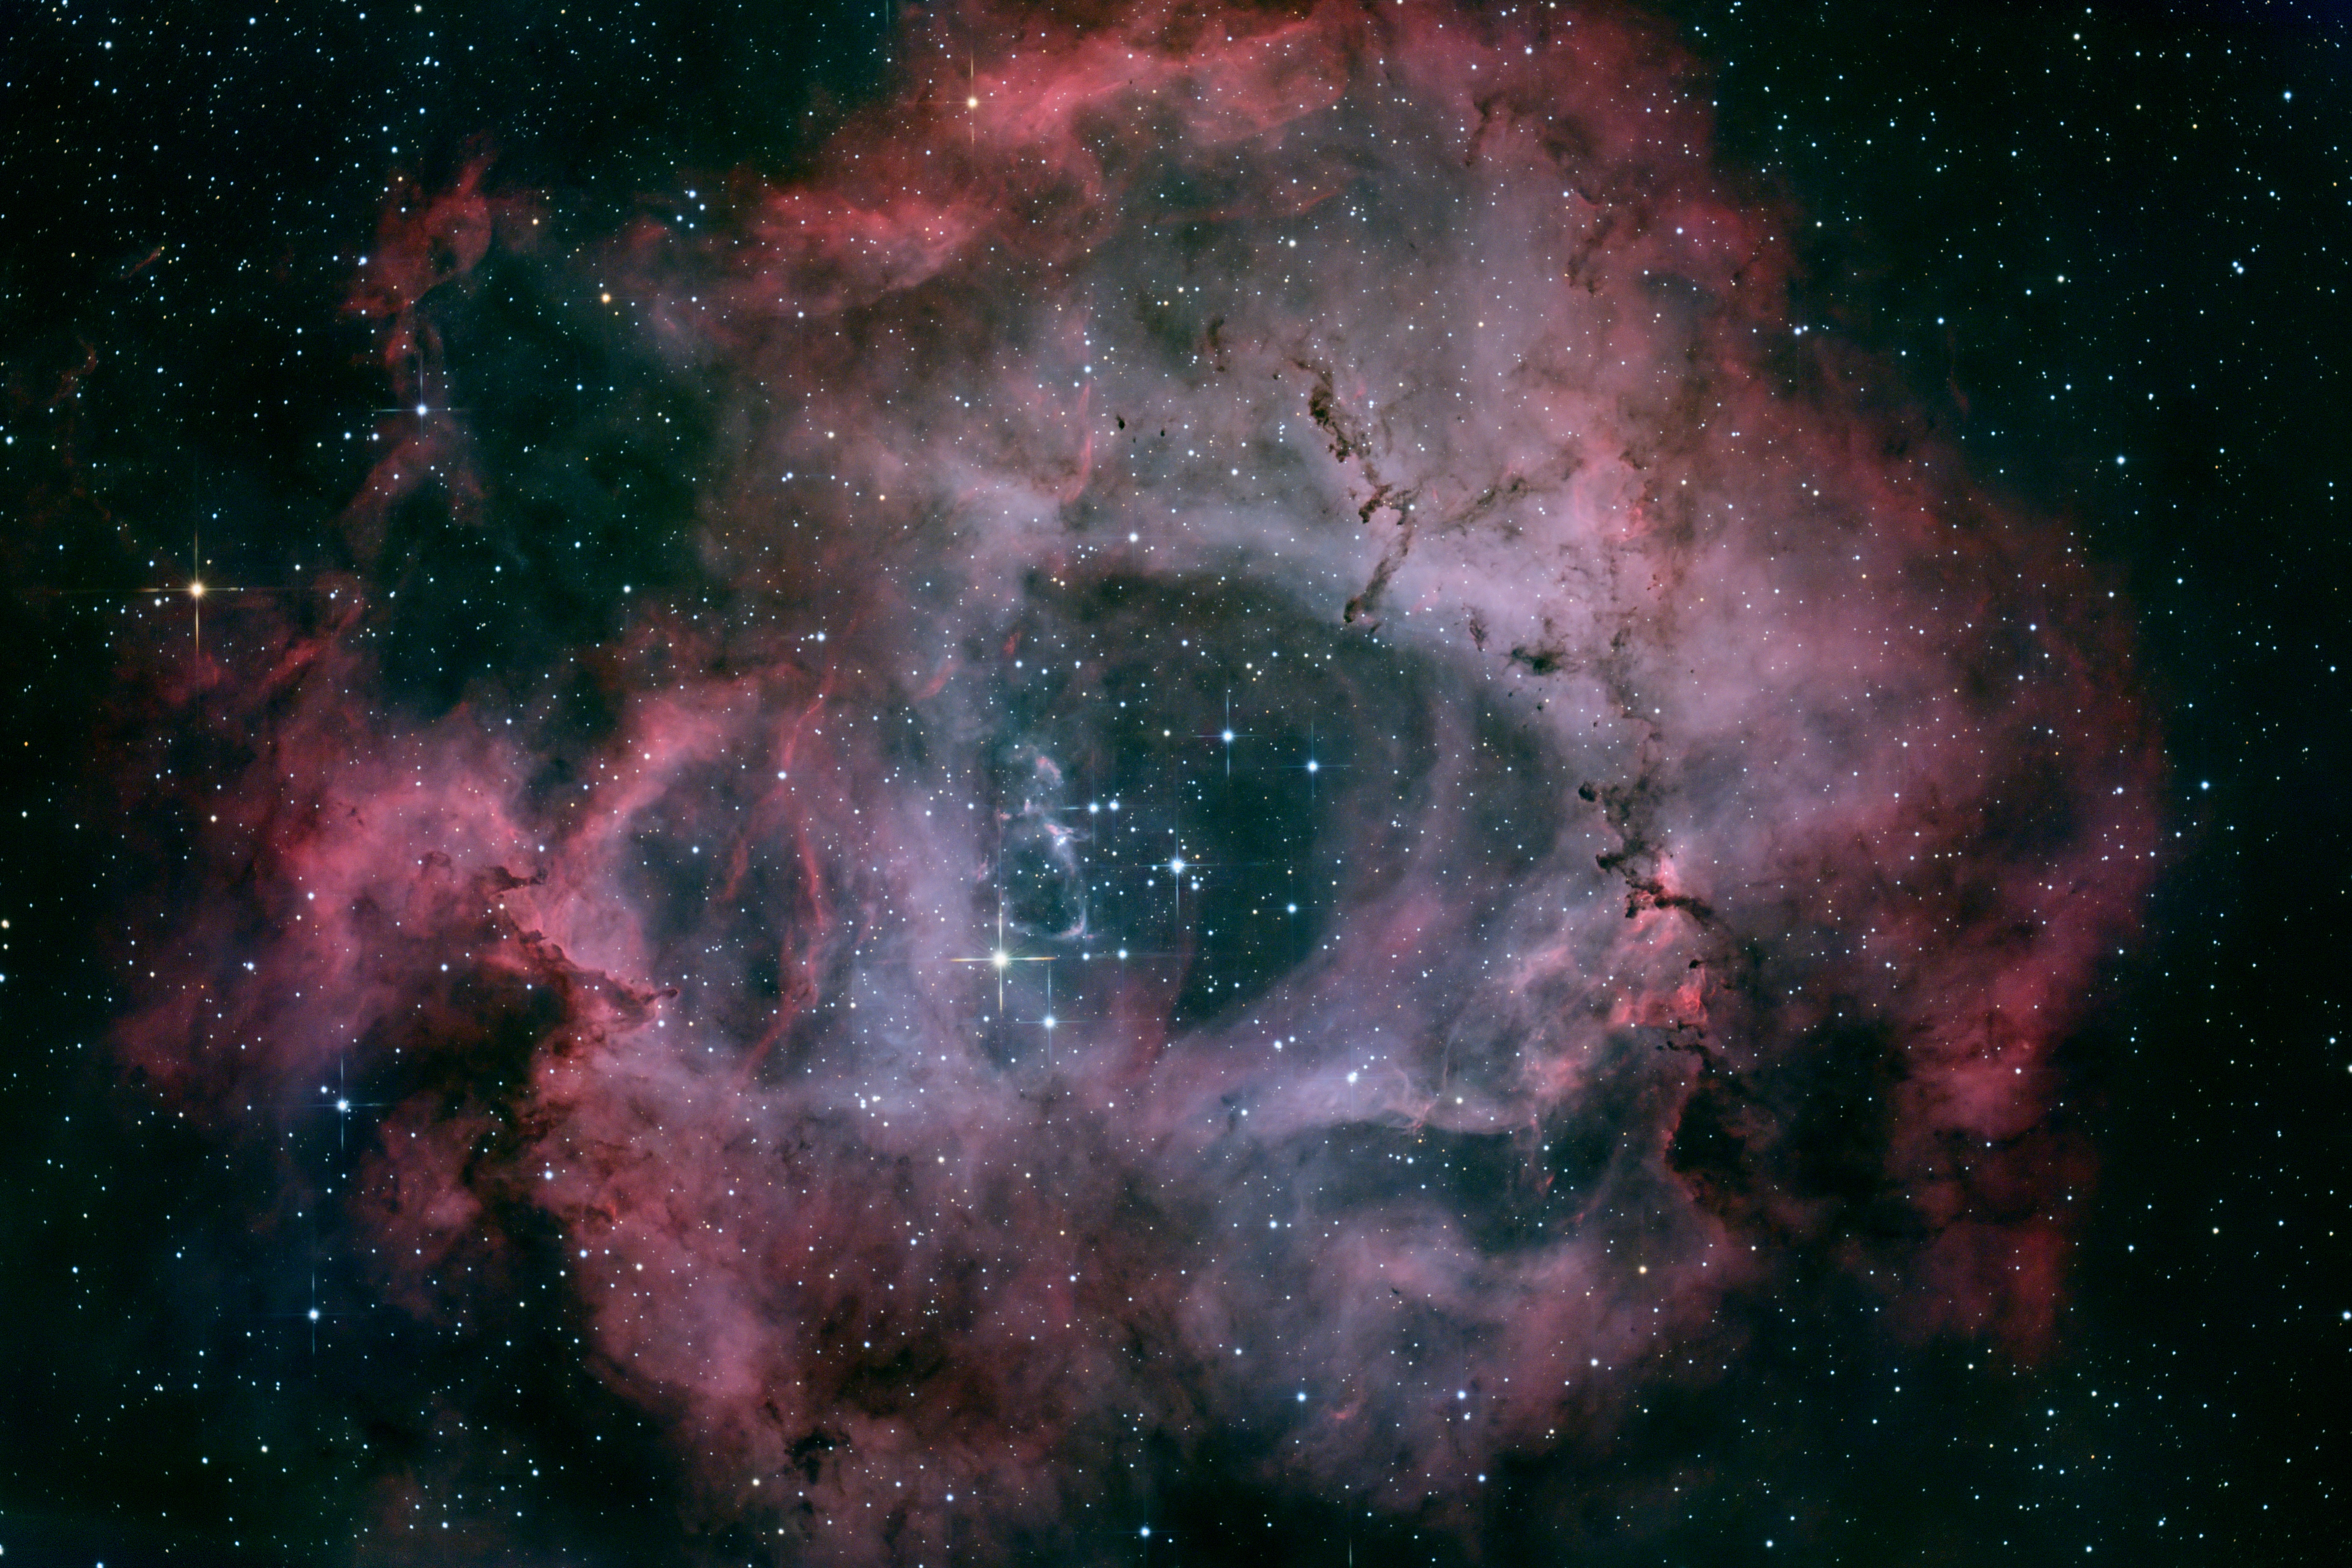
2h39m (53 x 3min) Broadband. Processed with GraXpert.
C11 Bubble Nebula
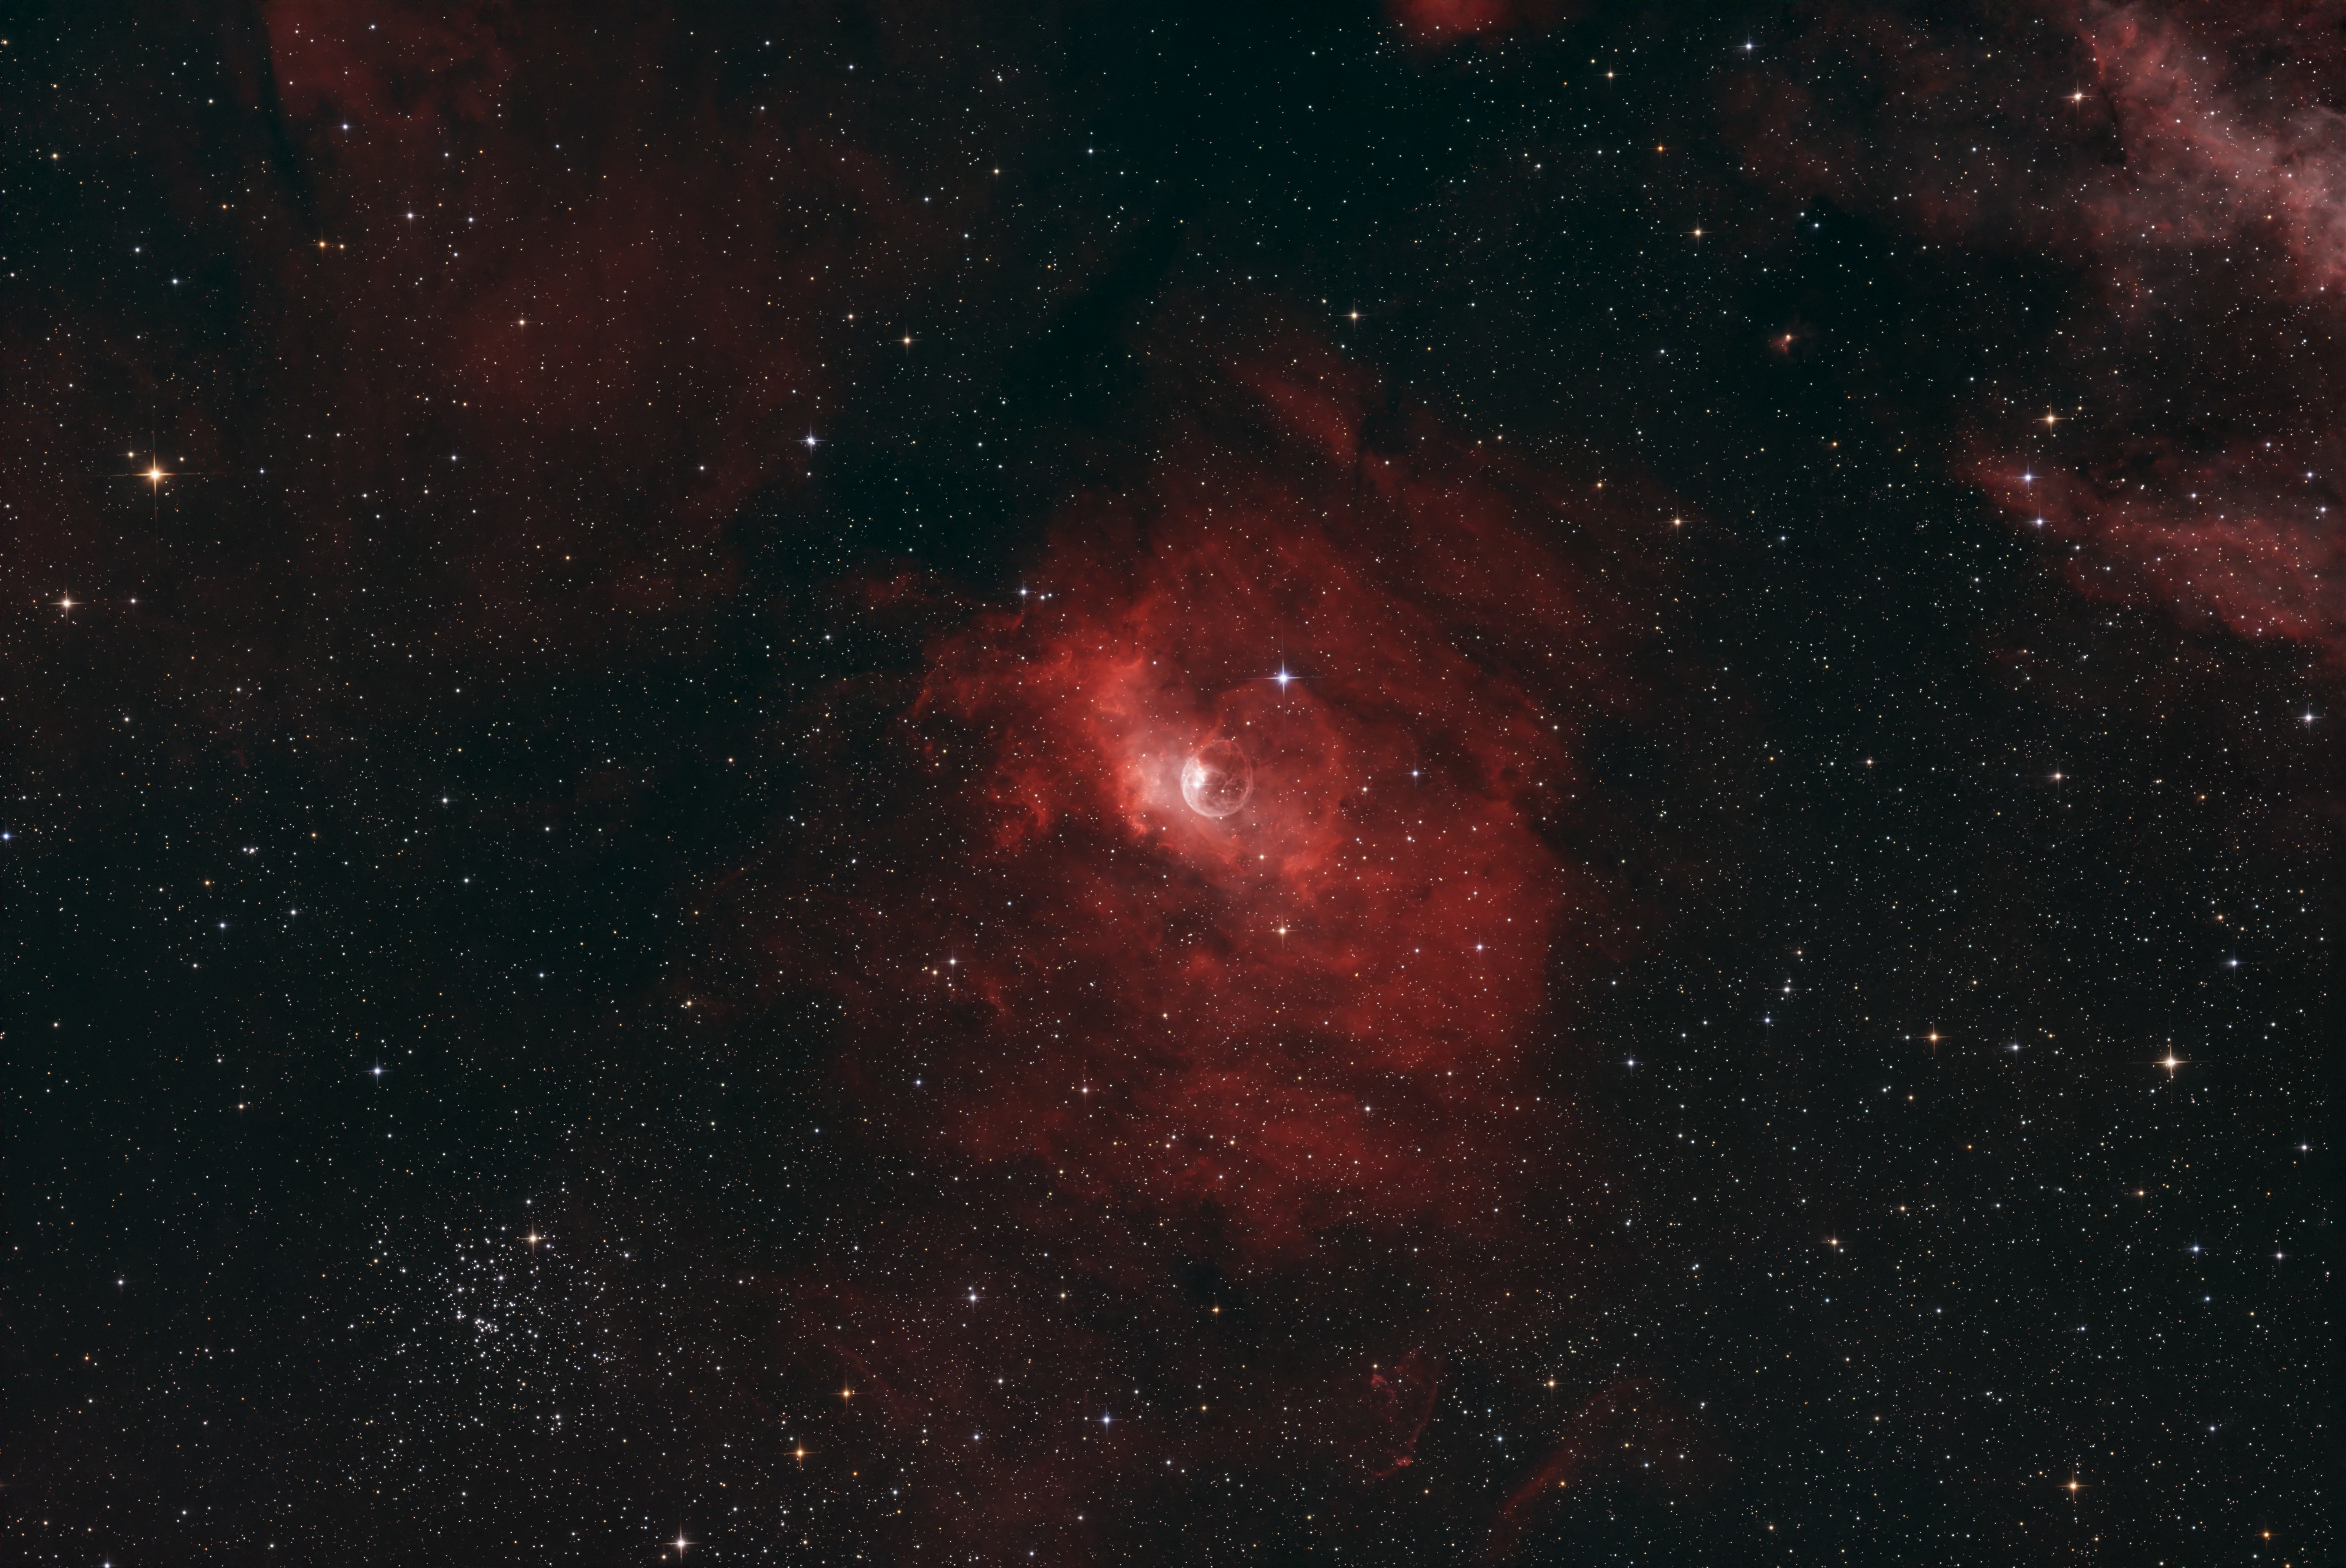
3h30m (70 x 3min) Dualband + 38min (19 x 2min) Broadband. Processed with NoiseX and BlurX. Here the starless dualband image was combined with the broadband stars to get a true color image of the stars with a Ha/Oiii nebula.
NGC2264 Cone Nebula Region
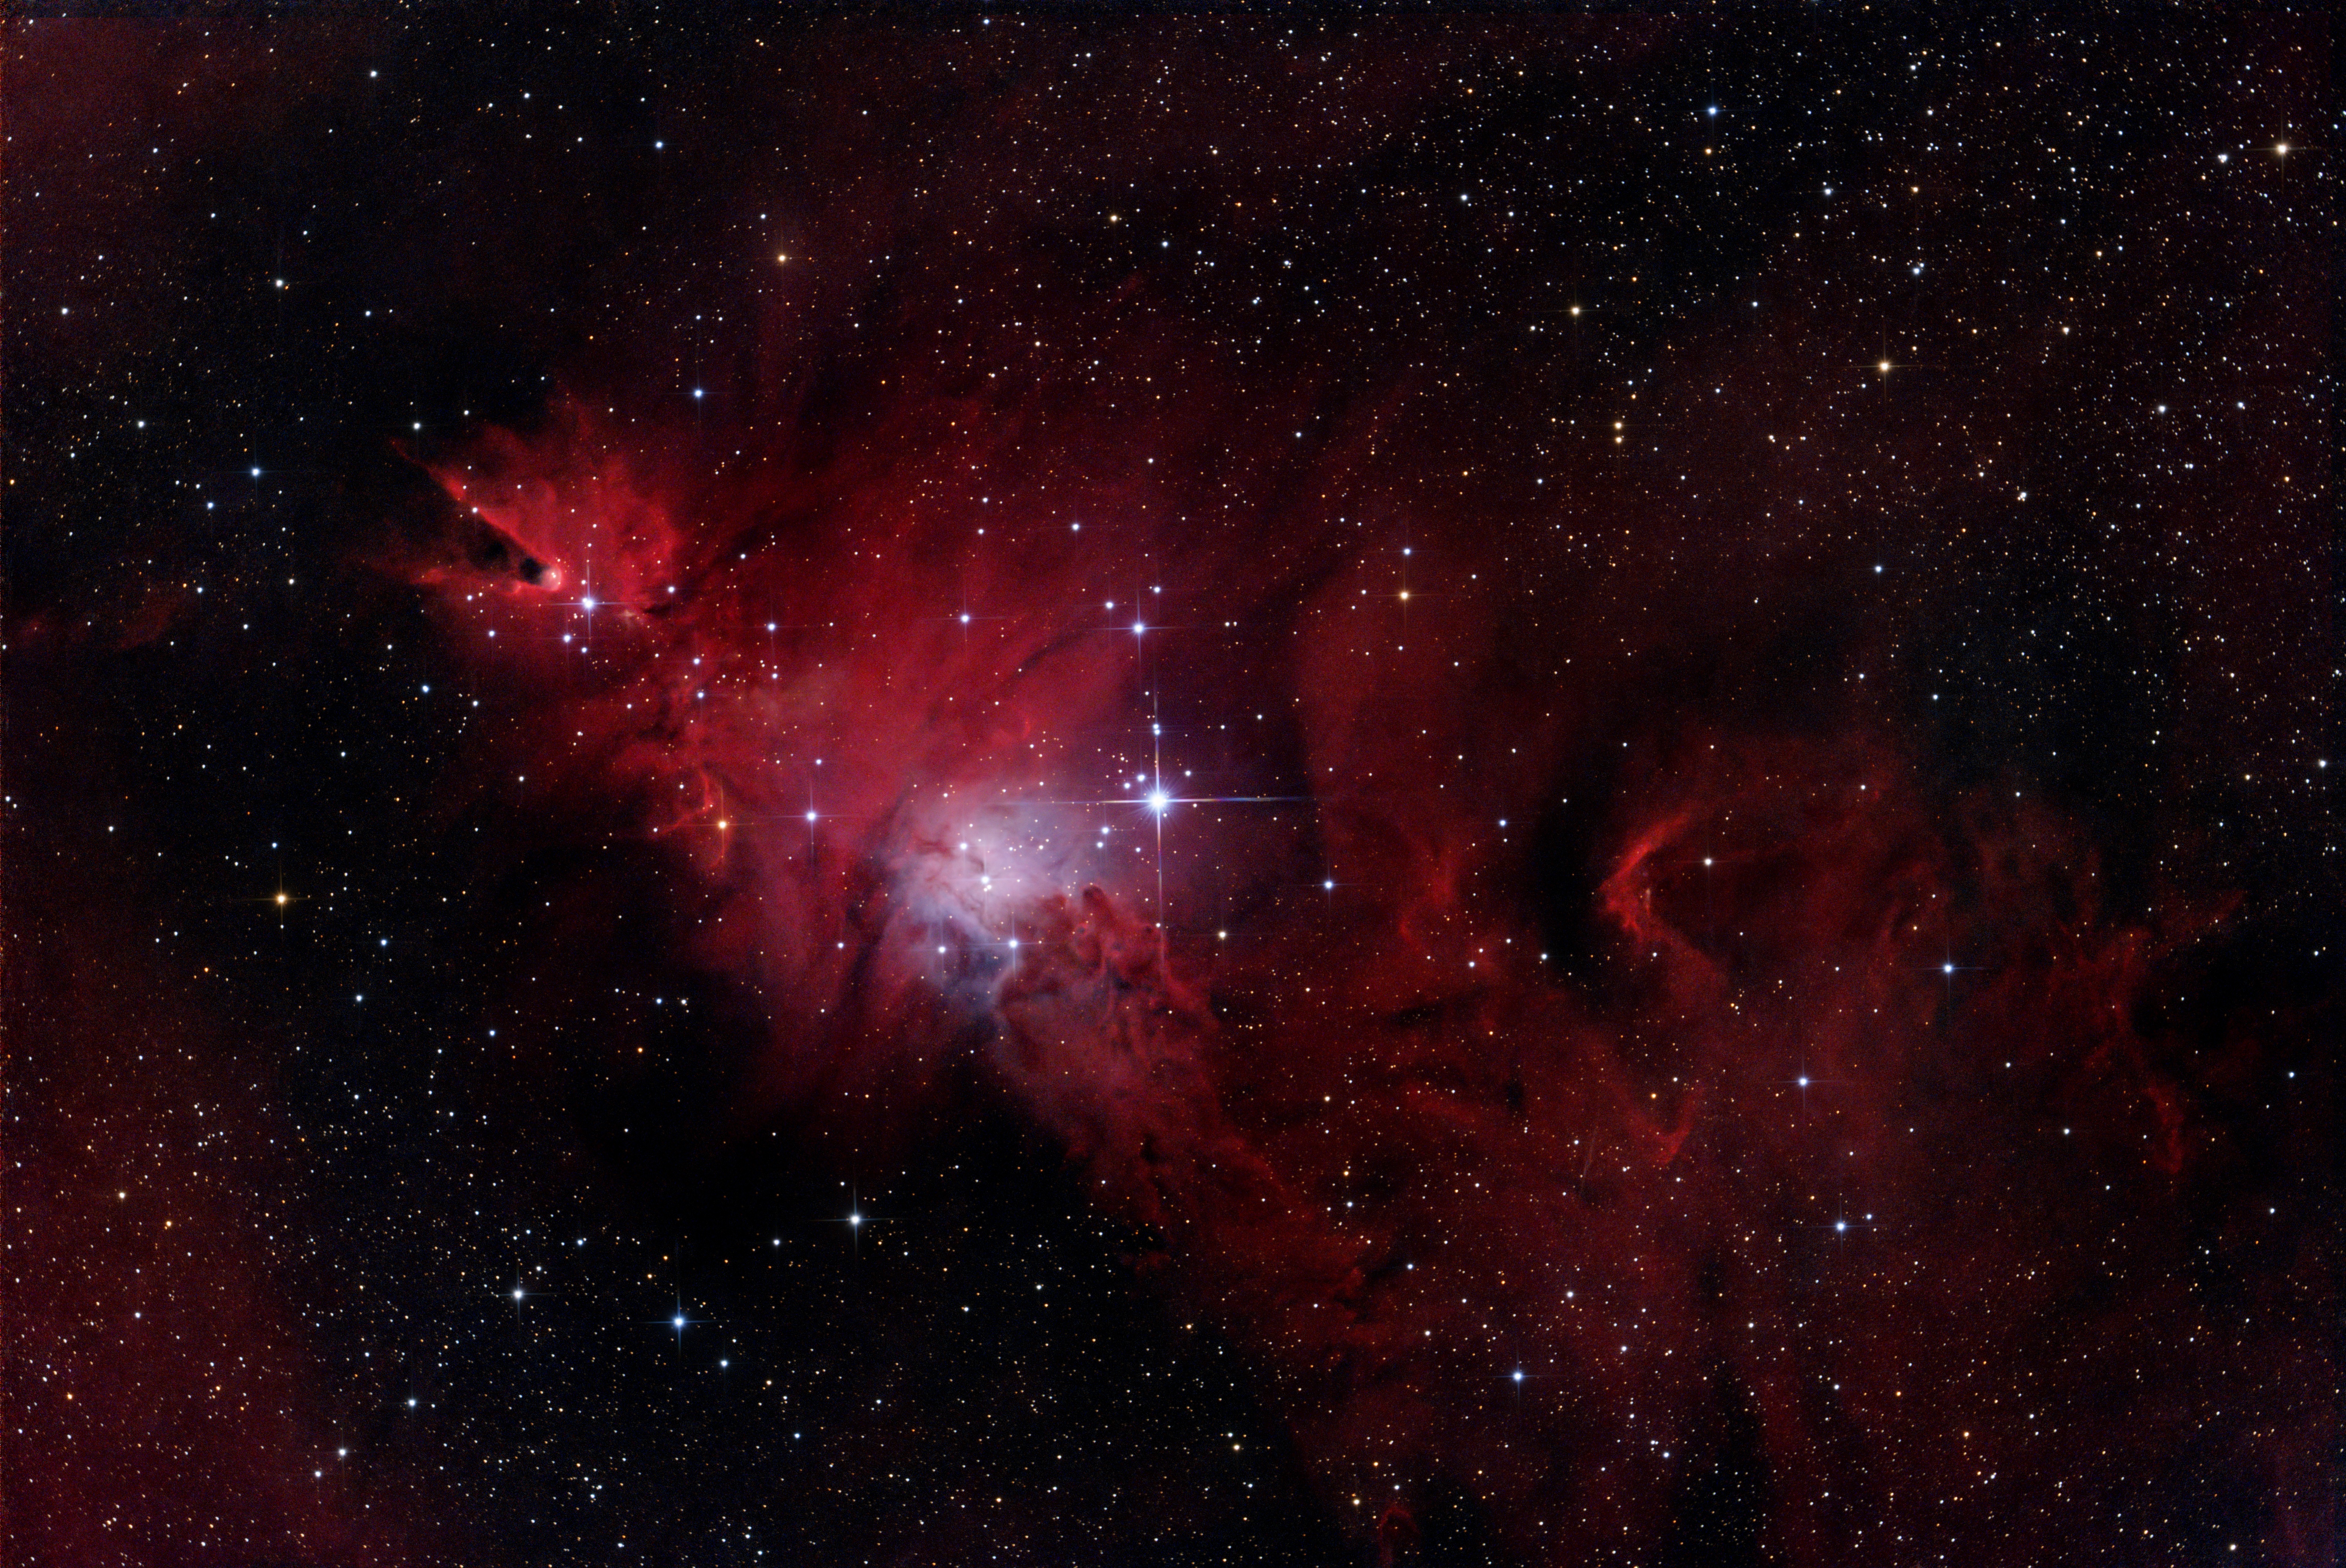
1h15m (15 x 5min) Dualband + 27min (9 x 3min) Broadband. Processed with GraXpert. This was processed more like the Horsehead nebula with continuum subtraction and recombination with broadband, but with very minimal exposure time. Potentially the lowest quality image on this post, but a really interesting target. You can see the uncorrected coma before I fixed some backspacing issues in this image, but BlurX would have removed it.
IC405 Wizard Nebula
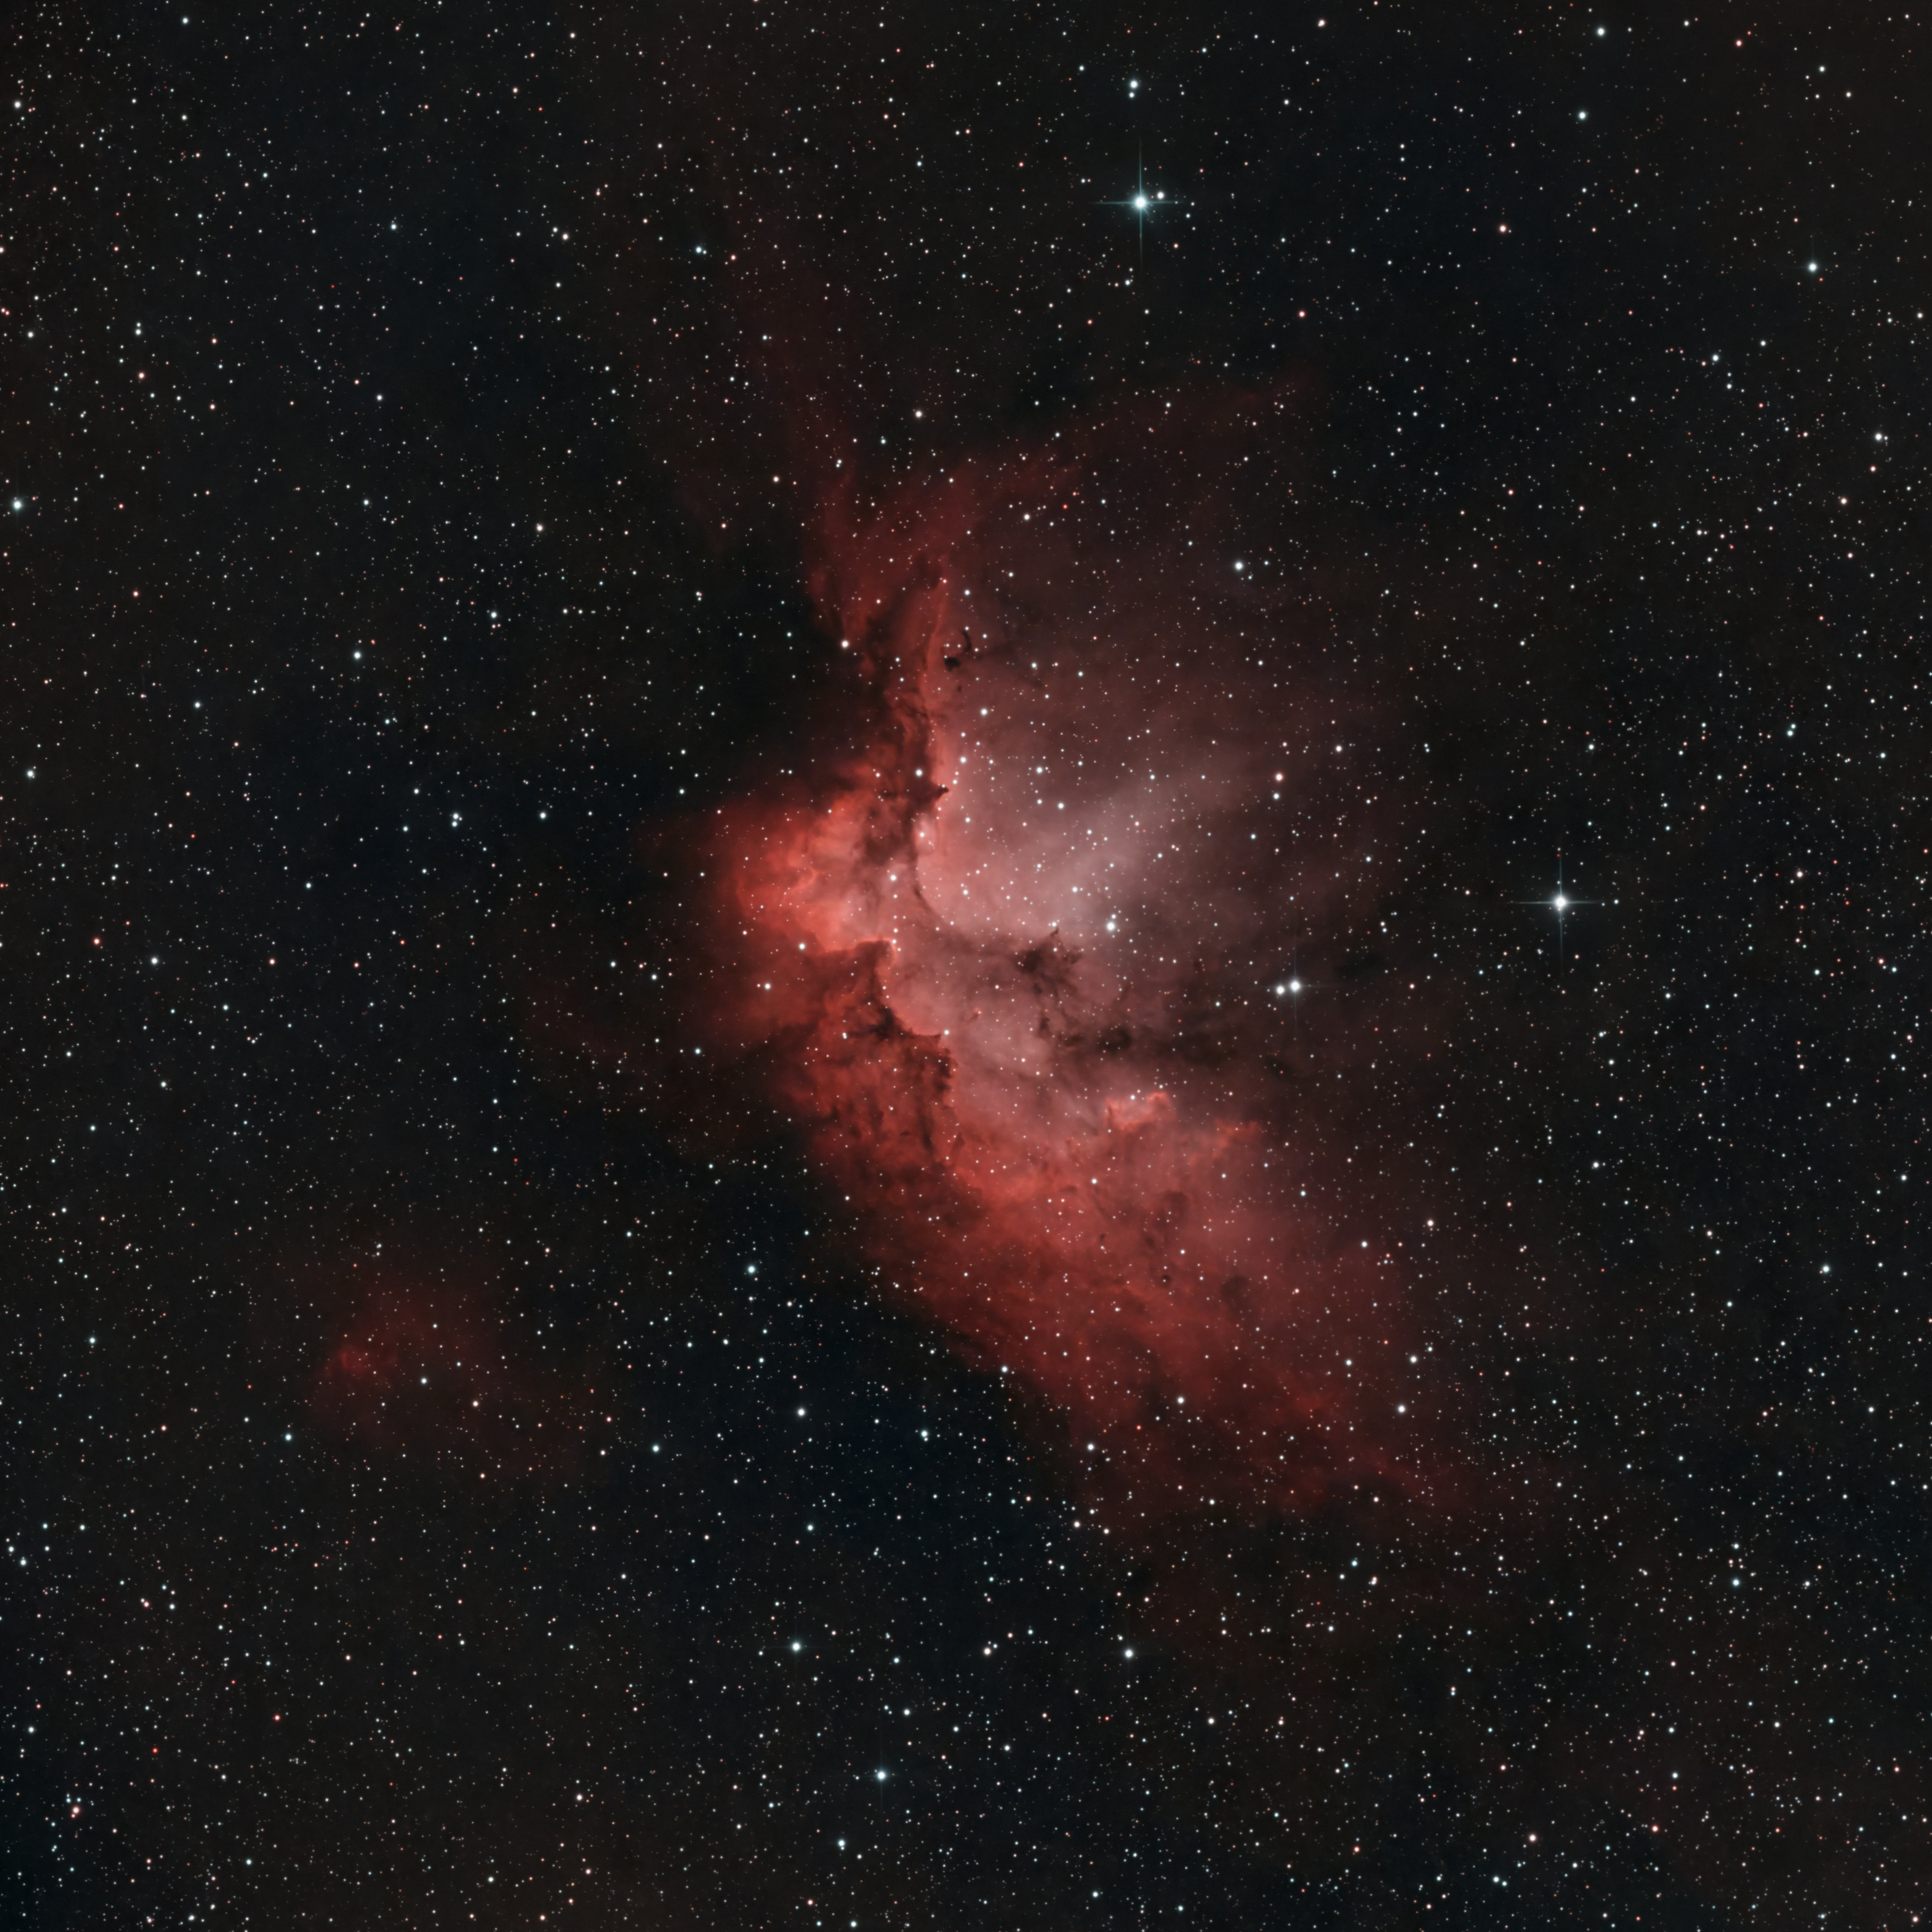
1h55m (23 x 5min) Dualband. Processed with DeepSNR and BlurX. Compare this and the Eagle Nebula, which are both dualband-only, but this one has BlurX so the stars betray no optical issues whatsoever.
NGC6888 Crescent Nebula
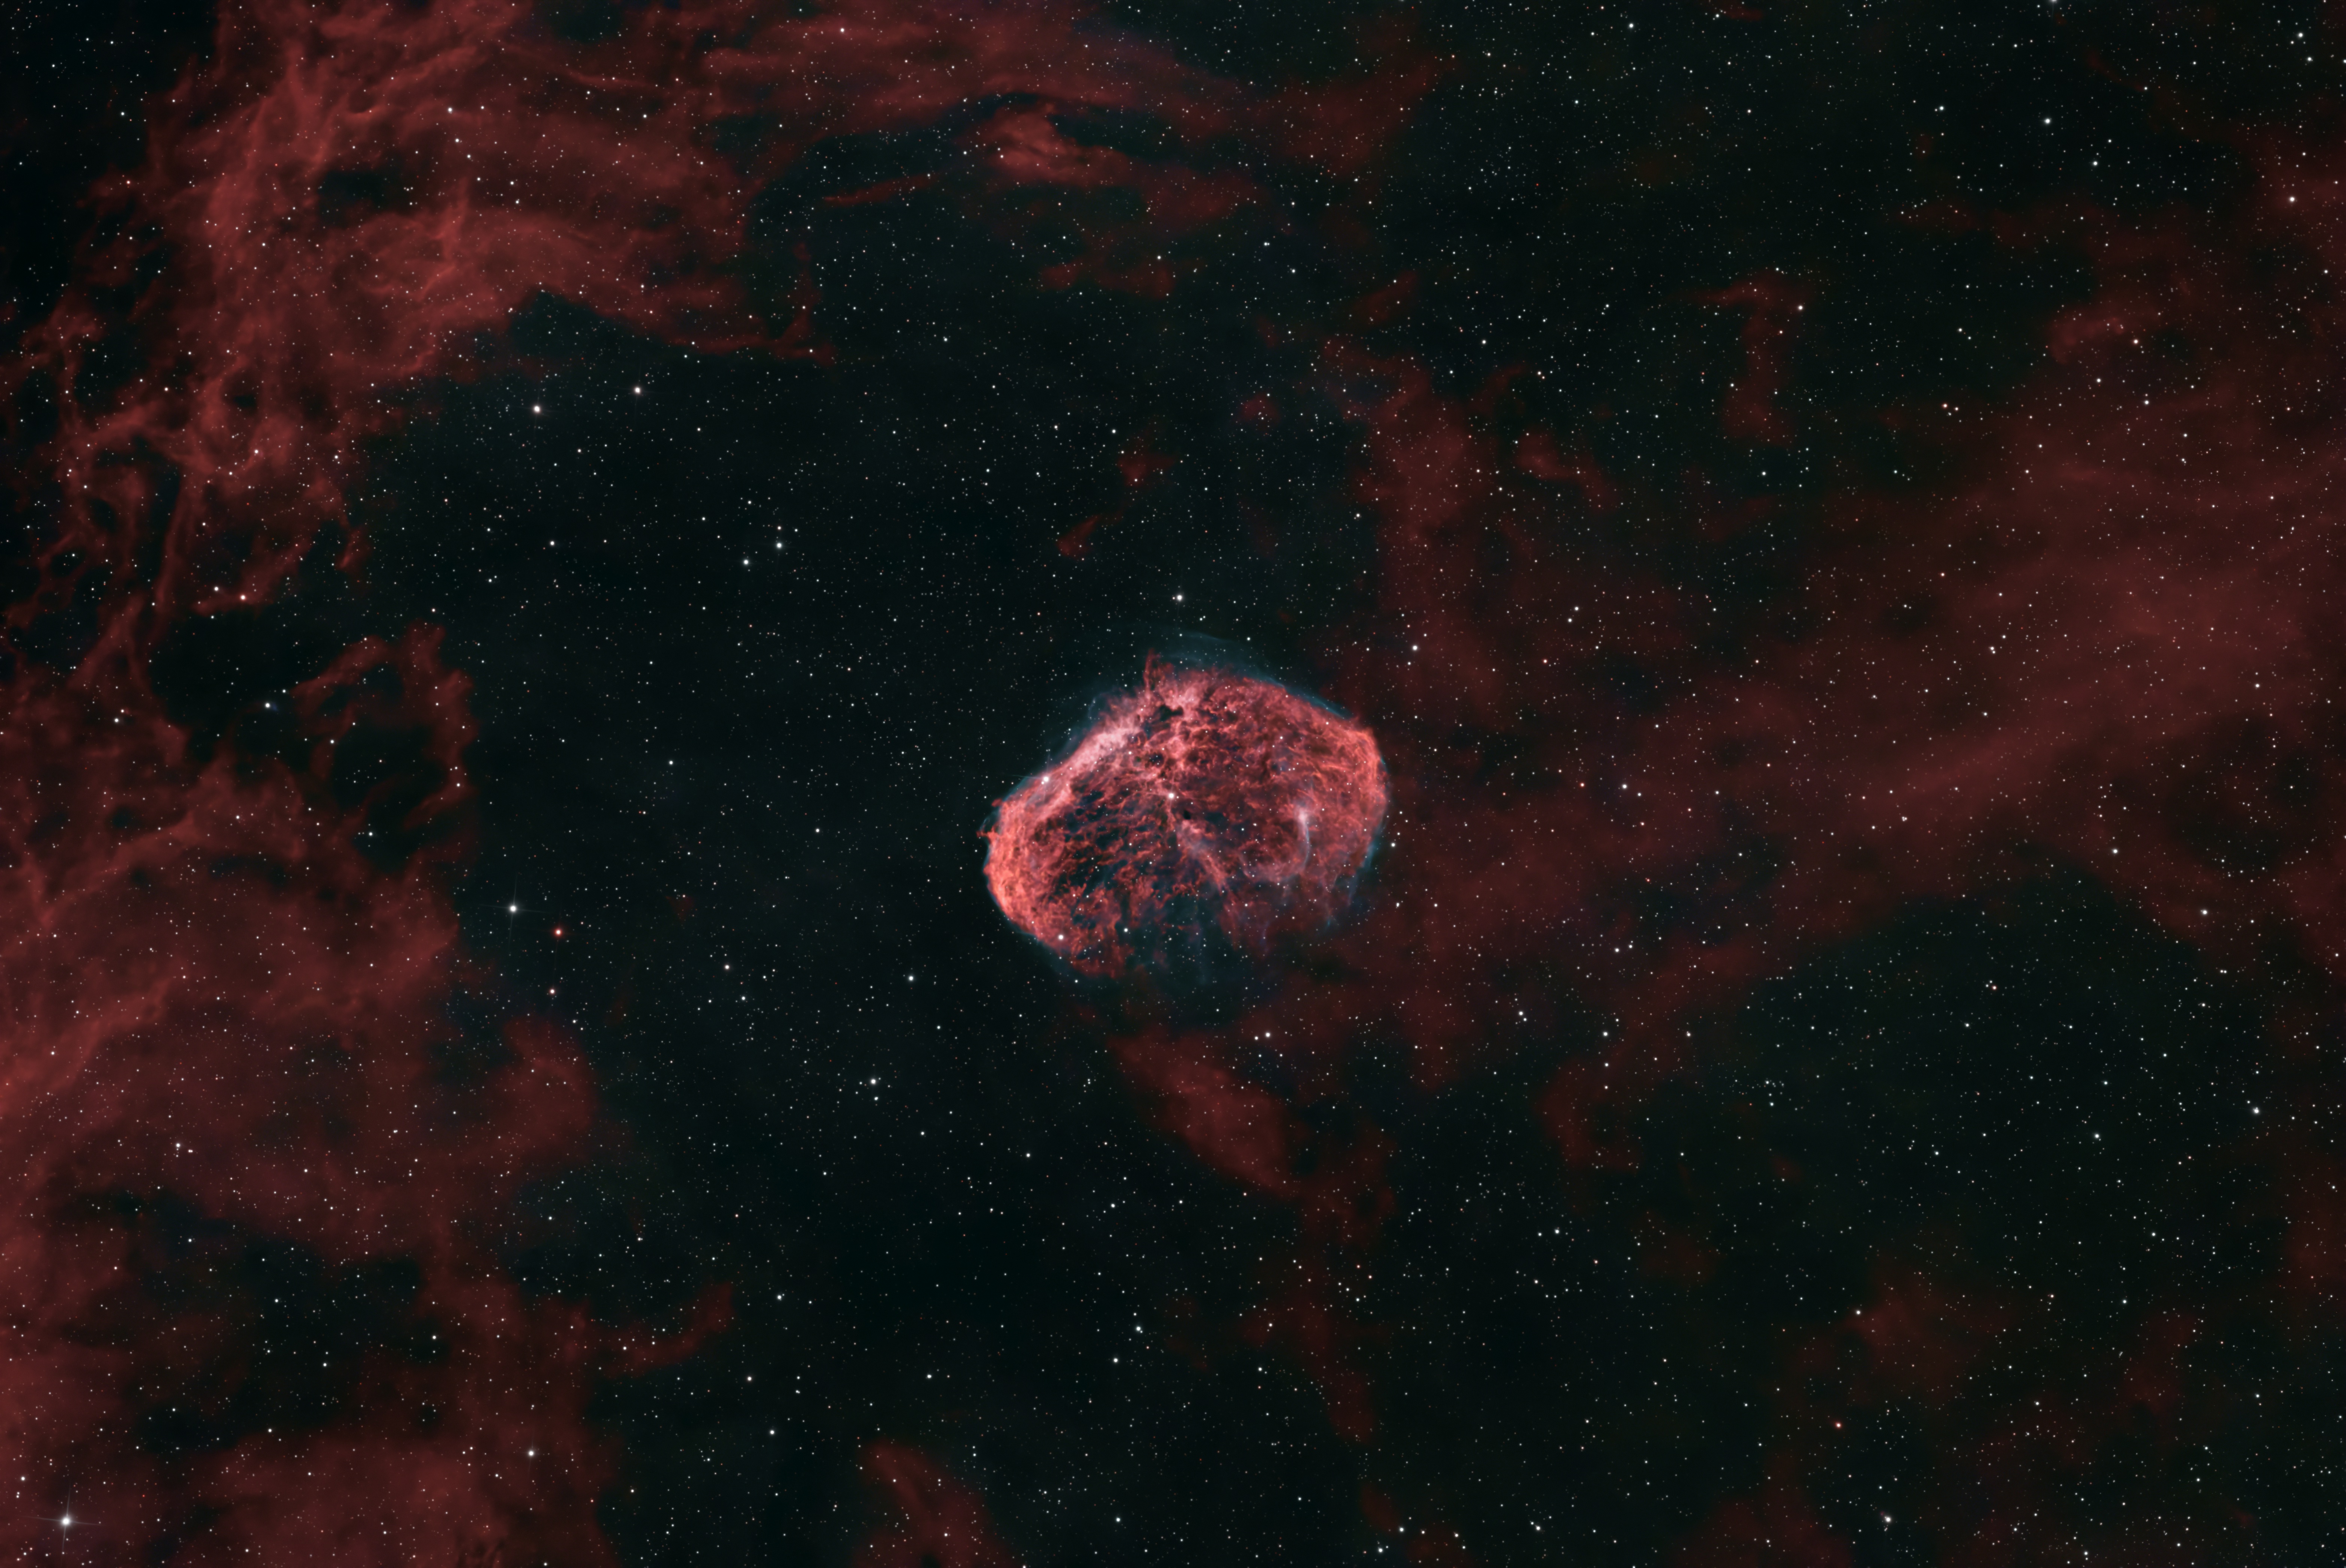
3h20m (40 x 5min) Dualband.Processed with DeepSNR and BlurX. Pattern recognition might classify this one as a supernova remnant, but in fact it’s just a very angry star in there whipping up the local dust.
Sadr Region ft. Crescent Nebula (widefield)

Similar to the Cygnus Loop image earlier, this one came from my yet-undisclosed widefield rig and has the Crescent Nebula visible just right and below center. Processed with NoiseX and BlurX, which did a heroic job cleaning up the bad stars.
NGC7000 North American Nebula (widefield)
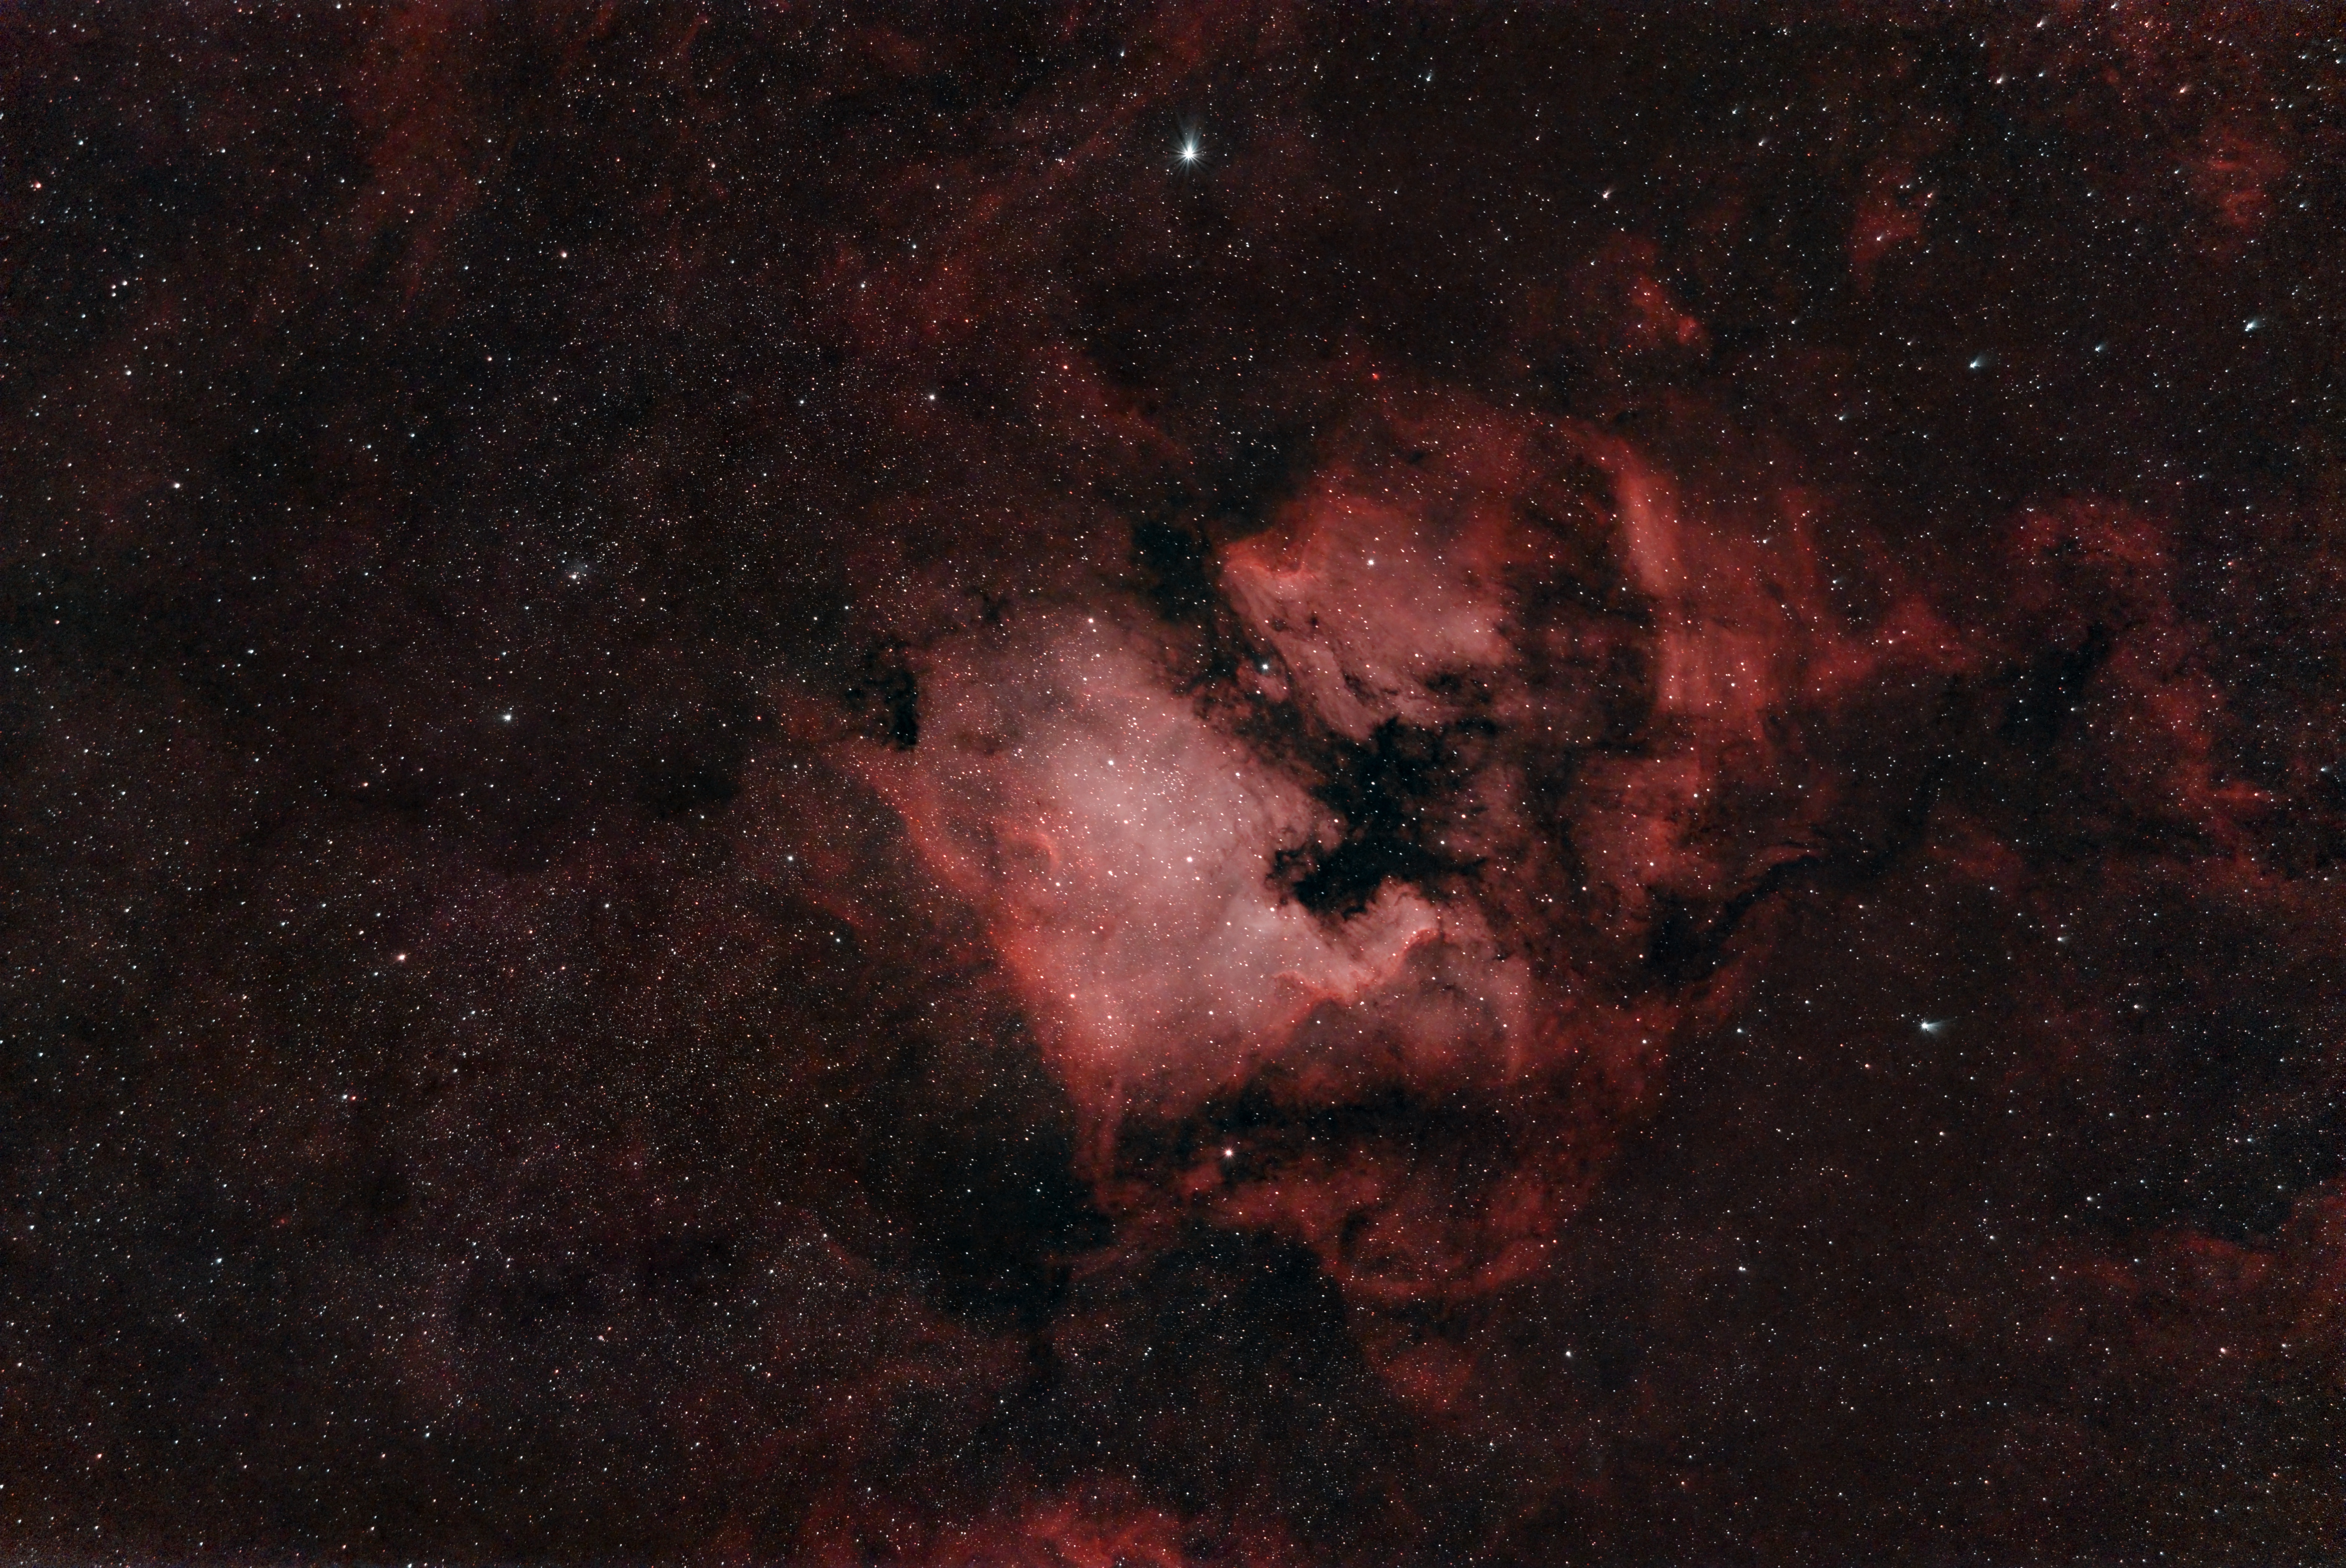
One last image from the widefield rig, this time of an object simply too big to capture at 800mm focal length. Processed with GraXpert. The lack of BlurX here shows just how bad the coma was due to some poor backspacing when testing the 135mm F/2 lens – probably not persistent once I stabilize the rig.
Galaxies
Nebula are great, but all of them reasonably accessible to amateur gear are within our own Milky Way galaxy and, even within that subset of the universe, not too far from us relatively, at no more than 10k light years distant in a galaxy hundreds of thousands of light years across. This is largely due to the galaxy being full of stars and dust, blocking the view of more distant things, i.e. we can’t see behind the Orion Molecular Cloud at all. If one looks through the breaks in the dust outside of our galaxy, many more galaxies are visible and easy to photograph.
Other galaxies range from “nearby” at 2.5 million light years to “intermediate” in the 20-50 million light year range, with even more distant galaxies in the >100 million light year range achievable with amateur equipment.
M31 Andromeda Galaxy
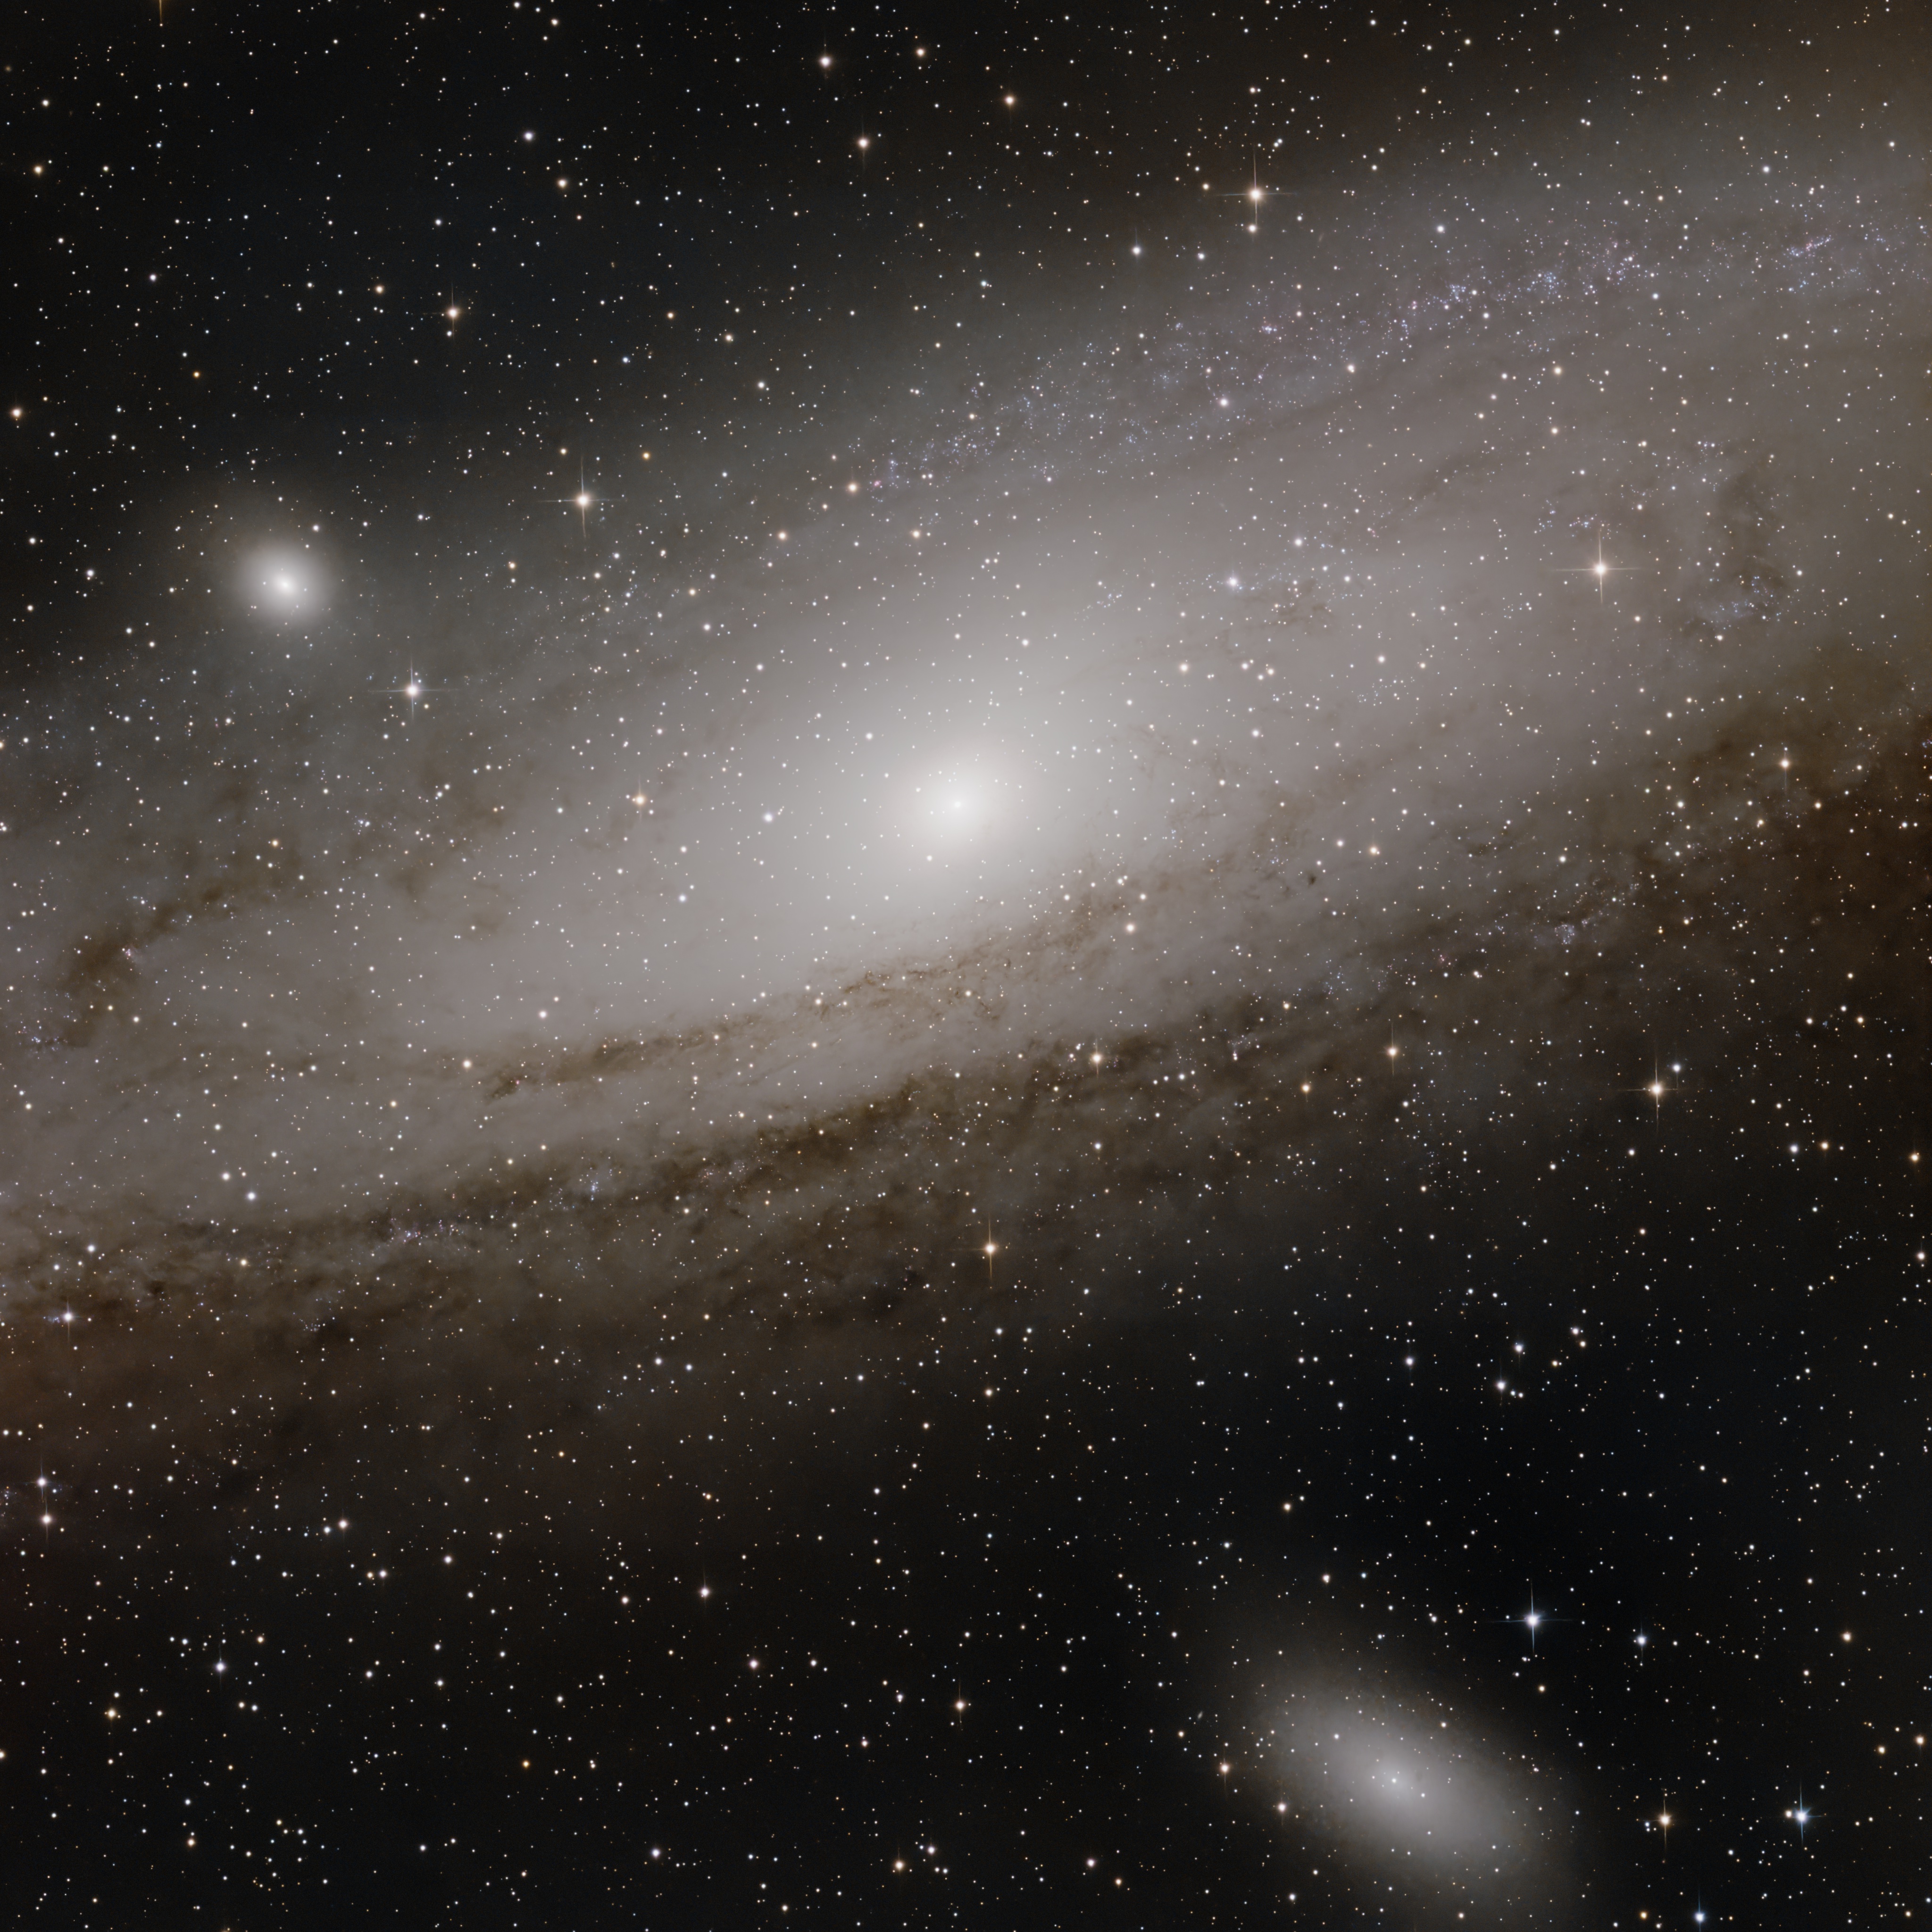
1h27m (29 x 3min) Broadband. Clearly this needs more than one frame, but it was only ever intended to be a test shot. Processed with DeepSNR and BlurX. Rotated and Cropped.
M33 Triangulum Galaxy
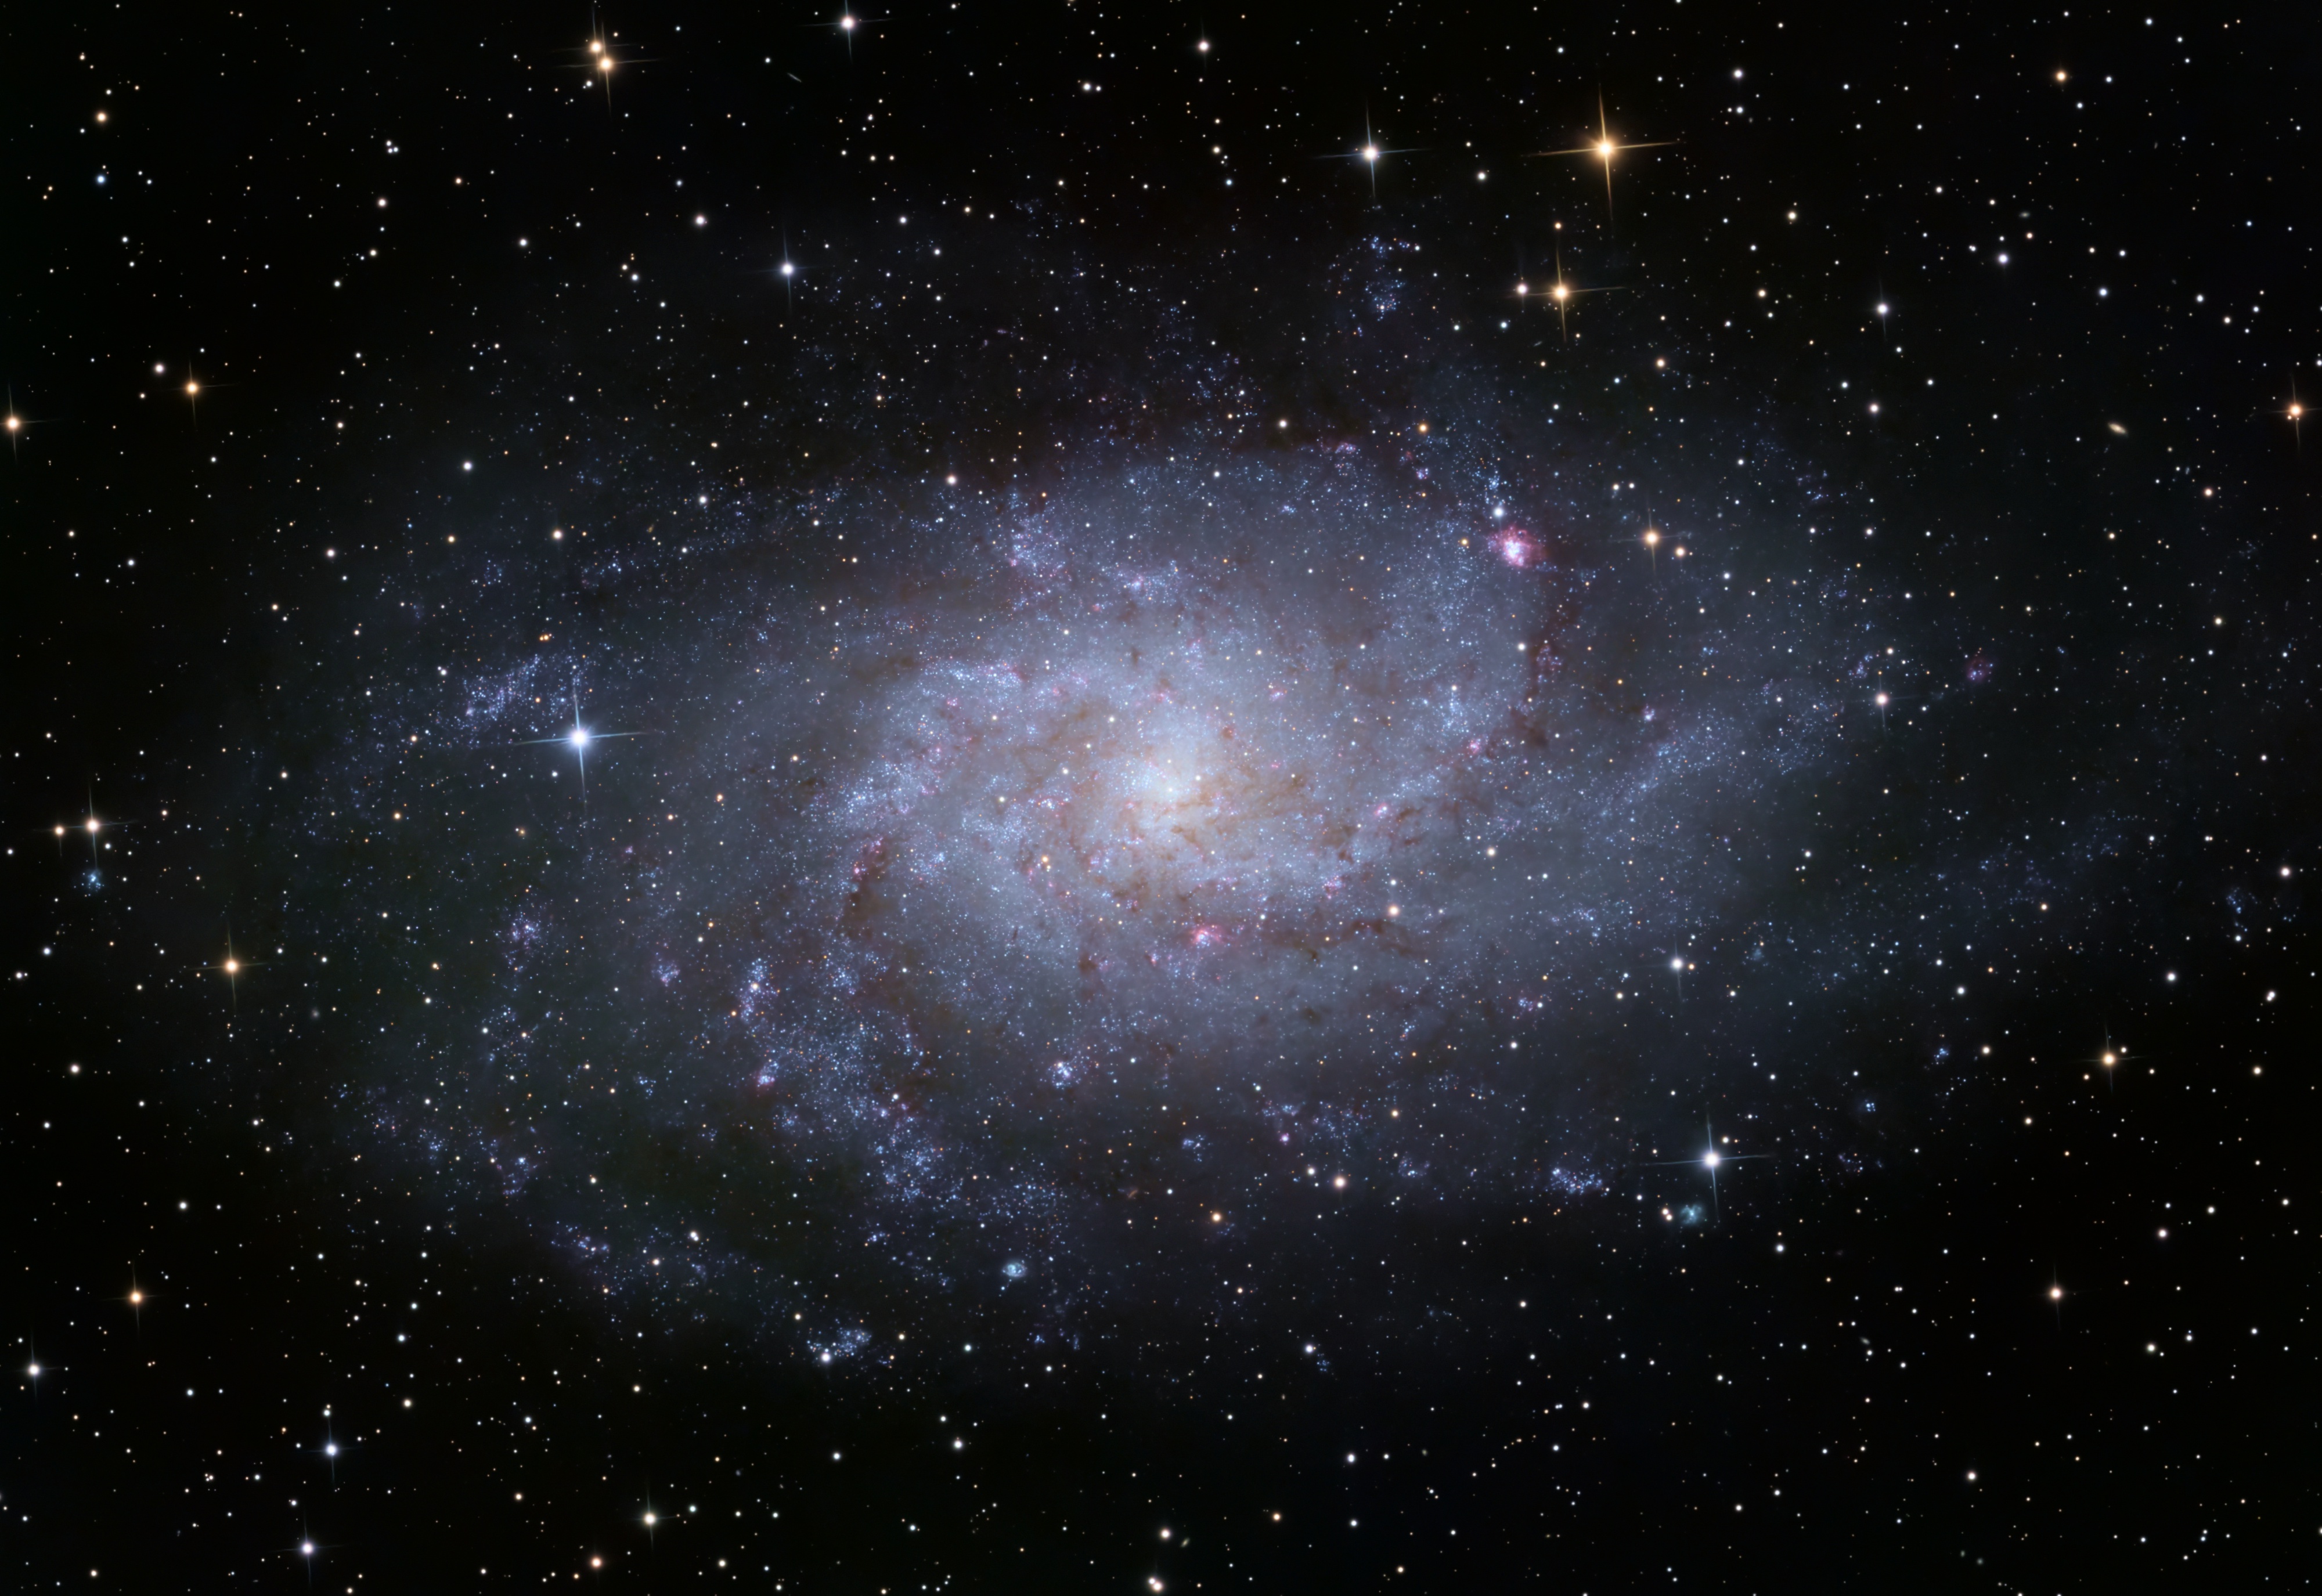
6h (120 x 3min) Broadband. Processed with NoiseX and BlurX. Cropped. You might notice M33 is bluer than M31 – that’s not color calibration gone wrong, it’s due to M33 having more hot young blue stars and M31 having an older population of redder stars.
M100 Mirror Galaxy
3h49m (57 x 4min 2s) Broadband using Sony α7C. Processed with DeepSNR and BlurX. Cropped. Unsure if the purplish hue here is real or some quirk of how I used the α7C. This and the M101 image next up are the oldest data on the post, from early 2024, but reprocessed with new tools.
M101 Pinwheel Galaxy

6h (120 x 2min + 30 x 4min) Broadband using Sony α7C. Processed with DeepSNR and BlurX. Cropped. Same potential issues with old data here as with M100. Focus was not great back then, either, but besides that and M101 being an ugly galaxy, this is a pretty good image.
M77 Squid & NGC1055
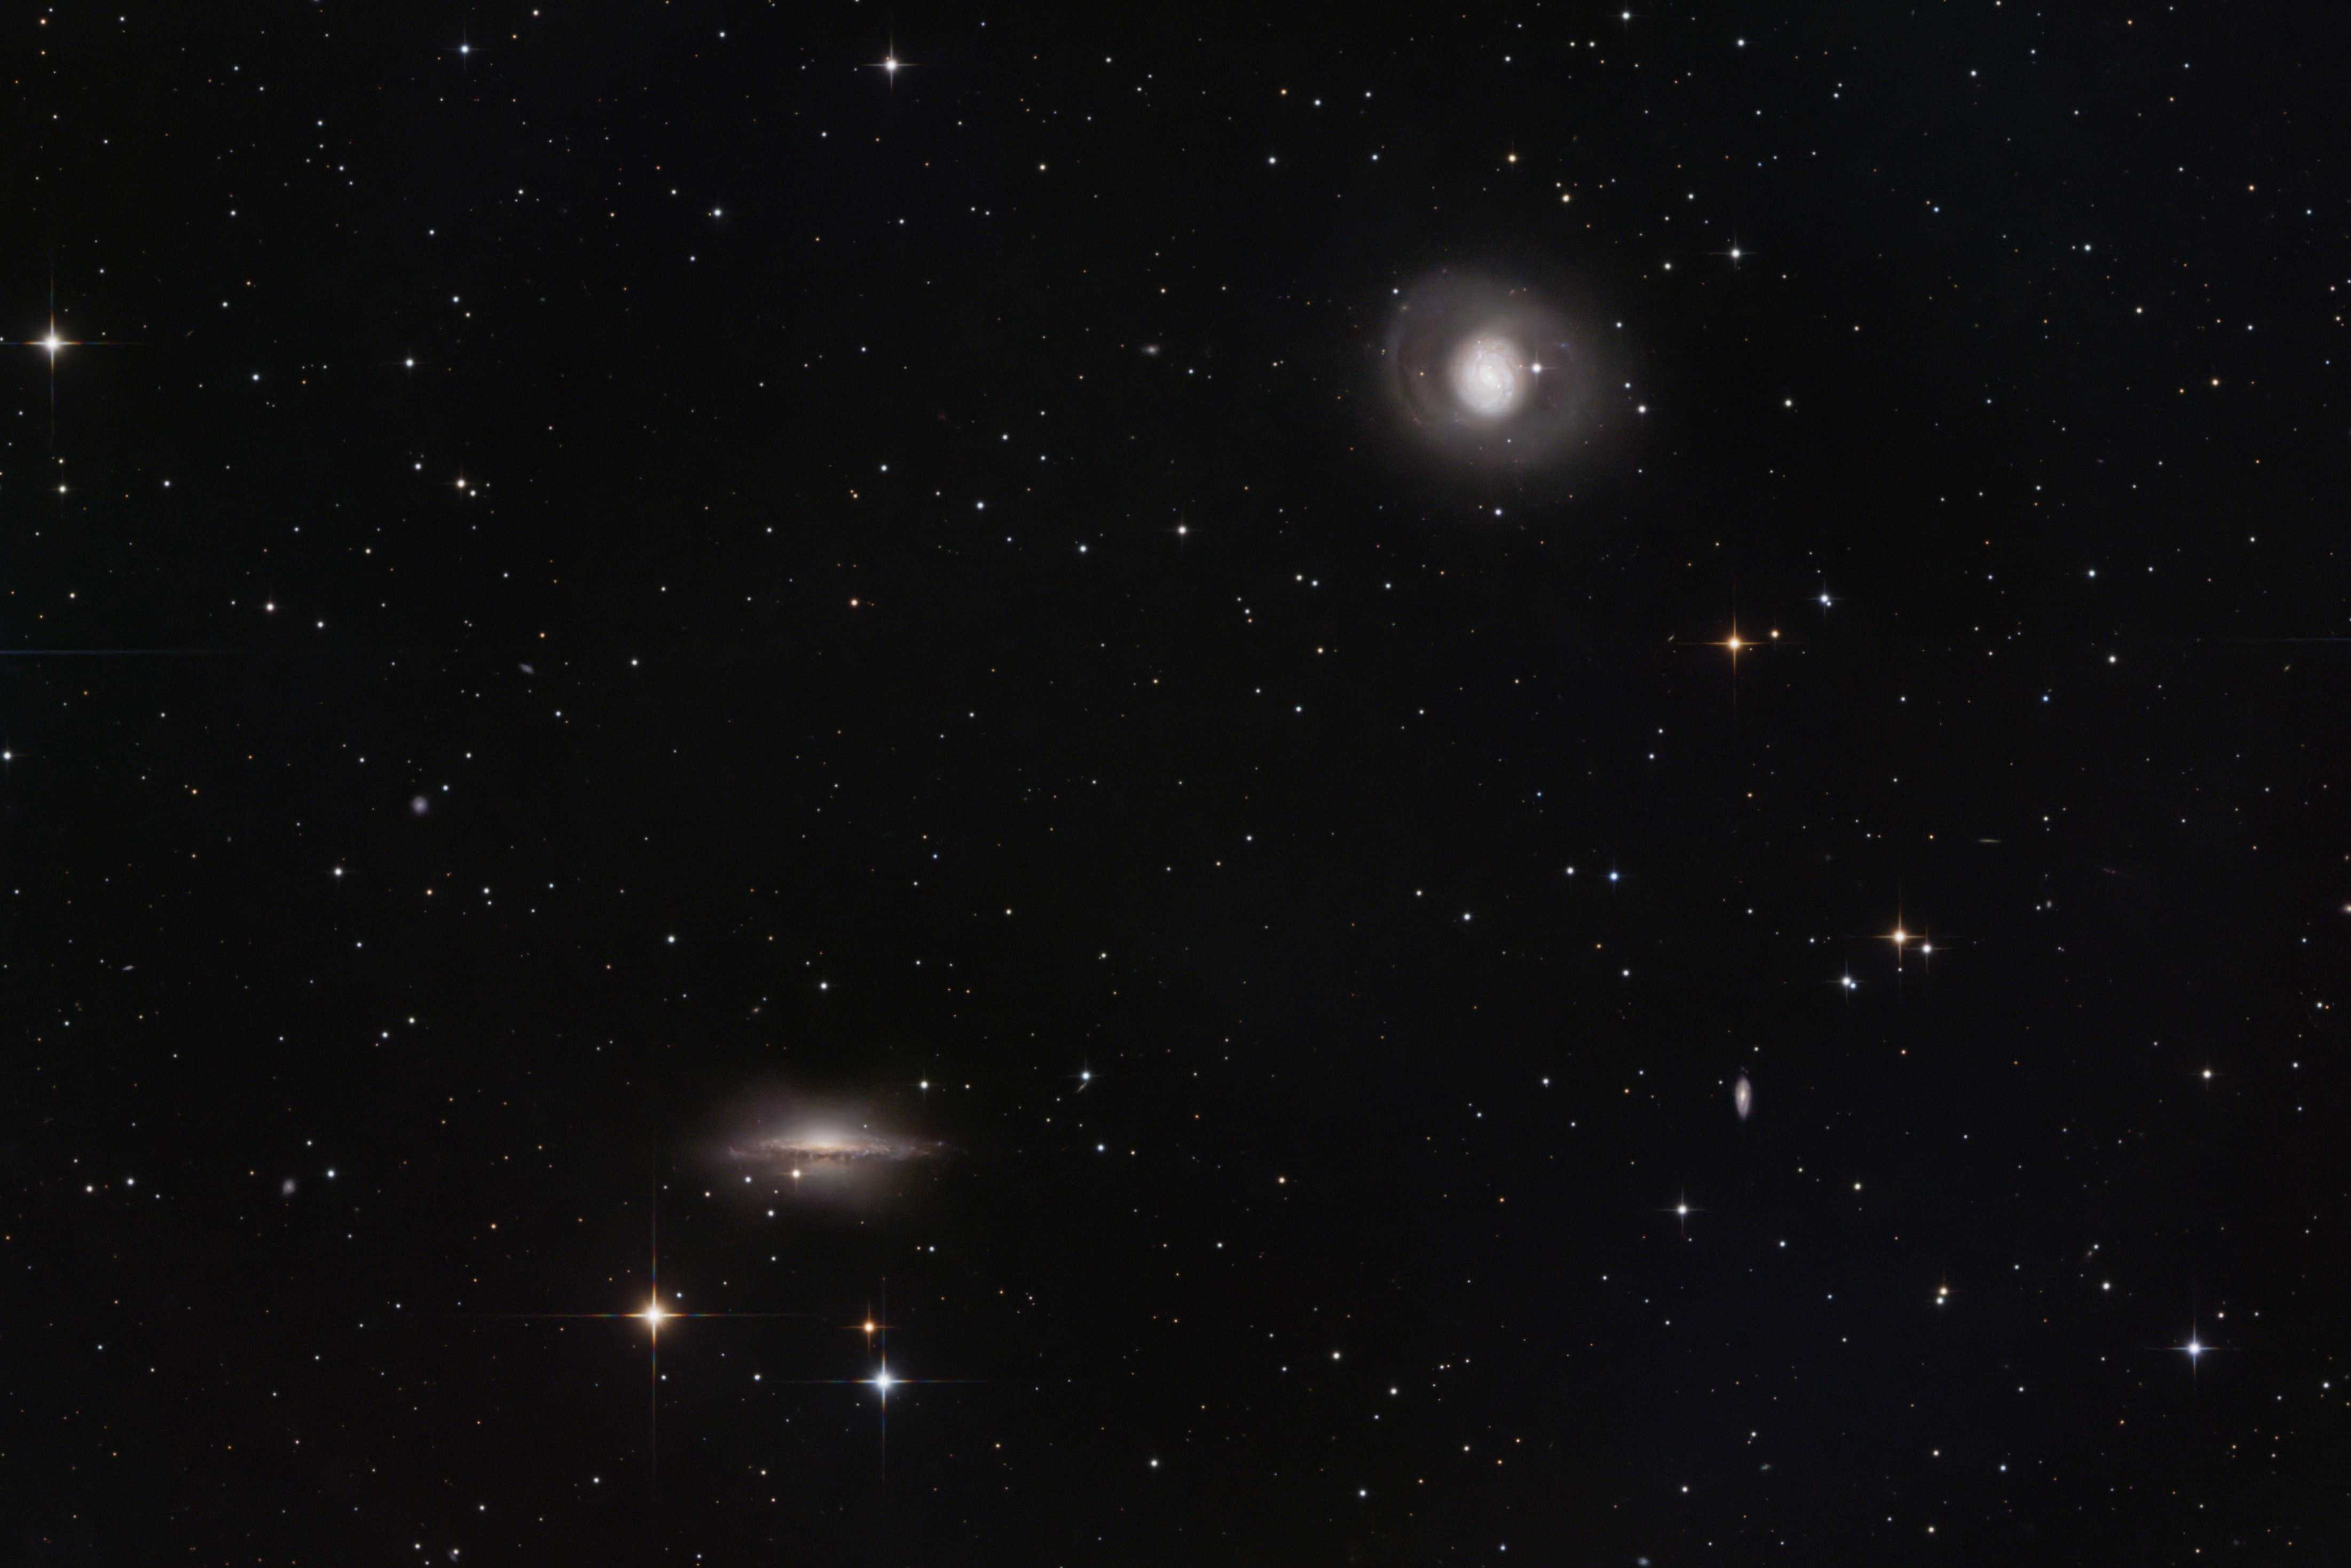
6h32m (196 x 2min) Broadband. Processed with NoiseX and BlurX. A little HDR was needed on the core of M77, which is bright enough to make the Messier cut while leaving the very close NGC1055 unseen.
NGC247 Needle’s Eye Galaxy

8h (160 x 3min) Broadband. Processed with GraXpert (BGE), NoiseX, and BlurX. Cropped. The eye of the needle is the mysterious void off to one side of the galactic disk. This one is very dim.
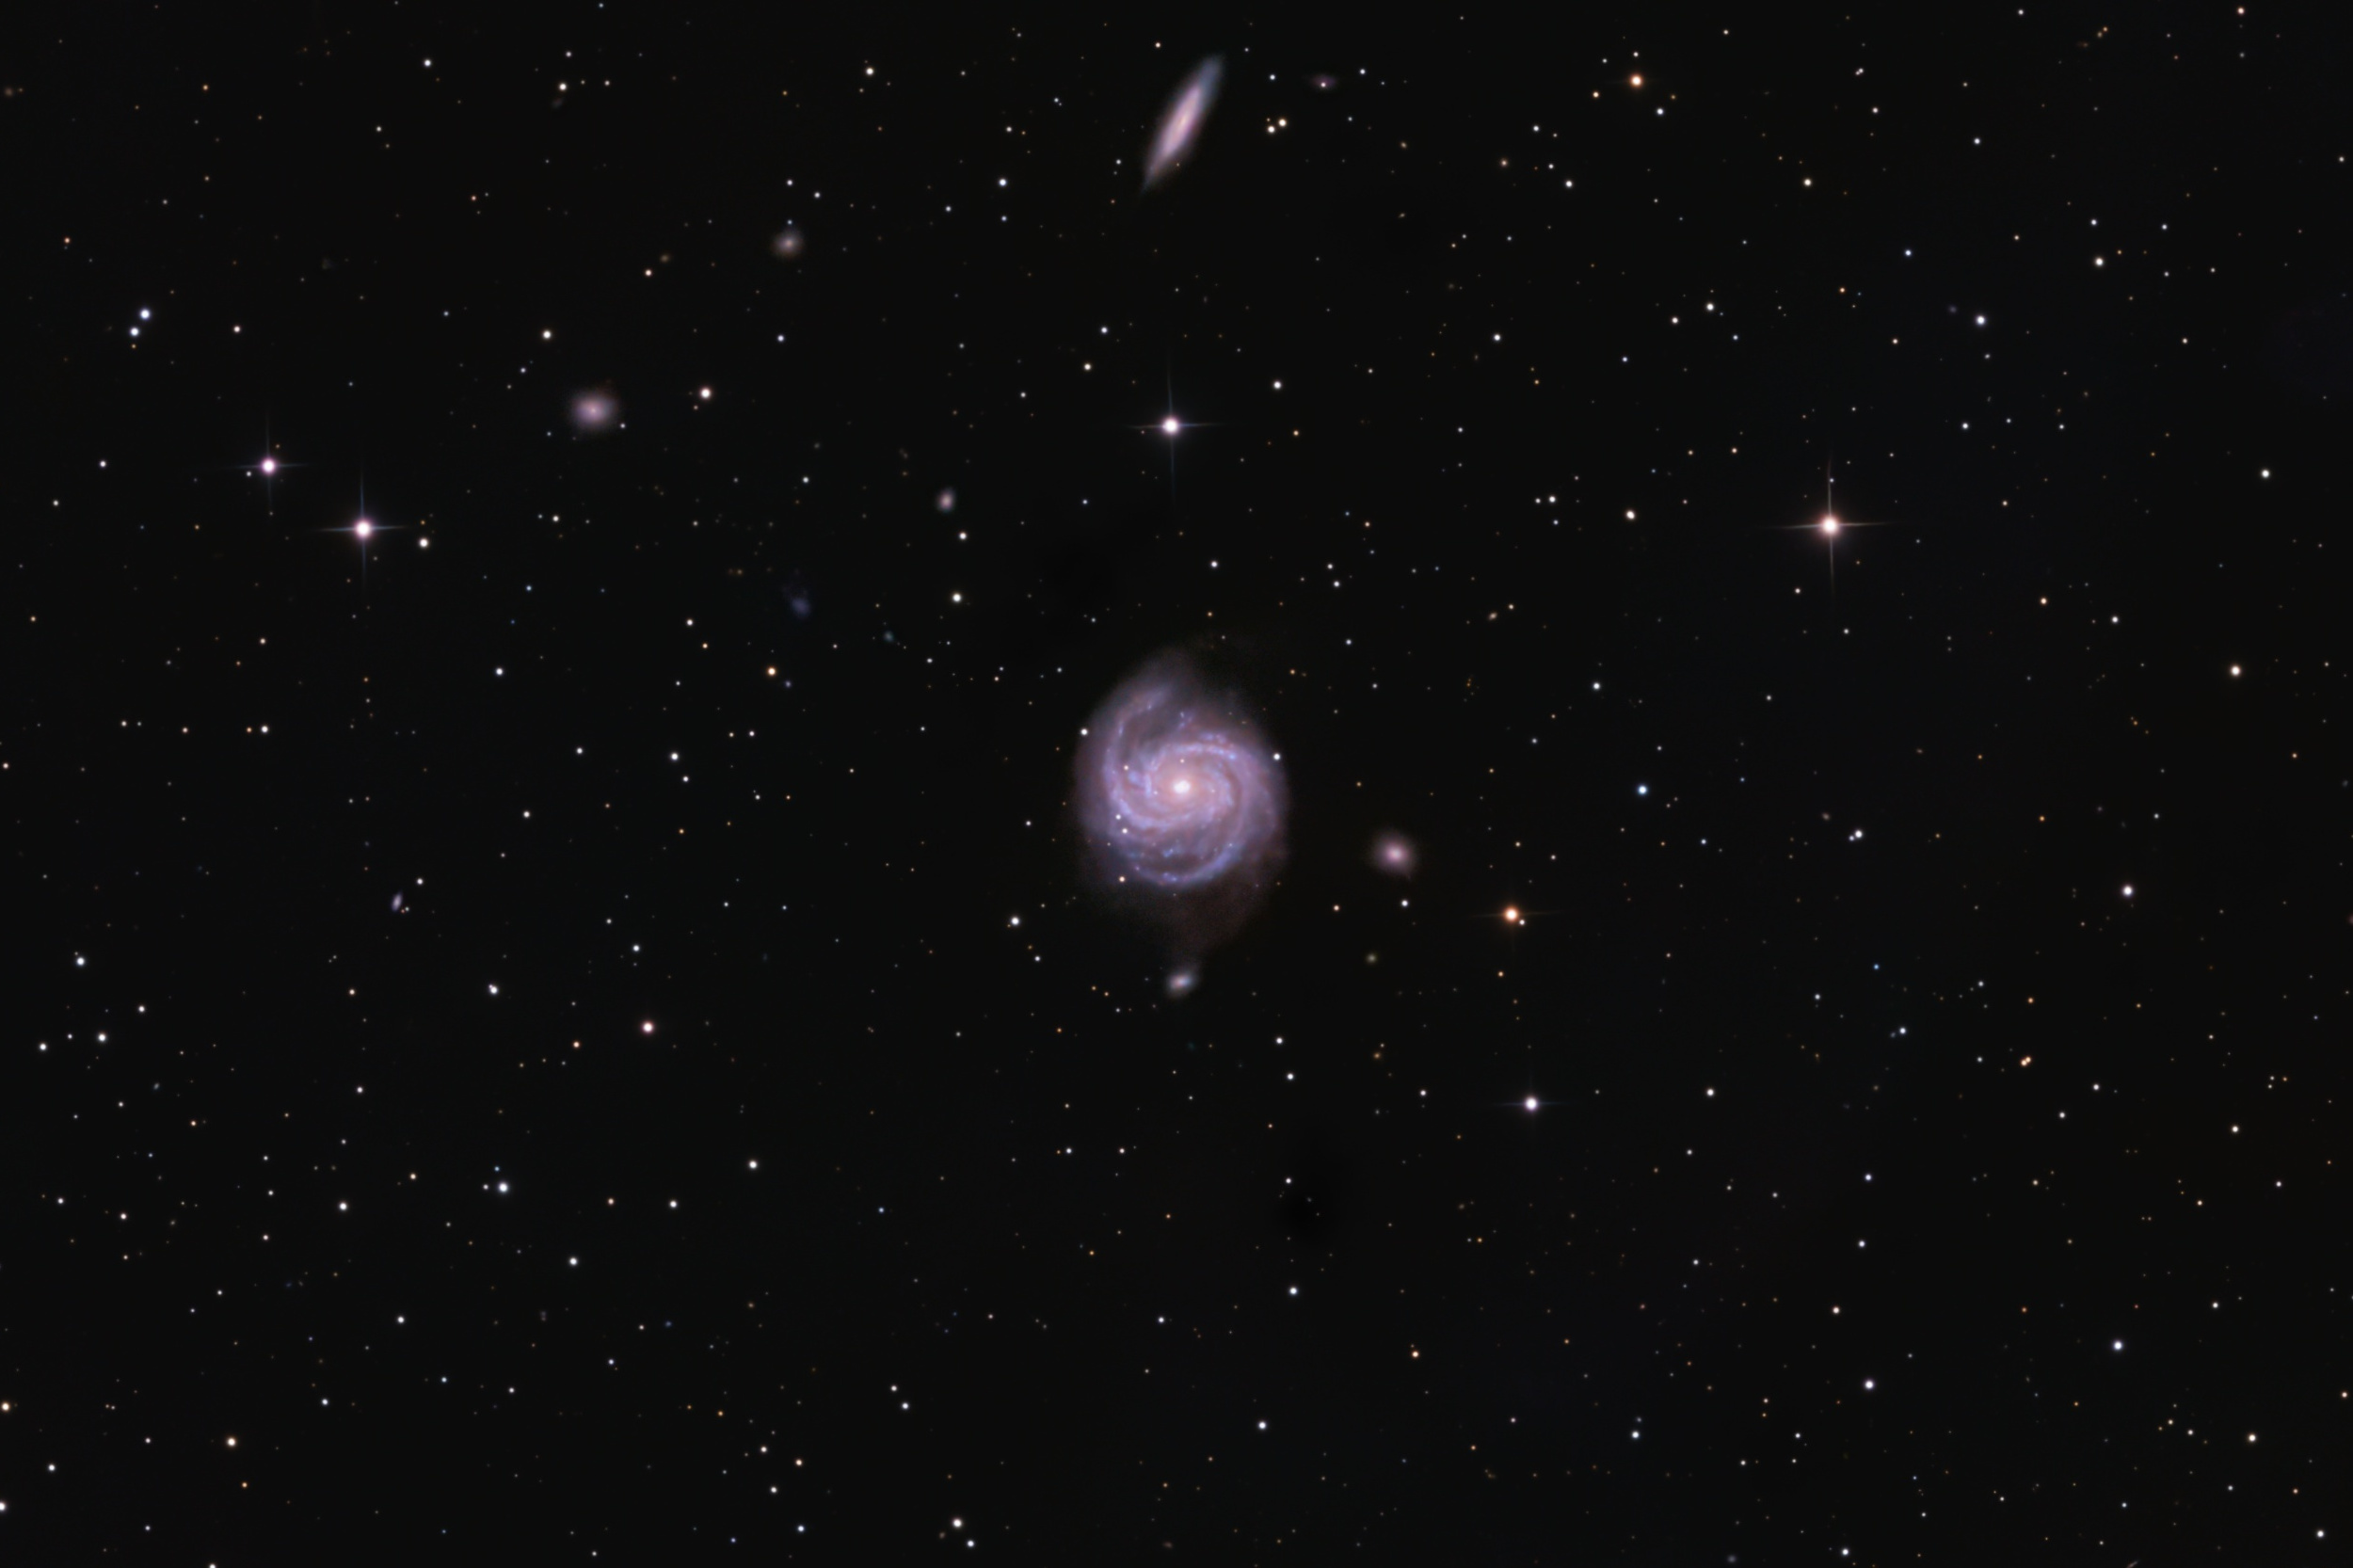
M74 Phantom Galaxy

3h14m (97 x 2min) Broadband. Processed with NoiseX and BlurX. Cropped. Another very dim galaxy, this time from being behind our own galaxy.
NGC7331 & friends - Deer Lick Group
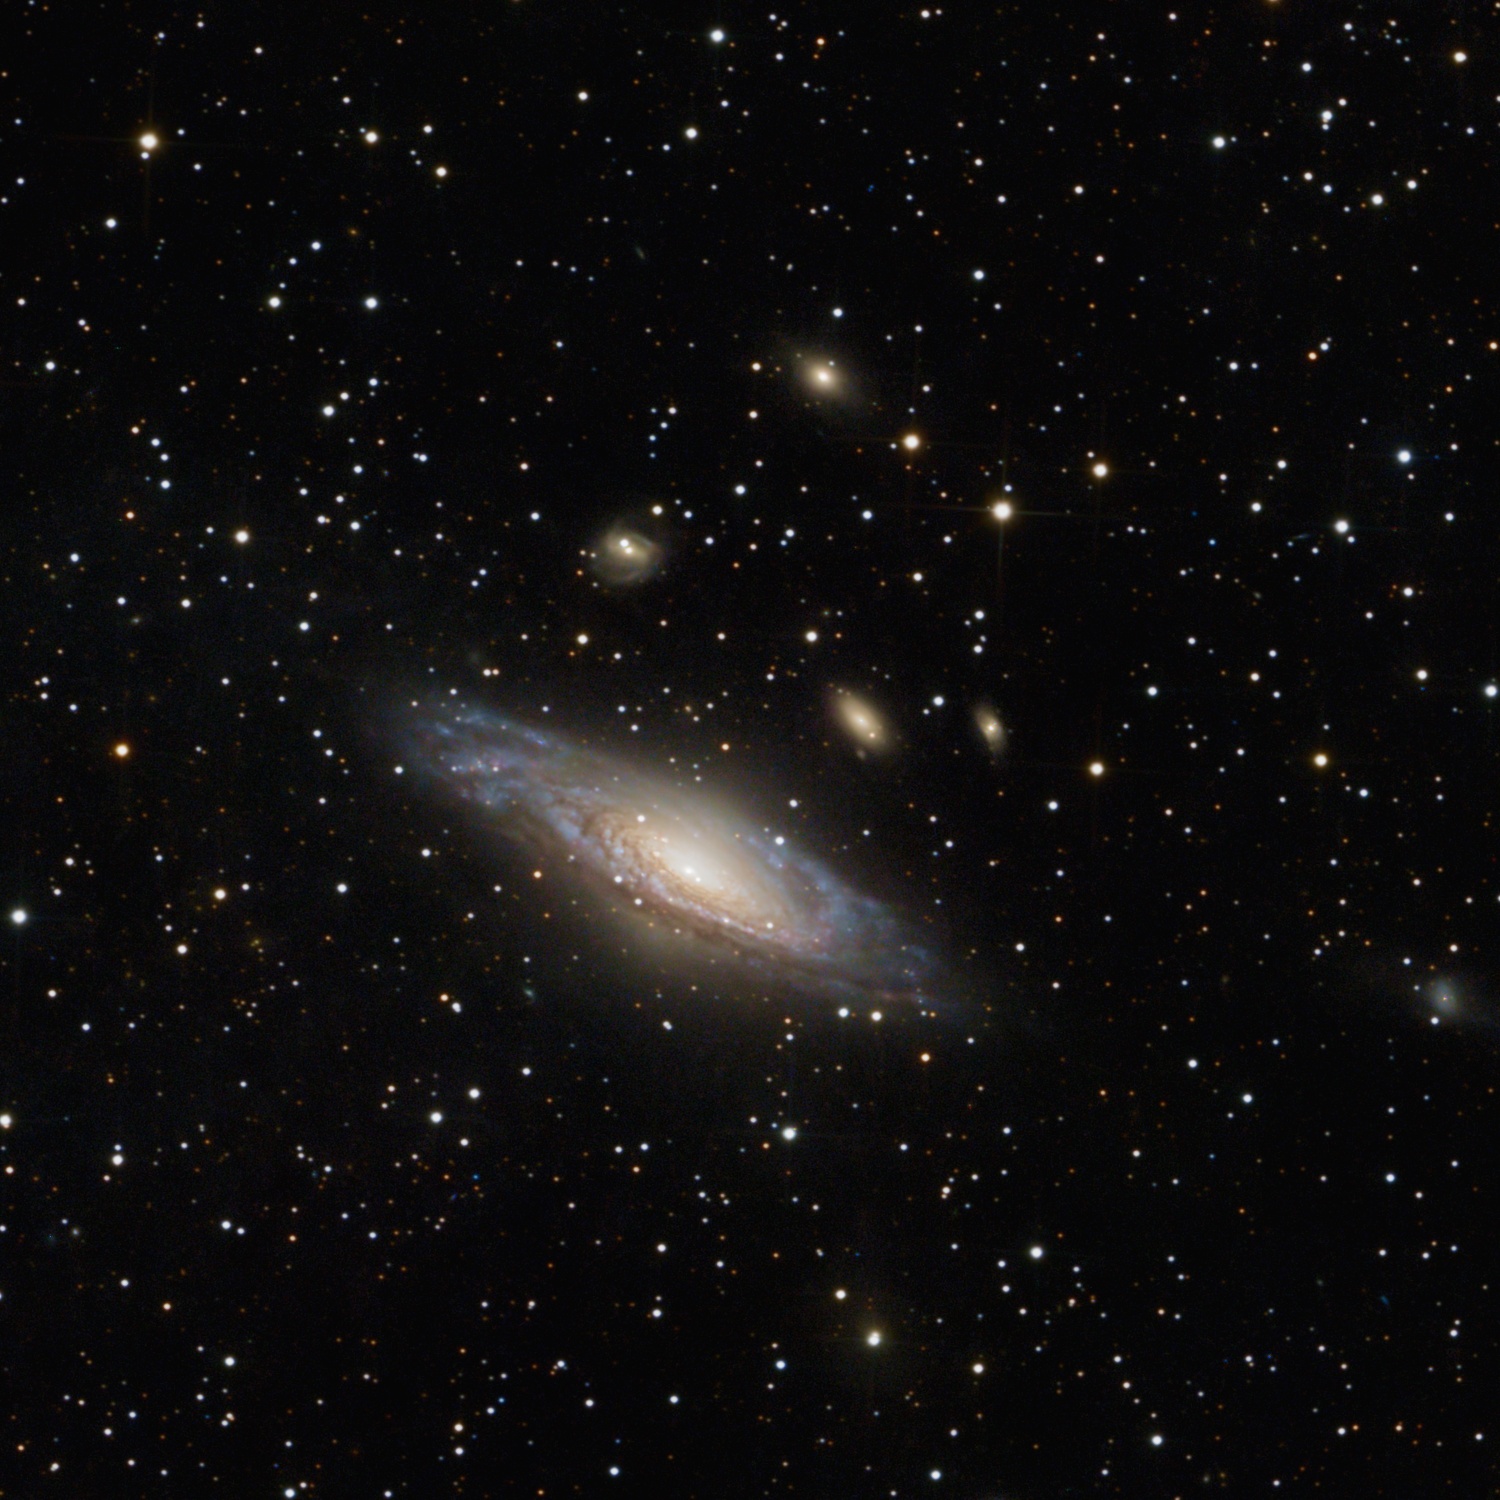
5h48m (116 x 3min) Broadband. Processed with GraXpert. Cropped from full field including Stephan’s Quintet. Supernova SN2025rbs is visible just to the right and below the core of the largest galaxy, which was discovered July 2025, captured ~5 weeks post-discovery.
HCG92 - Stephan’s Quintet
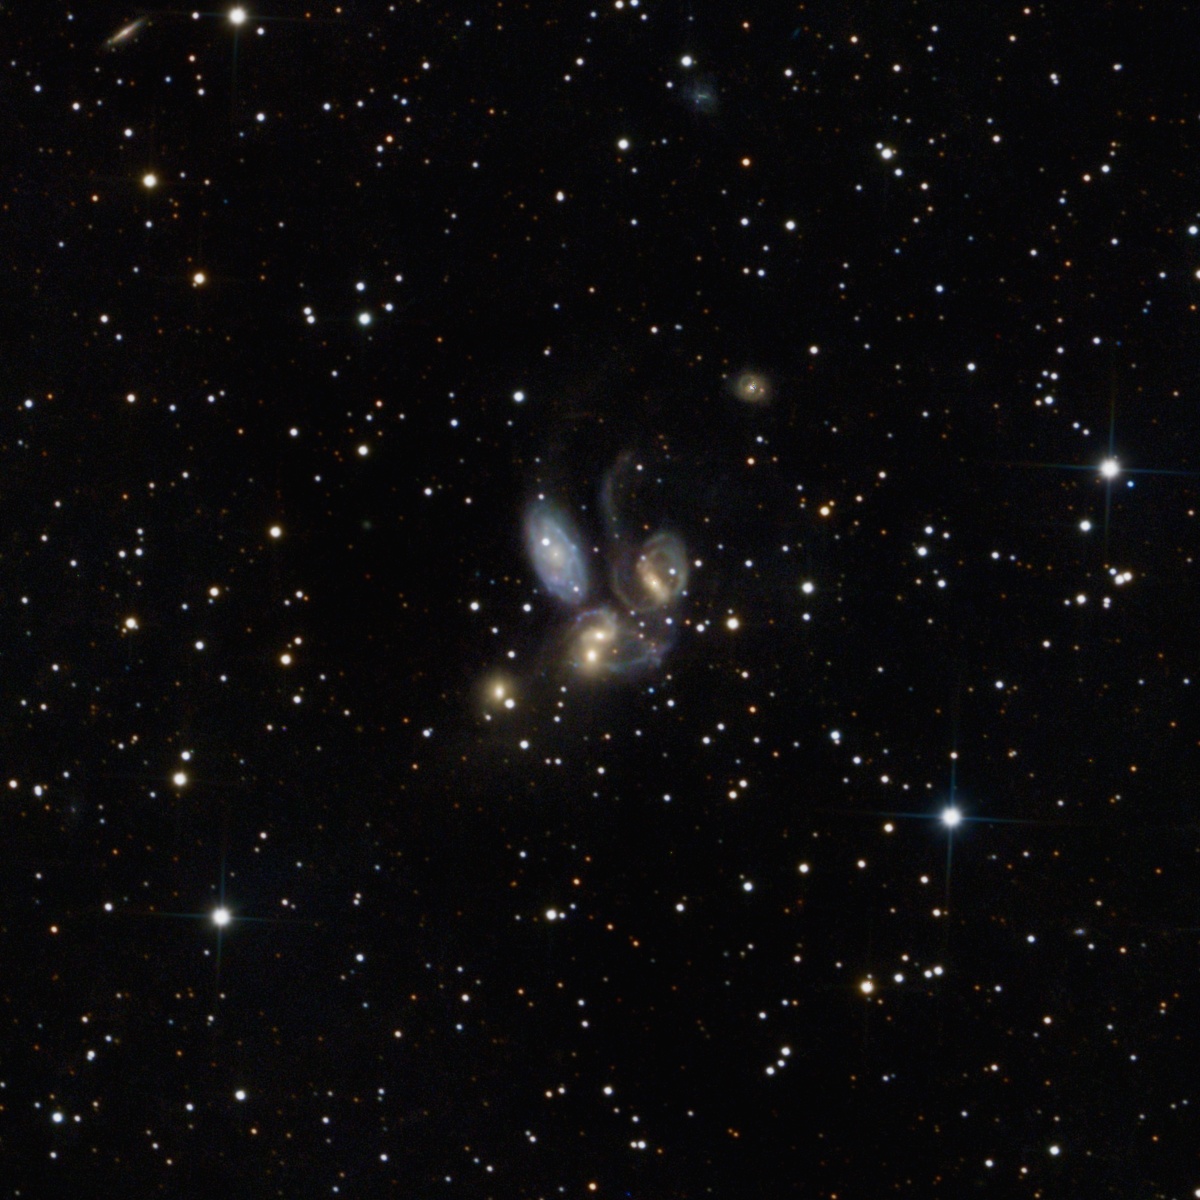
5h48m (116 x 3min) Broadband. Processed with GraXpert. Cropped from full field including Deer Lick Group. Some of the most distant (350+ million light years) targets, and quite dim on top of that.
M106 & friends

5h33m (111 x 3min) Broadband. Processed with GraXpert.
M51 Whirlpool Galaxy
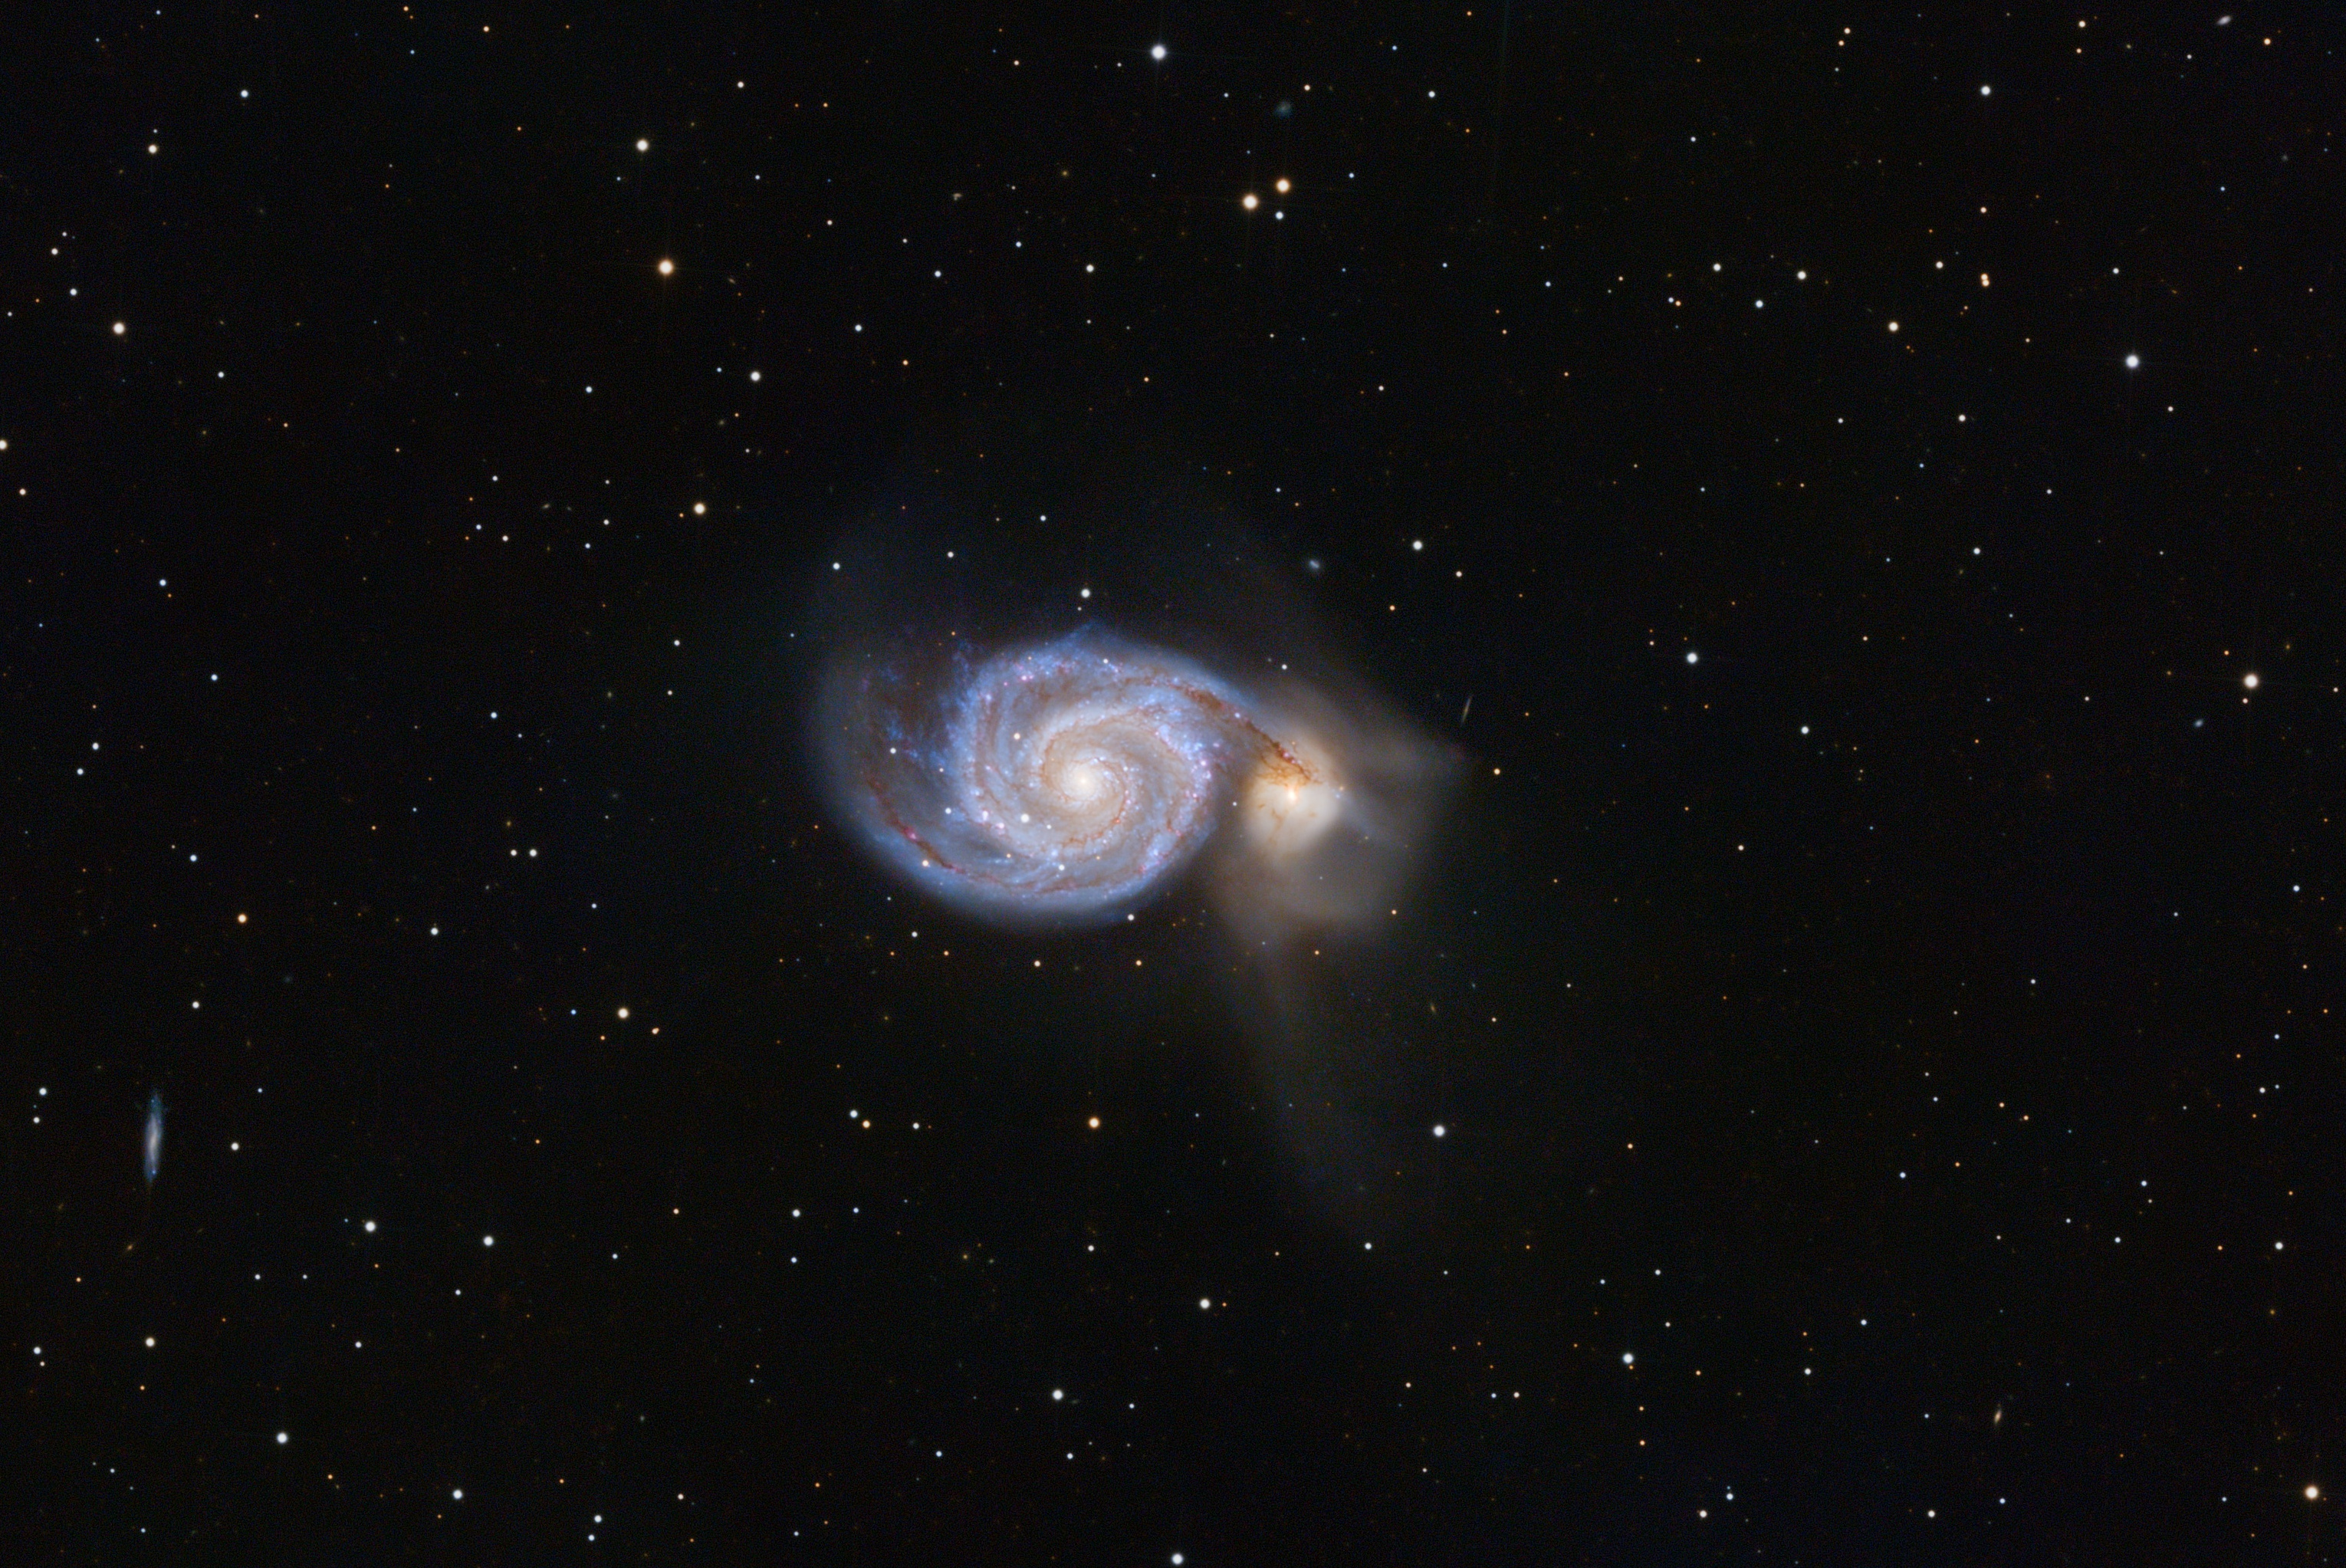
10h42m (214 x 3min) Broadband. No denoising or deconvolution at all, just showing off pristine data.
NGC6946 Fireworks Galaxy
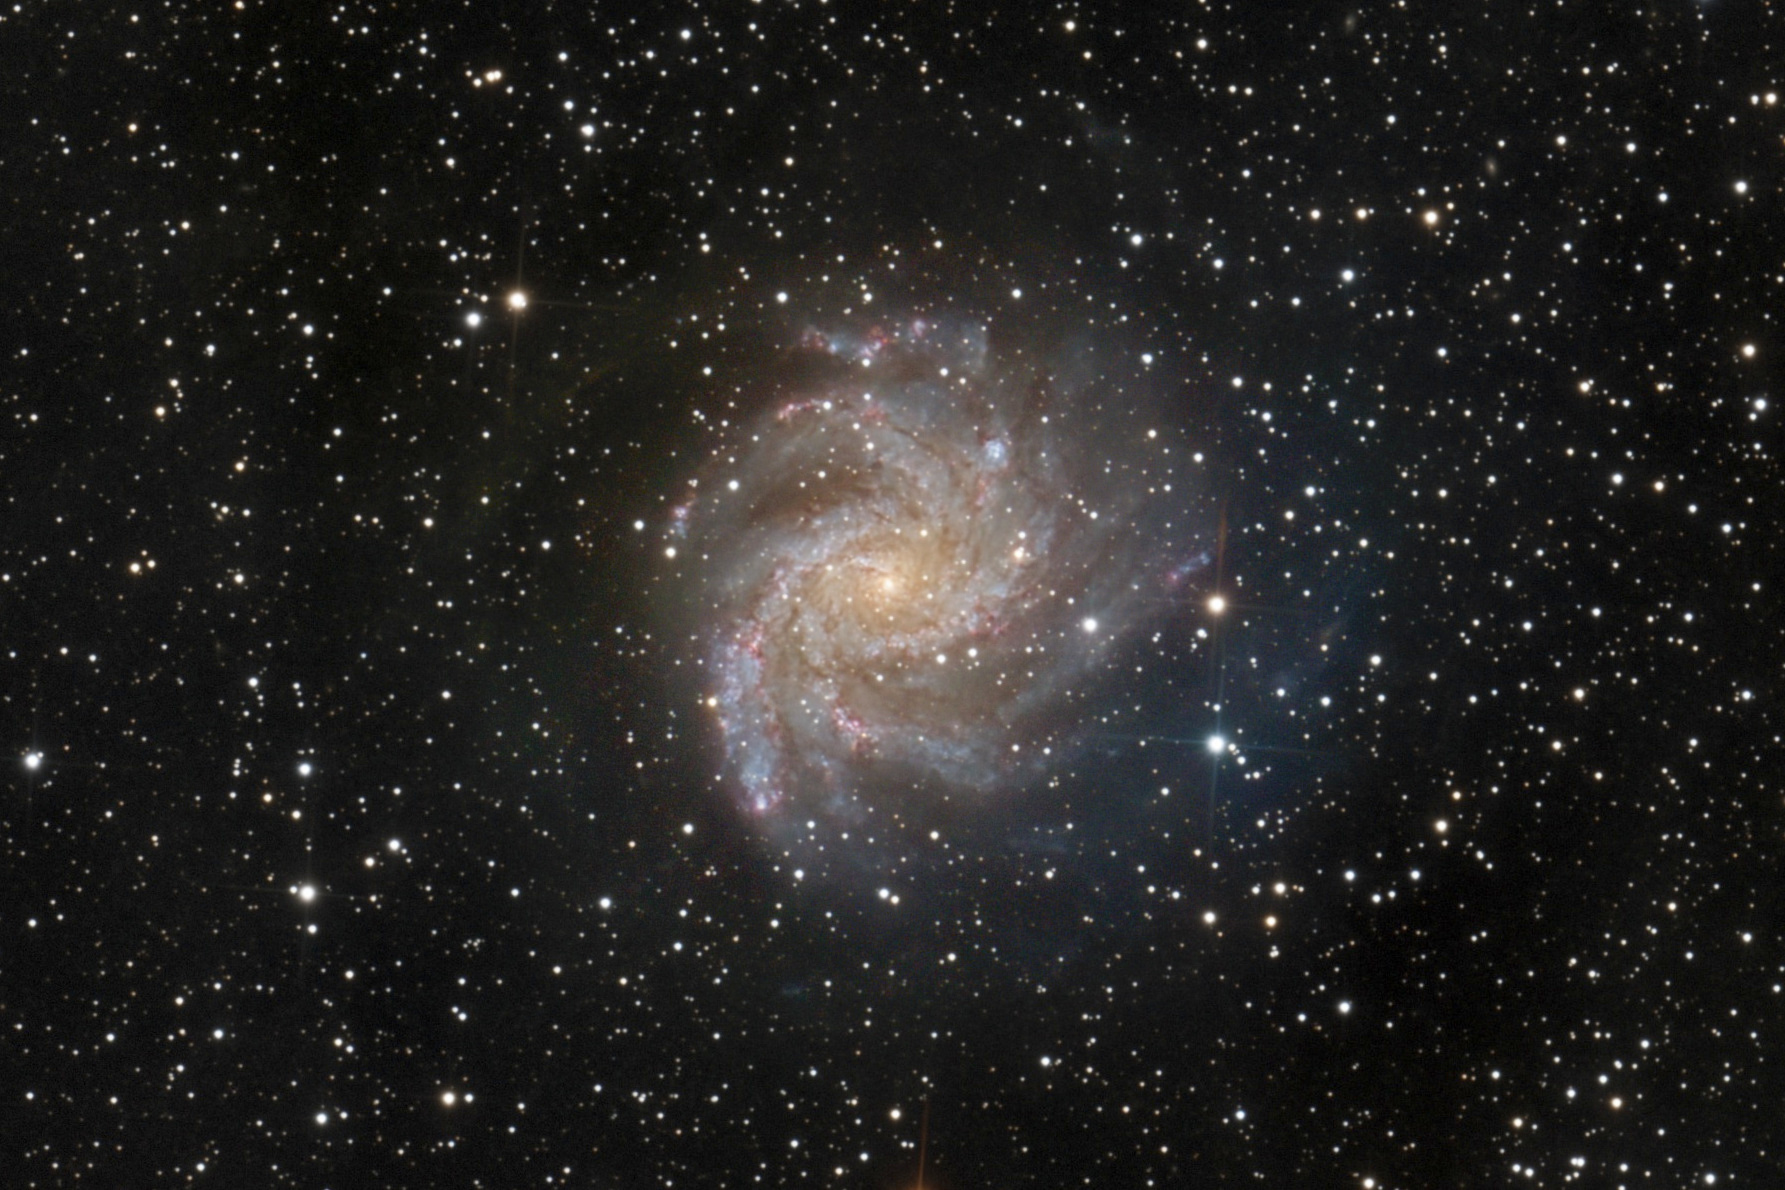
5h9m (103 x 3min) Broadband. Processed with GraXpert. Cropped. Bursts of Ha emissions can be seen throughout the spiral arms, presumably giving it the name.
M66, M65 and NGC3628 - Leo Triplet
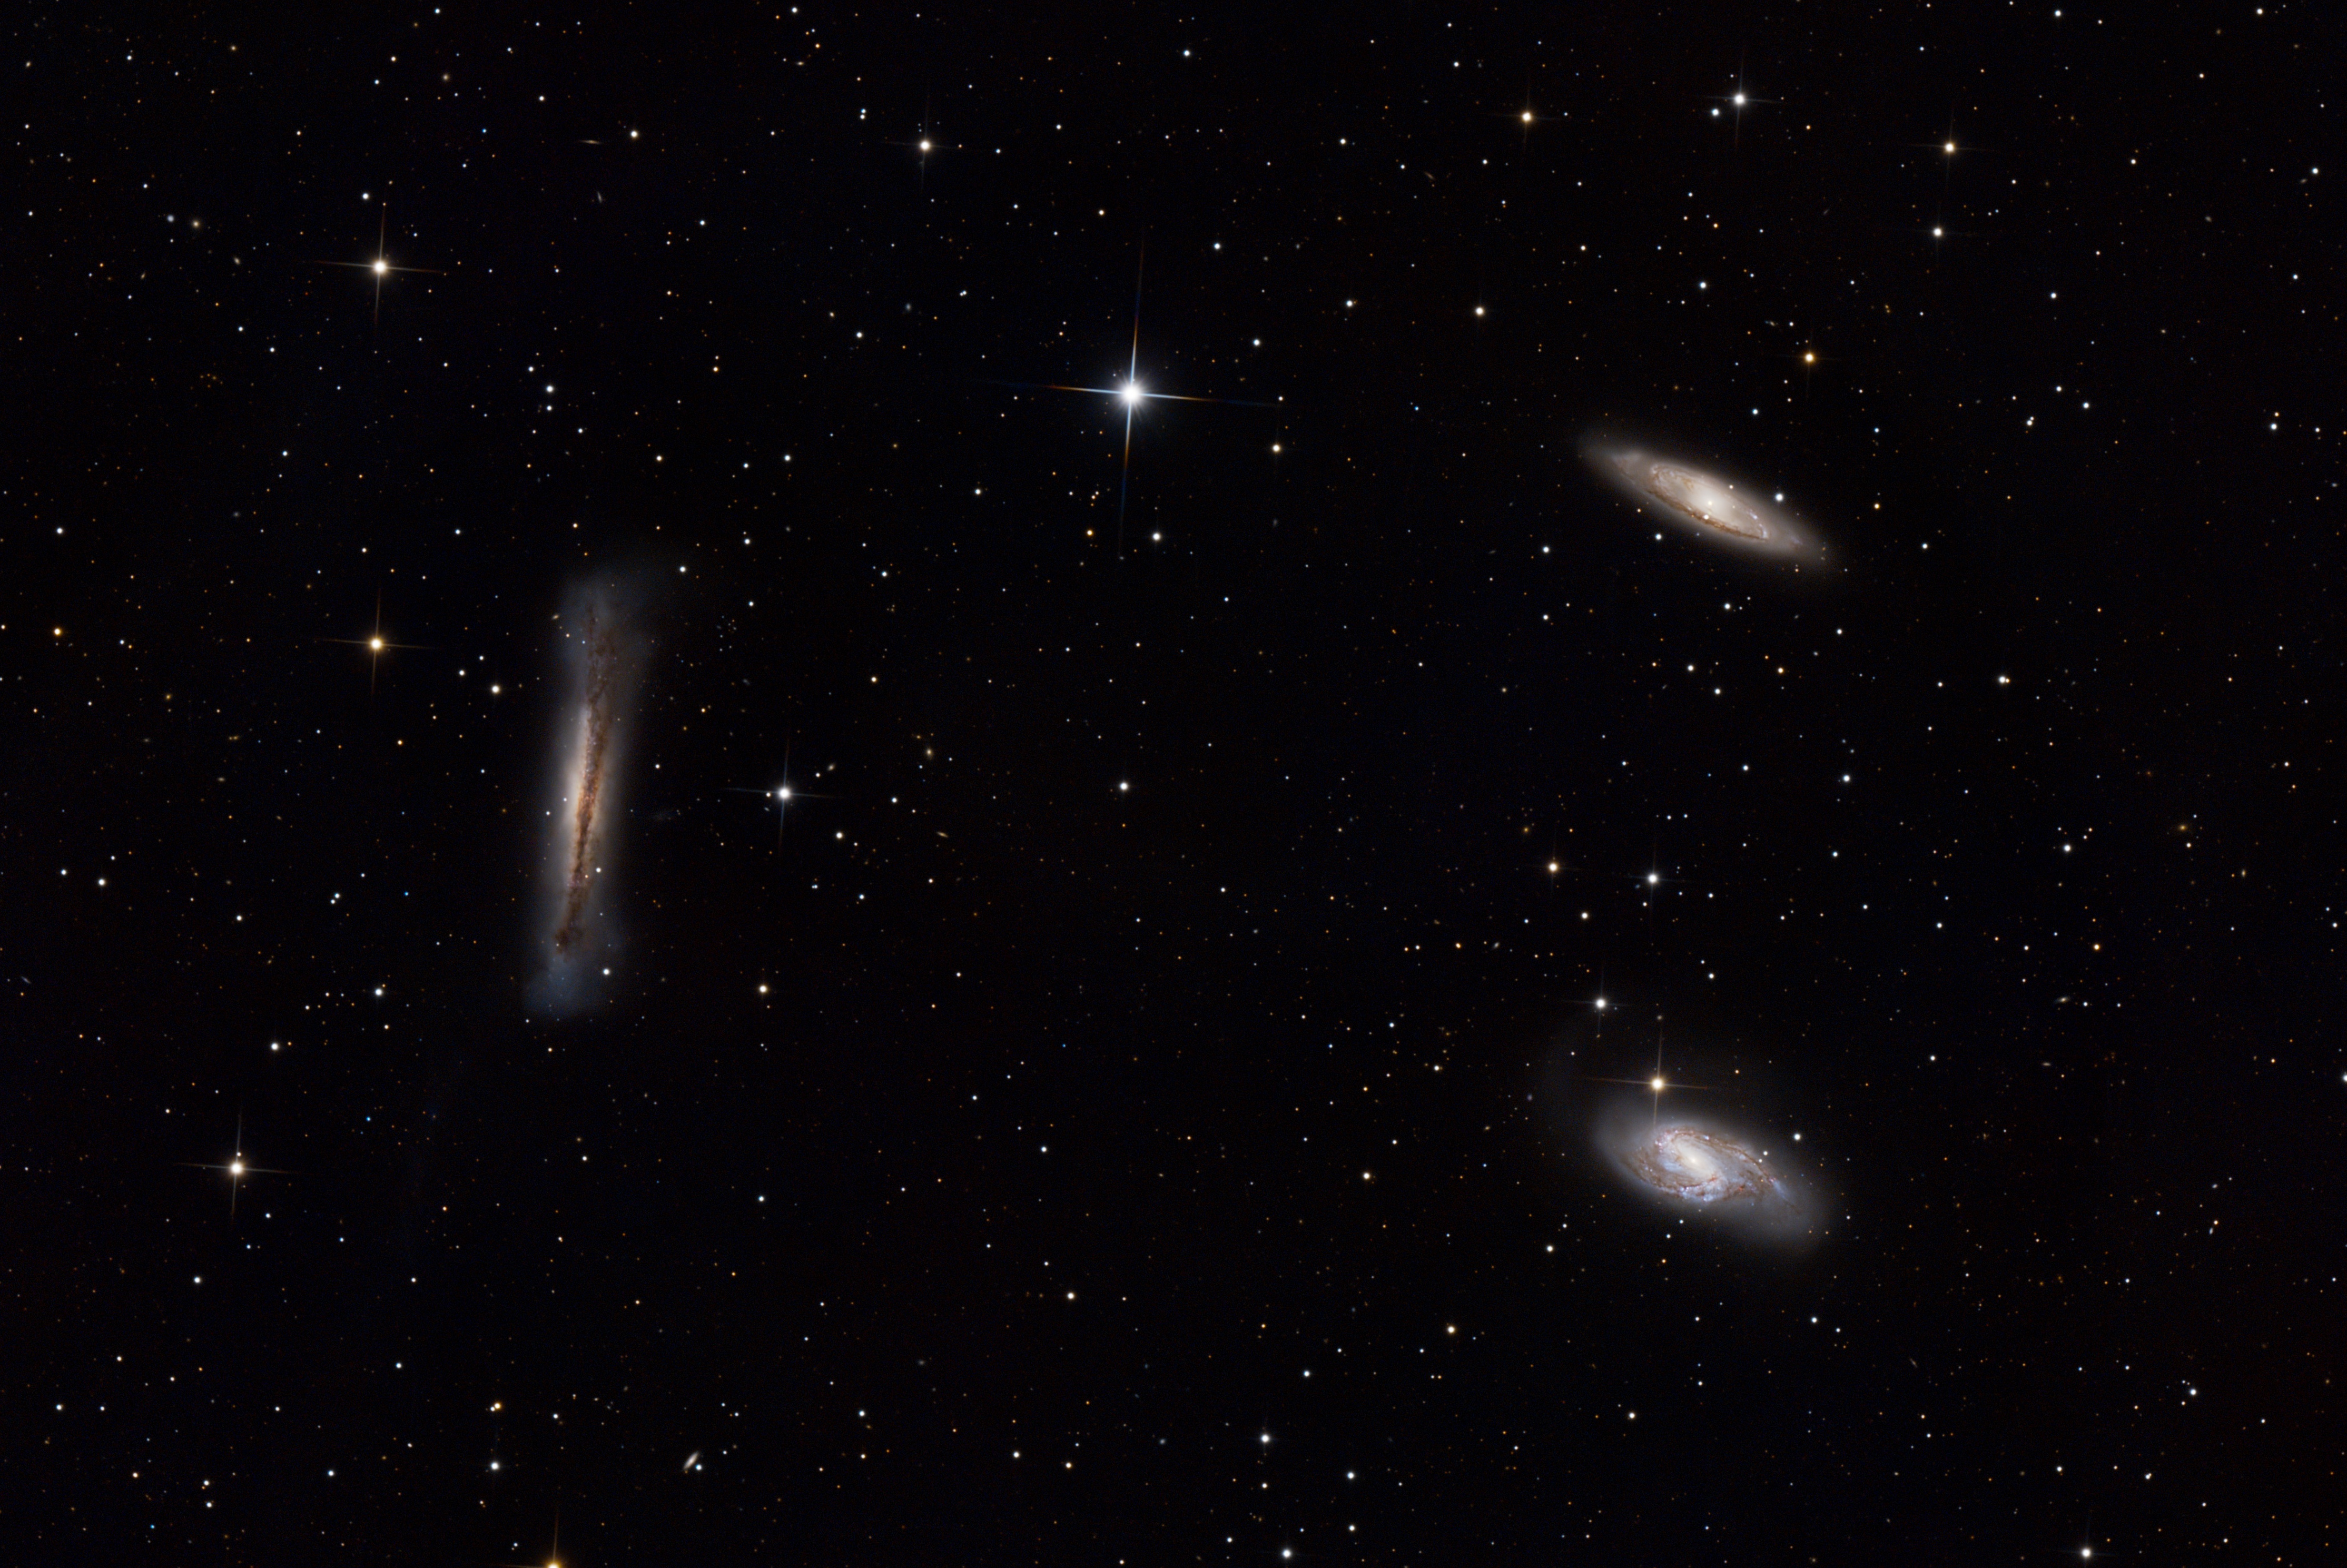
4h45m (95 x 3min) Broadband. Processed with GraXpert. A personal favorite, as there are very few opportunities to frame several detailed targets together.