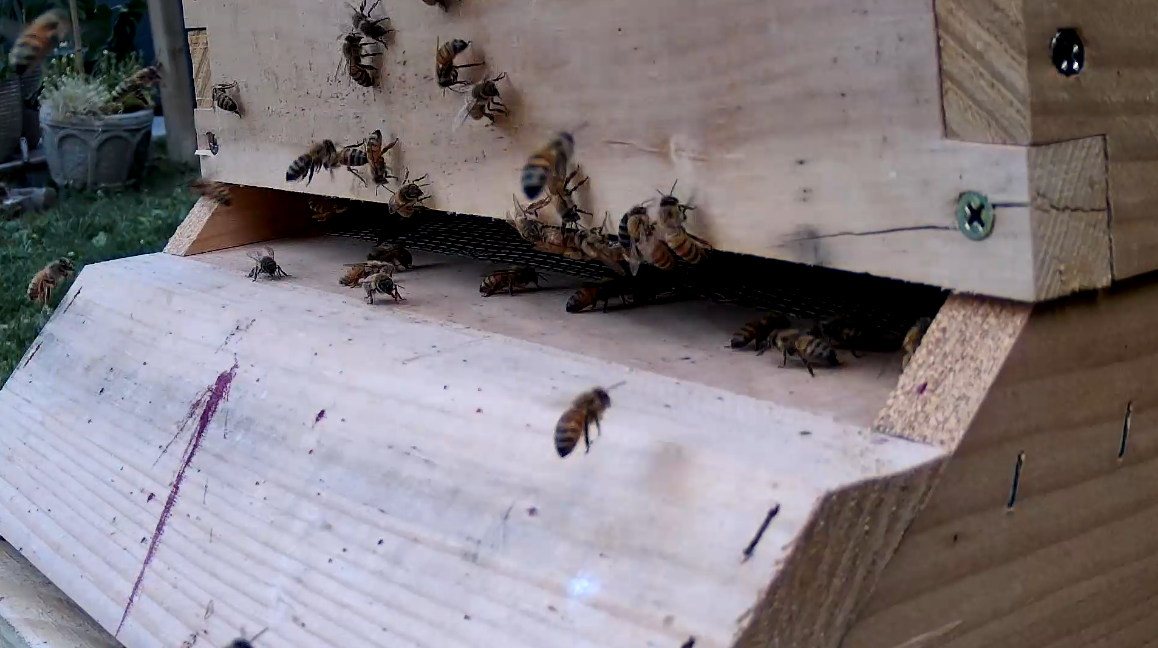
A still frame from the BeeCam. The carnage on the front is a rogue black cherry. The bees are friendly.
This post is begging for an initial post on how I ended up with bees, but as this isn’t a beekeeping blog (yet), I’ll first go into some detail on the live stream I setup to watch the bees come and go. There are a lot of live streaming guides targeted at social media enthusiasts, but these gloss over the weatherproofing and power difficulties of outdoor deployments, as well as assume some app (Youtube, Twitch, …) is going to be involved (via a mobile phone). So, I started to piece together bits of tech to arrive at something robust and self-hosted.
The Camera
I ended up going with the Reolink RLC-820A which is “security camera” with attractive and problematic features both.
Pros:
- 4K 25 FPS for budget price – I won’t be streaming 4k, but this means we won’t be pixel starved.
- Power-over-Ethernet (PoE) – One cable for network (stream) and power simplifies life immensely.
- Looked nicely adjustable – don’t be fooled, it’s not remote-control, and also won’t auto focus (!)
- Decent reviews – people claim to rely on it for actual home security applications
- Provides RTSP, RTMP streams out of the box – no need to rely on proprietary hardware
- Usable without an app – decent web interface.
Cons:
- Pigtail design is stupid – the 12V DC barrel connector and reset button are not weather proof (cut them off).
- Web interface won’t show full resolution – the Reolink app (and the RTSP/RTMP feeds) can
- Focus is fixed at infinity – some modification required to get macro shots
- 100 MBit connectivity – makes the link lights on my switch look antique
The pigtail is seriously dumb
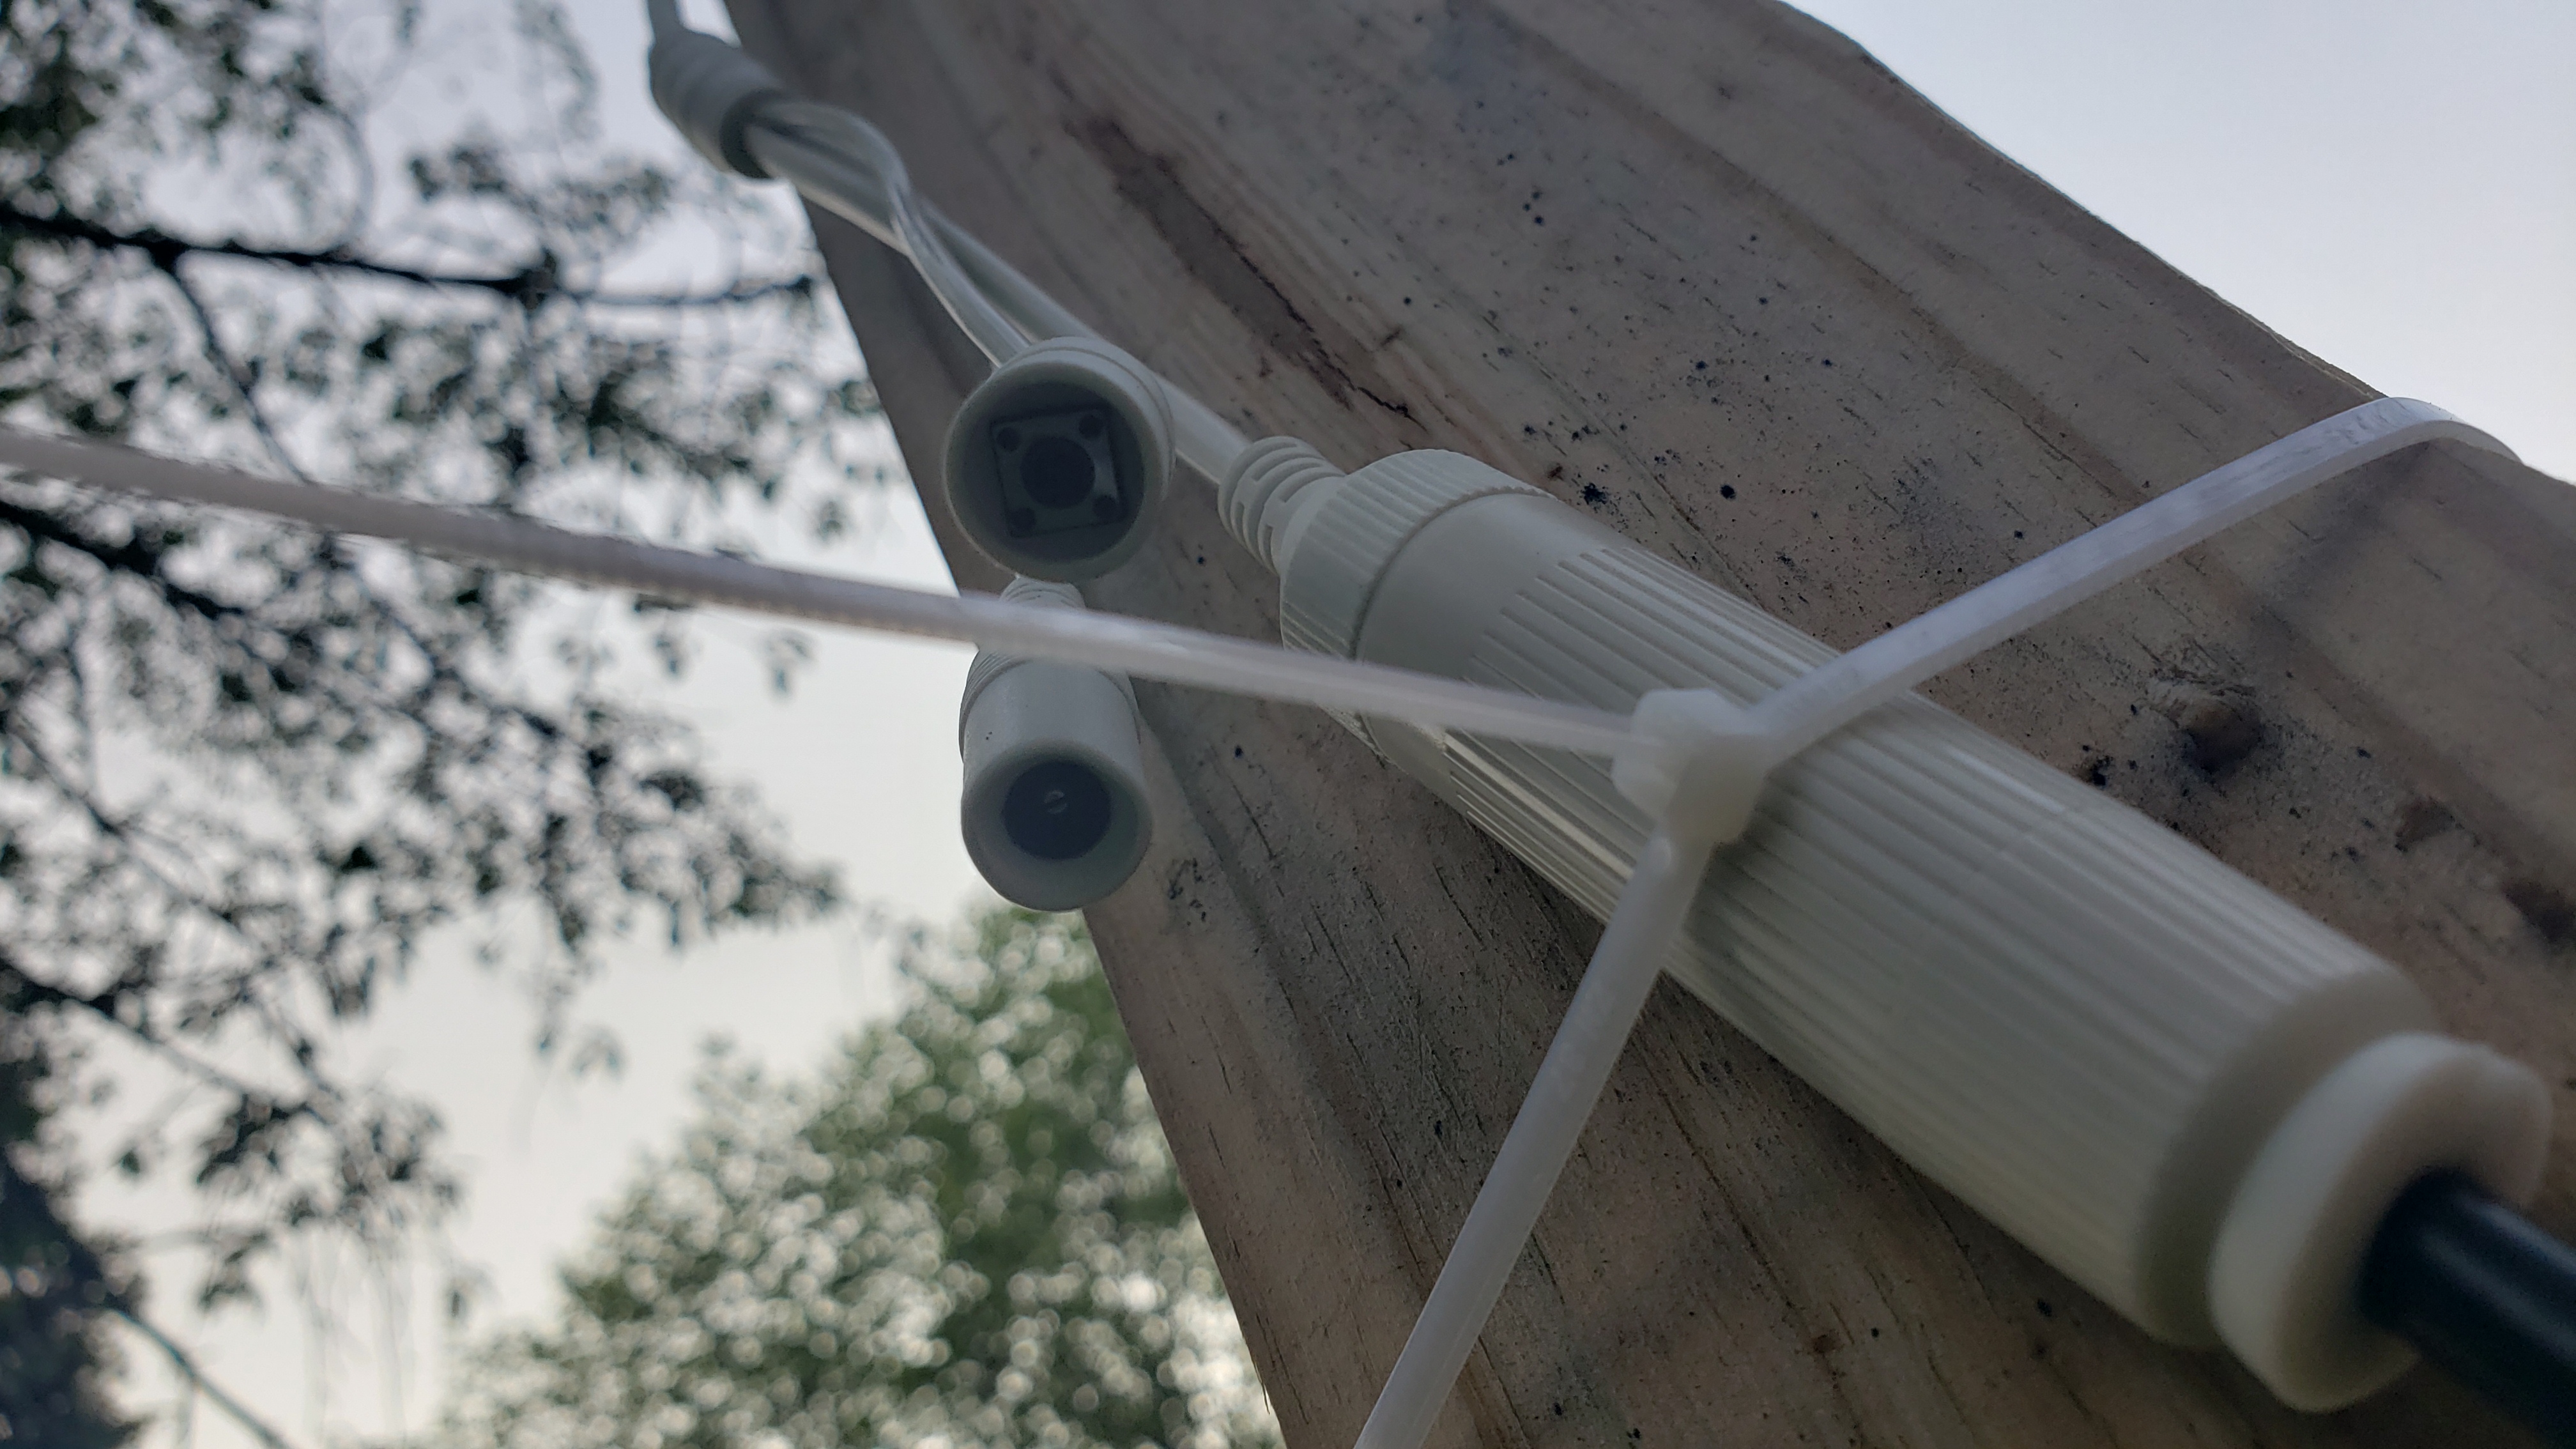
Note the stark lack of weather proofing.
Out of the box, there’s a weather enclosure only for the PoE Ethernet, leaving a reset button and 12V DC connector completely exposed to the elements. Reolink officially suggests buying a ~$25 mounting box with a weather proof compartment to contain this mess, but that’s a third of the cost of the camera, so no thanks Reolink. With these exposed connectors, expect corrosion on the 12V and frequent factory resets – the cameras are basically unusable outdoors.
I opted for removing these connectors and sealing off the end with silicone adhesive, and both problems were a thing of the past. Forgetting the password for the device might result in having to add a weather-proof reset button back (or shorting the wires manually), so be aware of the consequences.
PoE is delightful
I acquired a TL-SG108PE 8-port PoE switch to drive this (and optionally 3 more) camera(s). Couple that with some direct-bury CAT-6 Ethernet cable, and it was very easy to trench power and data connectivity out to the hive. Technically, this is limited to 330 feet, due to the Ethernet standard, but one might go further with PoE range extenders… 100ft cables were sufficient to reach anywhere in this suburban environment.
Focusing on the bees
As a security camera, this has a very wide field of view, and is intended for targets far away. The FoV is wide for my taste, so I’ll be cropping the center of the feed for the stream to achieve something like 70 deg FoV. The focus at infinity is a bit more problematic – placed close (2 feet) to a hive, the image will be blurry out of the box.
Fortunately, I’ve got some experience turning desktop webcams into telescope sensors, and these Reolink security cameras are just beefed up webcams with weather proofing and PoE. Inside the weather proof housing, one finds a pretty standard screw mount focusing mechanism for the optics. This has been glued at the “correct” (for a security camera) focus at infinity, but I’d like to pull it into about ~ 1.5 feet for prime focus. Around 1/8 of a turn of the focus screw brought a test pattern into crisp focus on the live feed. Brute force and a small pipe wrench was used to overcome the glue, which seems to still be in place holding at the new focus.
Mounting
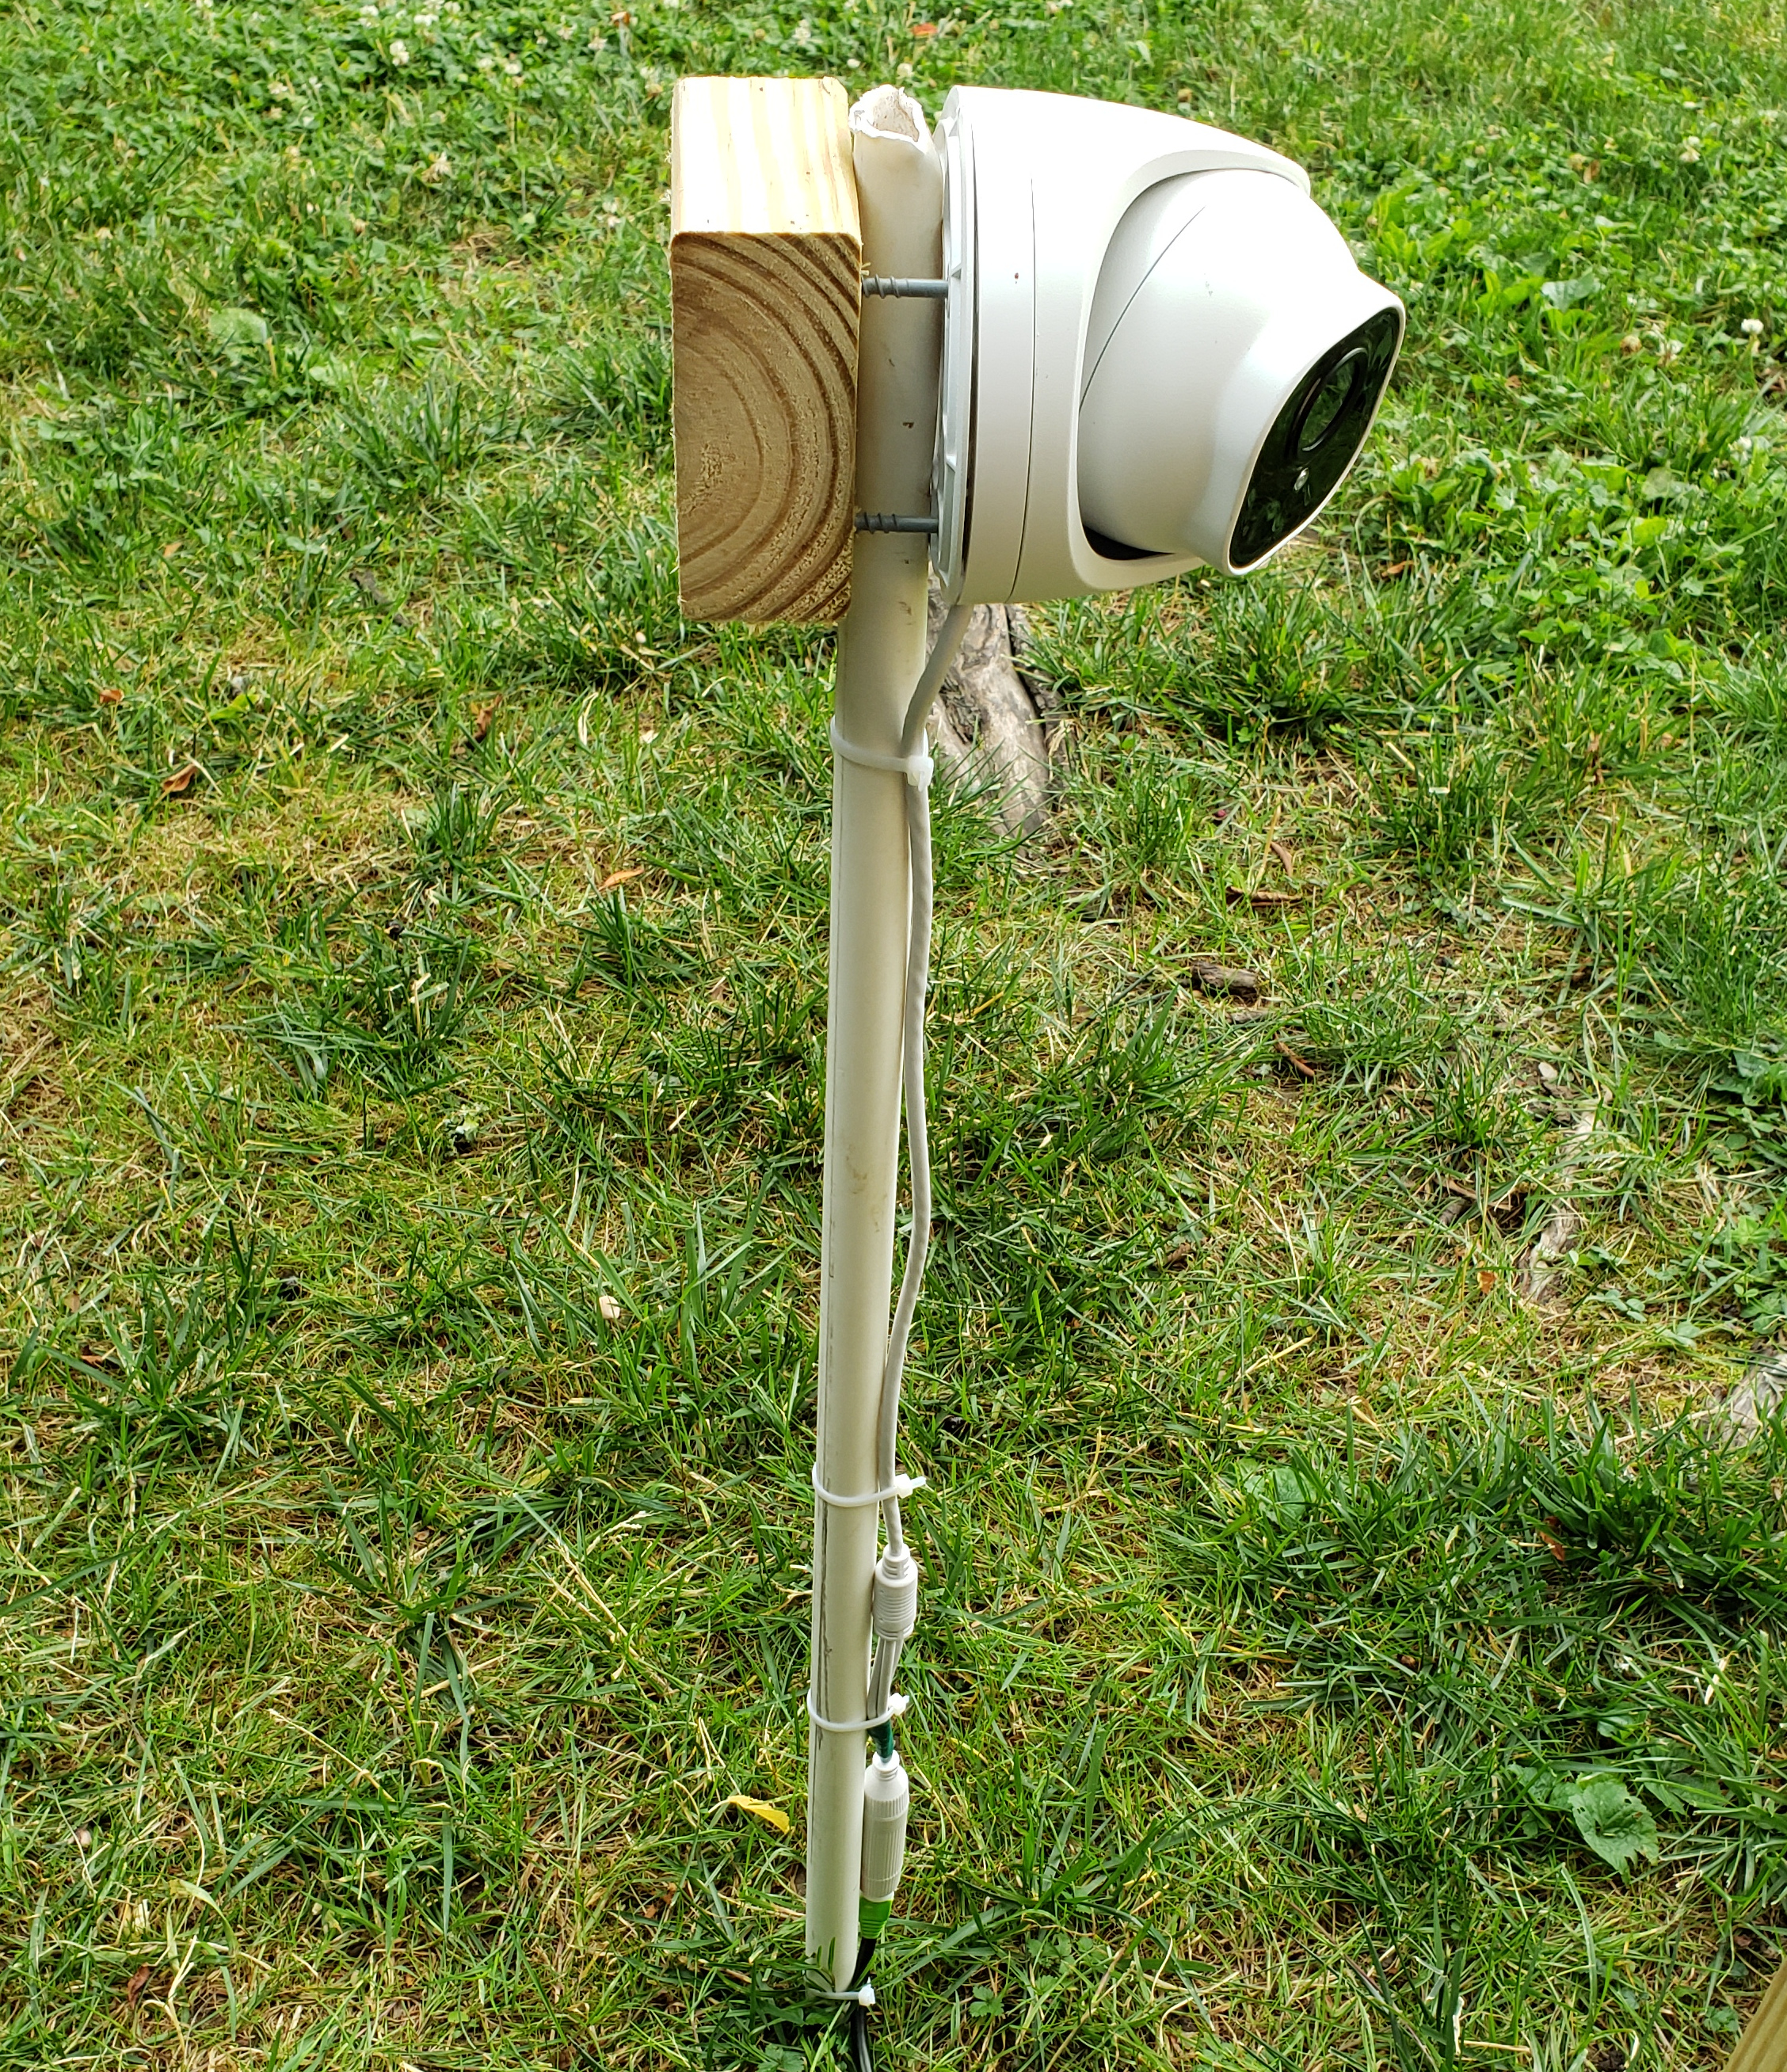
Call this the V1 mount, made from scraps in the garage. Note the removed pigtail.
This was not my proudest creation, but it got the camera close to the hive, in an easily adjustable (by virtue of re-staking) manner. A block of wood was used to compress a PVC pipe to the camera mount.
Network connectivity
Ultimately this is going to be a public feed, so I’m not too fussed with security on this camera.
That in mind, I connected it to my primary VLAN.
A more security-forward setup would dedicate a VLAN to cameras, and not route them to the internet, or other machines, at all.
Instead of that security-forward approach, this results in a standard DHCP assigned IP for the camera, and the router registers the hostname beecam on its local network DNS server.
Camera Services
Out of the box, the non-app streaming capabilities are not turned on, but can be enabled via the web UI.
Under the advanced network settings, “port” settings can be adjusted to enable RTSP.
This will cause the camera to emit an RTSP stream on port 554 (by default) containing the live video feed.
Assuming you created a stream user with the password password, this means the following URL is now a valid h265 stream.
rtsp://stream:password@beecam:554/h265Preview_01_main
This network protocol can be accessed by programs like SMplayer, VLC, and ffmpeg to display or manipulate the video feed.
Streaming with ffmpeg
The h265 RTSP stream cannot be played by any browsers I’m aware of. Both the codec (h265) and the encapsulation (RTSP) are an issue here, unfortunately, as h265 is poorly supported still. The usual strategy here is to transcode the h265 to h264 and encapsulate the latter in HTTP Live Streaming (HLS) format. This can be played by most modern browsers with the help of hls.js.
A minimalish command to create the stream using an Nvidia GPU to do the transcoding is the following:
ffmpeg -i rtsp://stream:password@beecam:554/h265Preview_01_main \
    -fflags flush_packets -max_delay 10 -flags -global_header -hls_time 5 -hls_list_size 10 \
    -vf crop=1920:1080 -c:v h264_nvenc -preset slow -crf 18 -y beecam.m3u8
This will create many segments beecam{xxx}.ts representing time slices of the stream, along with beecam.m3u8 listing the most recent segments and their relative timing.
Browsers will repeatedly query the .m3u8 for new segments during the stream.
I’ve included a crop of the middle 1080p segment of the feed for the final live stream. This results in a flatter perspective with smaller FoV, as well as reducing the bandwidth requirements of the stream.
Cleanup
This will continue creating *.ts files forever, while only the most recent ones are relevant to the stream, given the hls_list_size parameter used above.
10 segments (hls_list_size) that are 5 seconds each (hls_time) give enough for buffering, while restricting the scroll back significantly.
To get rid of old files, a simple shell loop can be used.
while true; do
    echo "Cleanup time!";
    #Delete any *.ts file older than 5 minutes
    find . -name '*.ts' -type f -mmin +5 -delete;
    sleep 30;
done
Serving the content
The final step here is to have a page a web browser can load that plays the stream. A slightly modified version of the examples on hls.js gets me most of the way there.
<!DOCTYPE html>
<html lang="en-us">

  <head>
    <meta charset="utf-8">
    <title>BeeCam | ben.land</title>
    <meta name="viewport" content="width=device-width, initial-scale=1">
    <meta name="description" content="A live, 1080p view of my beehive.">
    <link rel="stylesheet" href="/css/style.css" />
    <link href="https://fonts.googleapis.com/css2?family=Open+Sans:ital,wght@0,400;0,600;0,700;0,800;1,400;1,600;1,700;1,800&display=swap" rel="stylesheet">
    <script src="https://cdn.jsdelivr.net/npm/hls.js@1"></script>
  </head>

  <body style="">
    <video id="beecam_stream" width="100%" controls style=""></video>
    <script>
    var video = document.getElementById('beecam_stream');
    var src = 'https://ben.land/beecam/beecam.m3u8';
    if (Hls.isSupported()) {
        var hls = new Hls({
            debug: true
        });
        hls.loadSource(src);
        hls.attachMedia(video);
        hls.on(Hls.Events.MEDIA_ATTACHED, () => {
        });
    } else if (video.canPlayType('application/vnd.apple.mpegurl')) {
        video.src = src;
    }
    </script>
  </body>

</html>
This is saved as index.html in a folder aliased to /beecam on this domain. Apache gladly serves this content along with the output from ffmpeg.
Happy Viewing!
The bees are most active from 1pm - 5pm EST during the Spring/Summer/Fall on days that are above 50 deg. Enjoy!
>> Home